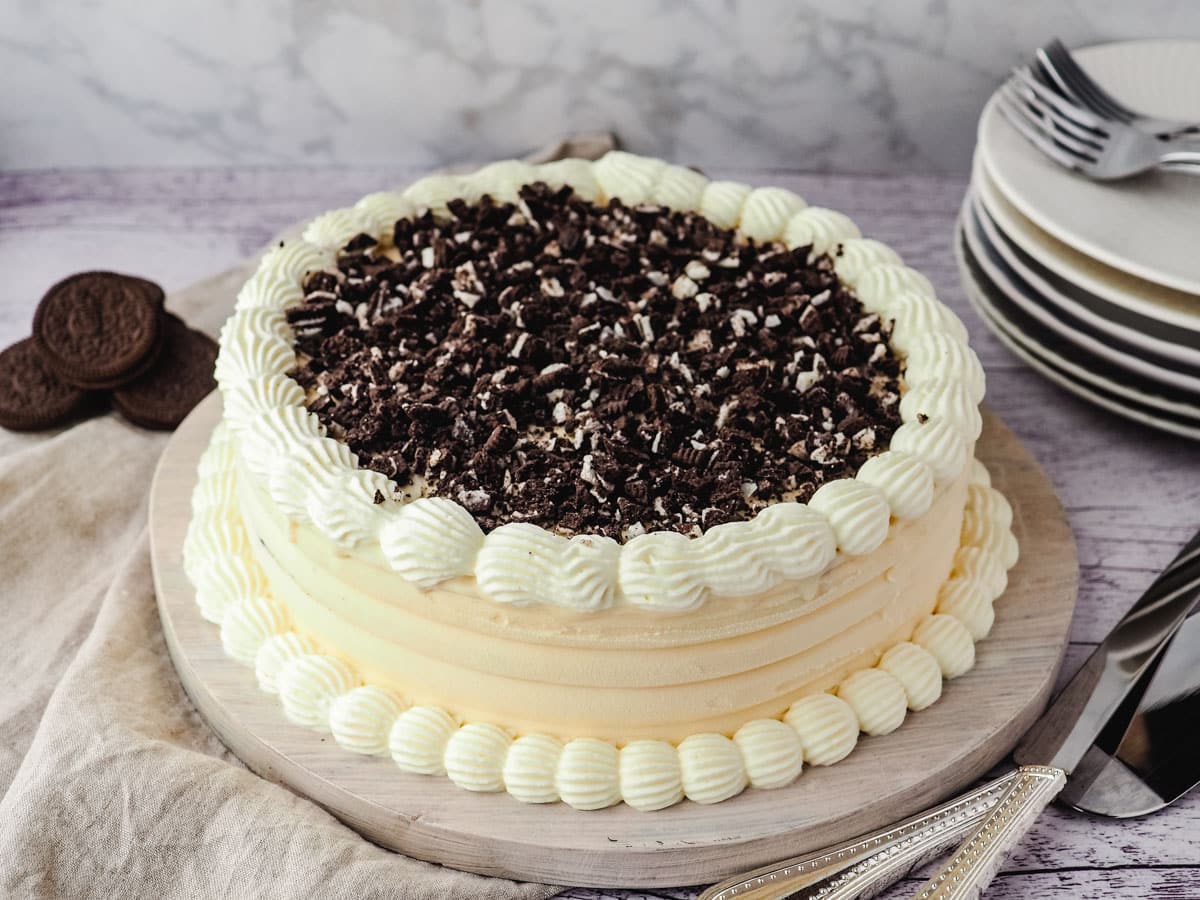
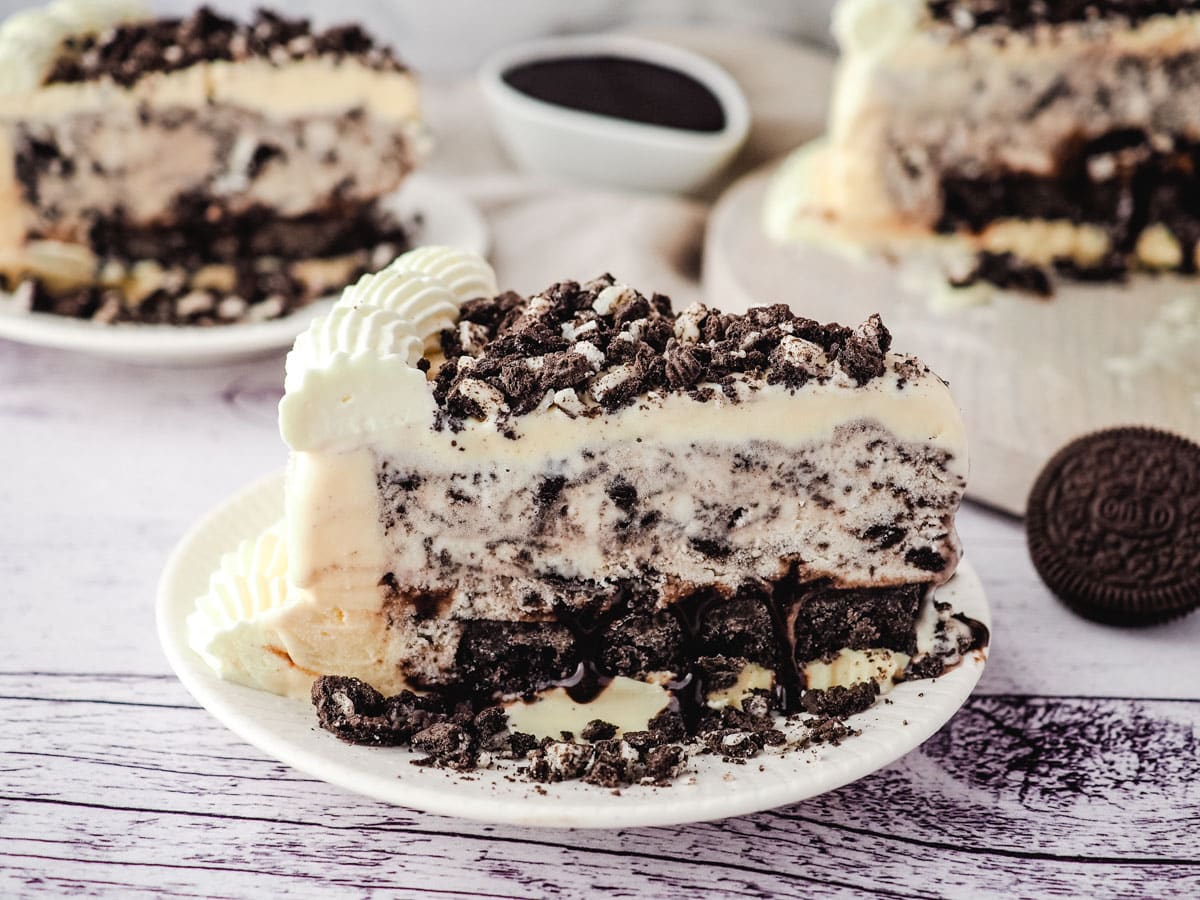
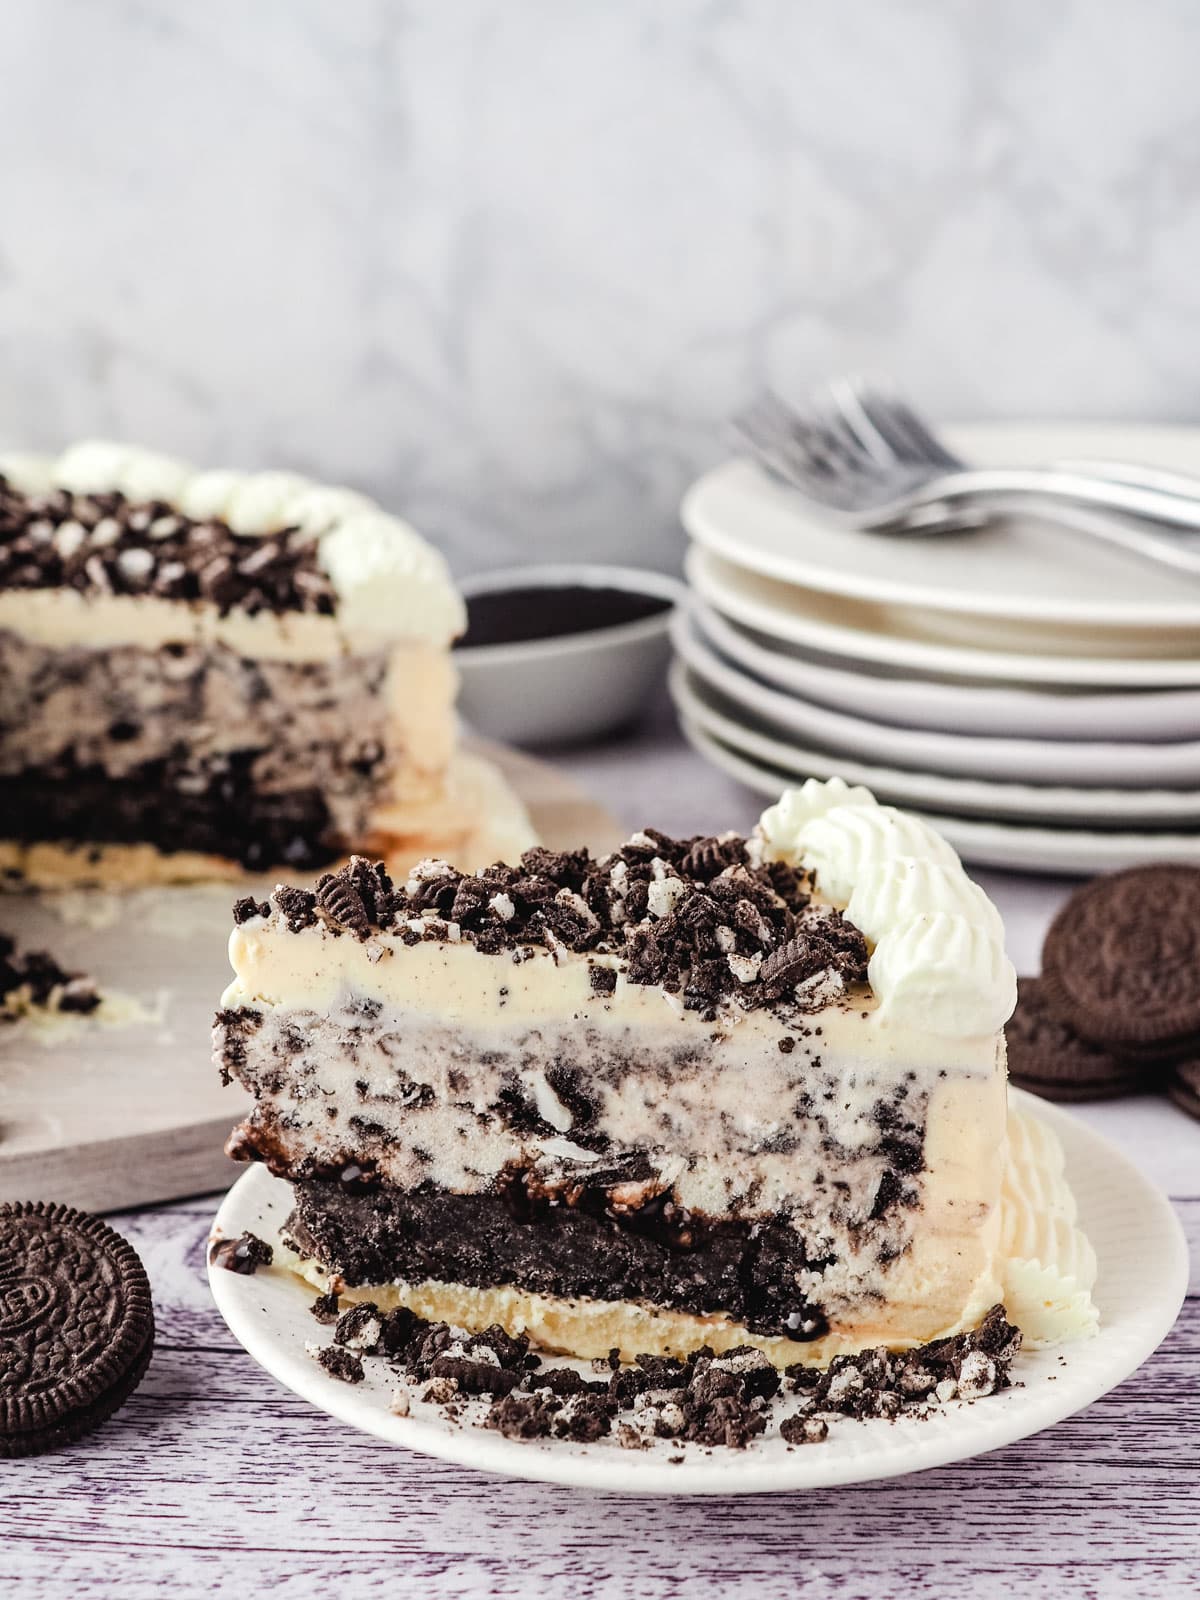
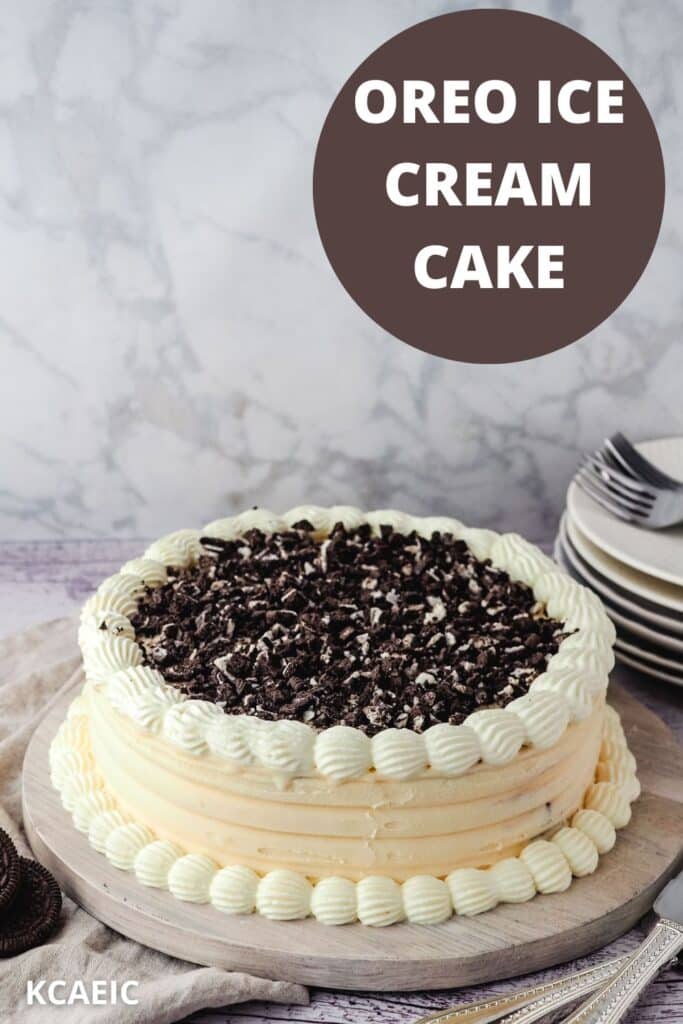
This homemade Oreo ice cream cake is a mouthwatering combination of creamy Oreo and vanilla ice cream with chocolate sauce and Oreo pieces, yum!
Jump to:
This copycat Oreo Blizzard ice cream cake is just like your favorite store-bought ice cream cake, but homemade! Make it traditional style with Oreo ice cream to wow your guests or follow my recipe tips and tricks for a simpler but equally yummy version!
Why you'll love this recipe
- Perfect ice cream cake for a party or celebration.
- Delicouis no bake dessert.
- Classic flavors of Oreo cookies, creamy vanilla ice cream and decadent chocolate fudge sauce.
Looking for more fabulous celebration cakes? Why not try making my gorgeous chocolate red velvet cake, fresh eggless carrot cake or show-stopping traditional black forest cake. Or for something different my Birthday cake ice cream. Delicious!
Or if you're in the mood for more delectable ice cream check out my full collection of Cuisinart ice cream maker recipes (that work well in other brands ice cream makers too!).
Ingredients
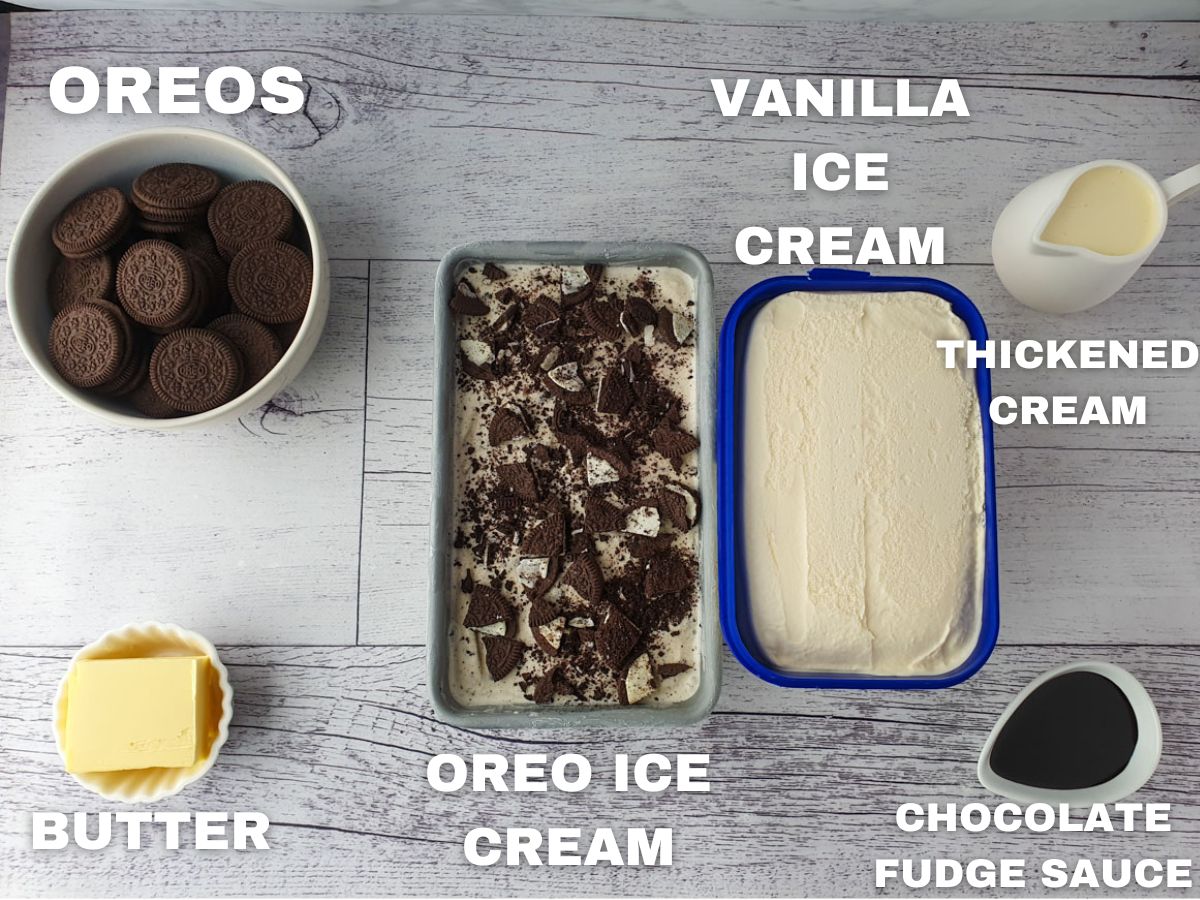
Oreo ice cream: use store-bought or my homemade Oreo ice cream. If you can't get Oreo ice cream you could also use cookies and cream ice cream, which is the same thing. If anything freshly churned homemade is easier to work with, but obviously more work to make!
Vanilla ice cream: a good quality store-bought vanilla is just fine in this recipe. If you want to make the whole thing from scratch you could make two batches of my easy egg-free vanilla ice cream.
Chocolate fudge sauce: keep things simple with store-bought chocolate fudge sauce.
Thickened cream: or heavy cream or heavy whipping cream, to decorate the cake with. You could also use cool whip and simply spread it over the cake.
Oreos: I used regular Oreos in this cake to make it as close as possible to the original, but you could mix things up with different flavored Oreos.
Unsalted Butter: because butter makes most things taste better. In this case it helps bind and set the cookie layer.
How to make Oreo ice cream cake
See the full recipe card at the end of the post for ingredient amounts and instructions.
Hot tip: This recipe makes a large ten inch ice cream cake. Before beginning make sure you have room in your freezer for the cake tin and the finished decorated cake and the board it will sit on.
Line the base only of a 9-inch spring-form cake tin, and the base and sides of a 10-inch springform cake tin. Put the 10-inch cake tin into the freezer to chill.
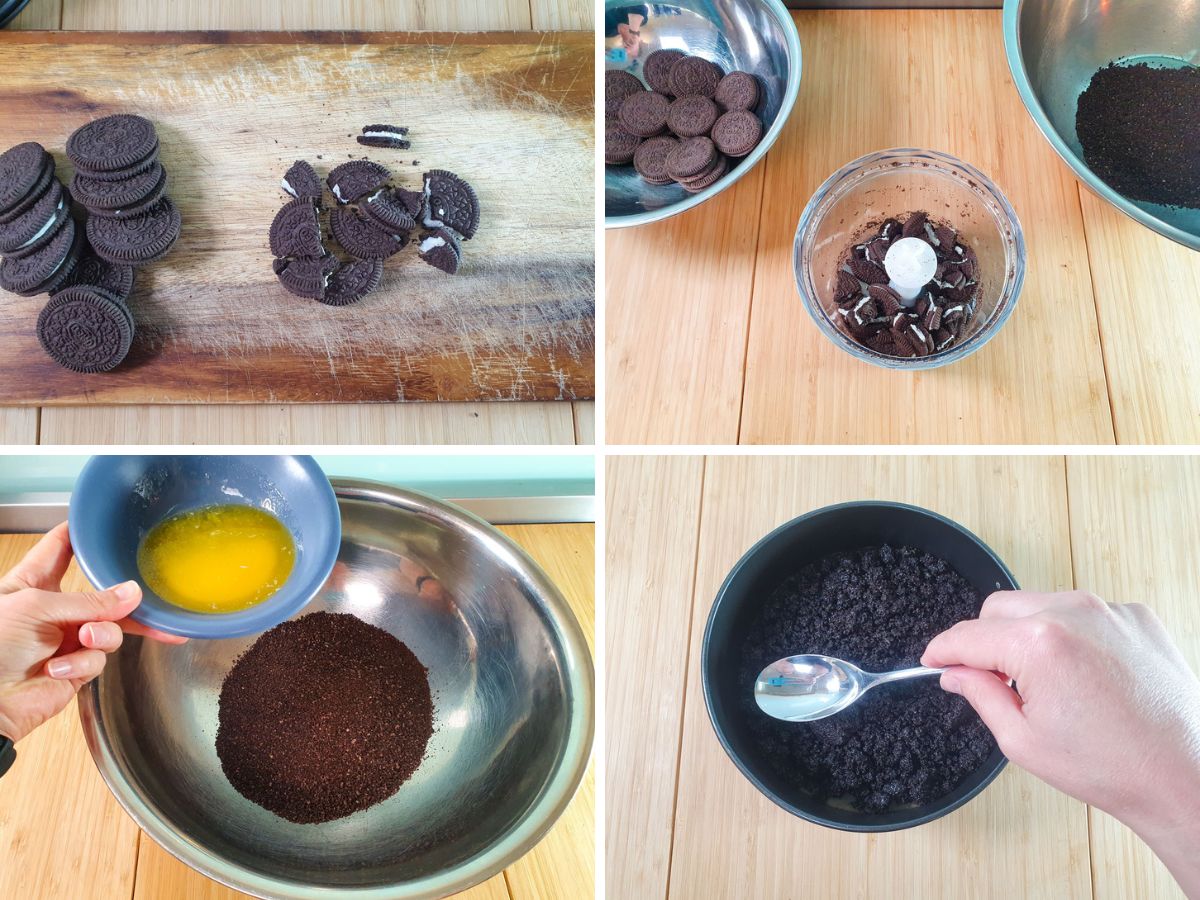
Break up the Oreos for the cookie layer into smaller pieces. Blitz the broken-up Oreos to breadcrumb consistency (leave in the filling). Melt the butter and mix it into the blitzed Oreo crumbs. Loosely press the mix into the 9-inch springform tin with the back of a spoon or cup and freeze. This will form the Oreo cookie layer in the ice cream cake.
Put several scoops, or approximately ⅓ to ½ of the vanilla ice cream into the chilled 10-inch cake tin. Working quickly spread the ice cream around base and sides. Do you best get an even layer about ⅓ to ½ of an inch thick. Remember you need to get the 9-inch Oreo cookie circle into the vanilla ice cream shell. Return to the freezer to harden up.
Carefully remove the Oreo cookie circle from the 9-inch tin. Peel off the parchment paper and place it into the vanilla ice cream shell. The circle should fit nicely into the vanilla shell, but don't worry if there's a gap around the edges.
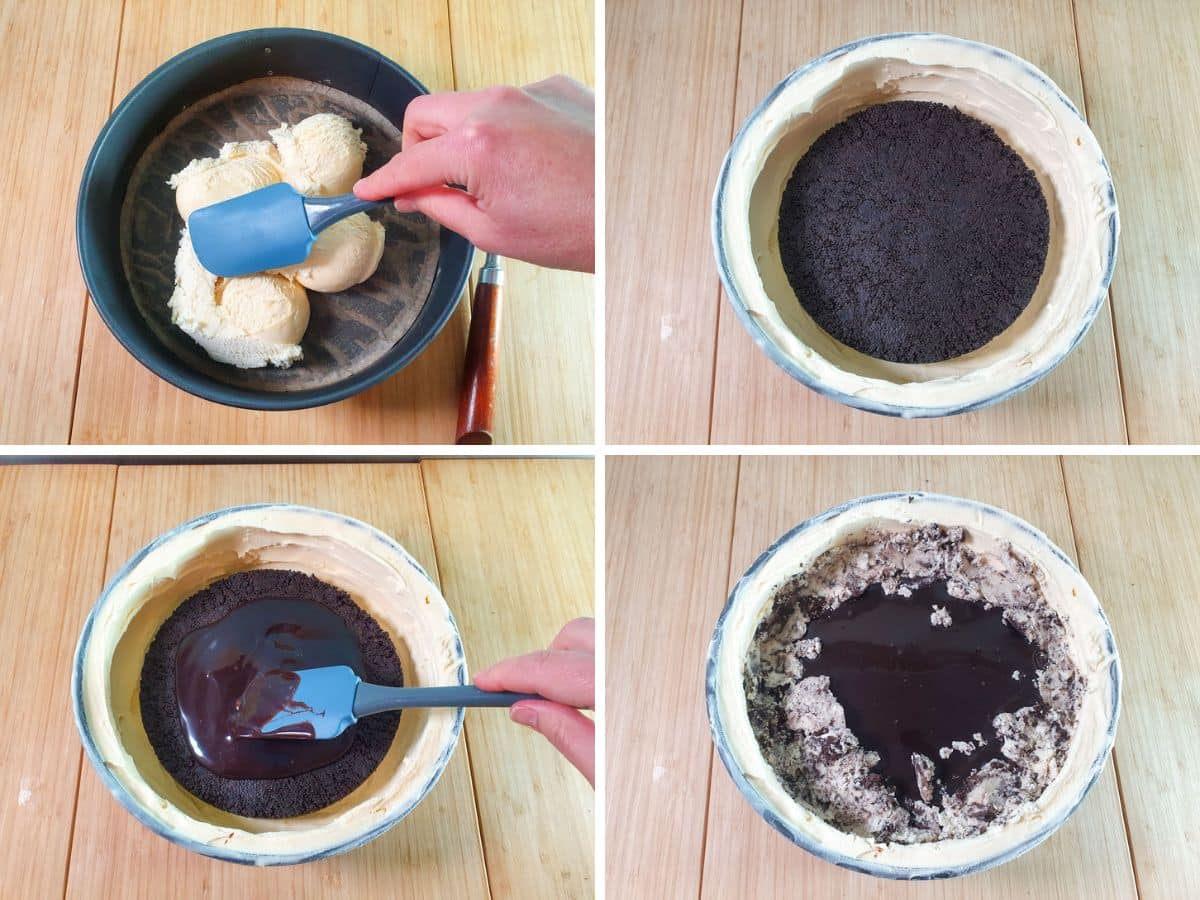
Add the chocolate fudge sauce to the top of the Oreo circle and spread it around evenly. Return it to the freezer to harden up.
If using store-bought Oreo ice cream remove it from the freezer for a couple of minutes to soften up. Working quickly add the Oreo ice cream layer on top of the chocolate fudge layer. If using homemade Oreo ice cream this can be churned and then added straight into the tin. Do your best to smooth down the ice cream and remove any air bubbles, but work quickly. Put the tin back into the freezer to harden up.
Working quickly add the final layer of vanilla ice cream on top. Do your best to smooth down the ice cream and remove any air bubbles. Put the tin back into the freezer to harden up. Put your serving board into the freezer to chill.
Chop the remaining ½ packet of Oreo fairly finely. Whip the cream and put it into a piping bag with your preferred nozzle. Have your cake scraper ready.
Remove the cake from the tin. Carefully remove the parchment paper or acetate.
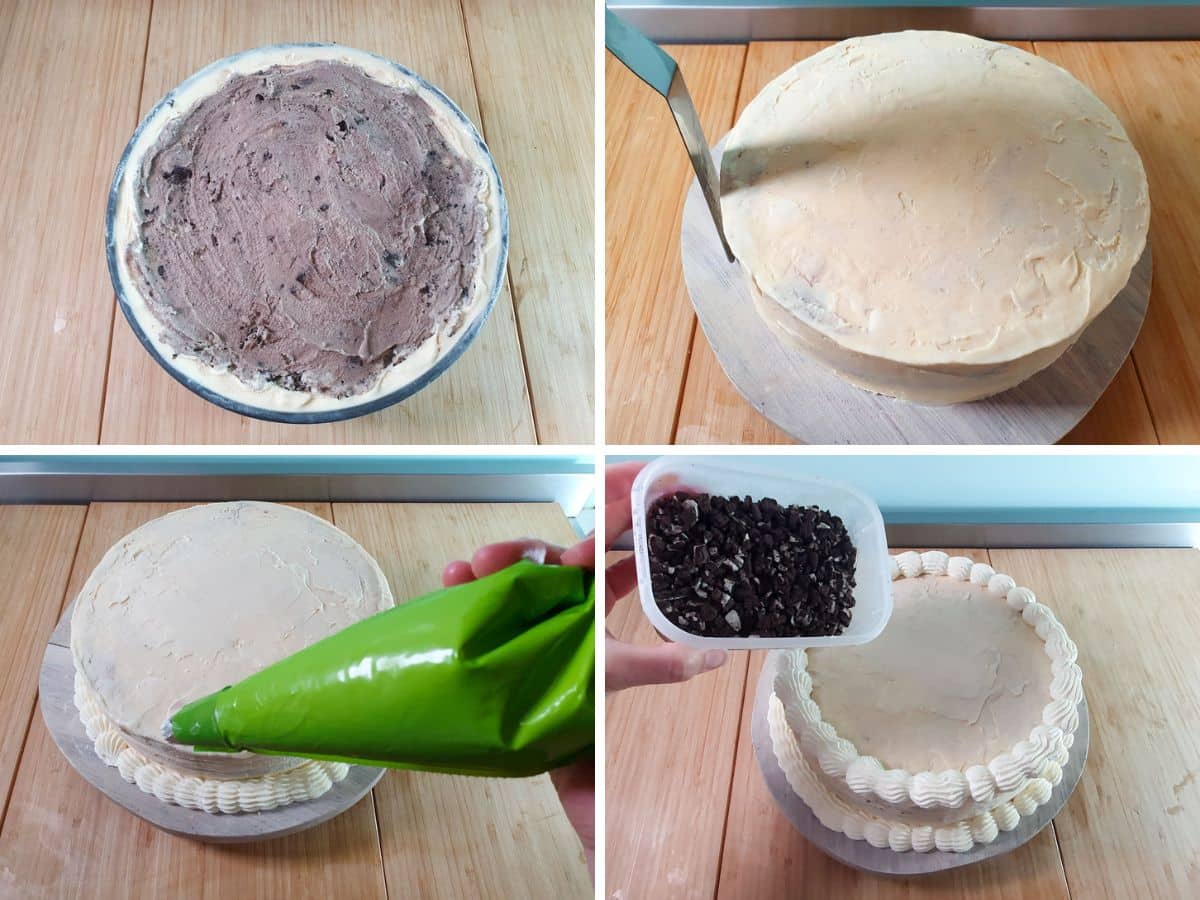
Hot tip: The vanilla ice cream shell will be fairly soft, even after hardening up, so do your best not to put any big dents in it with your finger! If at any point the cake starts to melt or get to soft return it to the freezer to harden up before continuing to work.
Transfer the cake onto the chilled serving board. Use the cake scraper to scrap the bumps into the side of the cake.
Working quickly pipe the cream around the edge and top of the cake. To get the classic 'bumpy wave' look to the cream, squeeze the piping bag, then move slightly along, squeeze, move, squeeze, move. This is easier with a cake turntable if you have one.
Return to the freezer to firm up before serving. Sprinkle the chopped Oreos on top and you're done!
Love the flavors in this but looking for a simpler version? Follow my recipe tips and tricks below to make an easier but still equally tasty cake.
How to serve
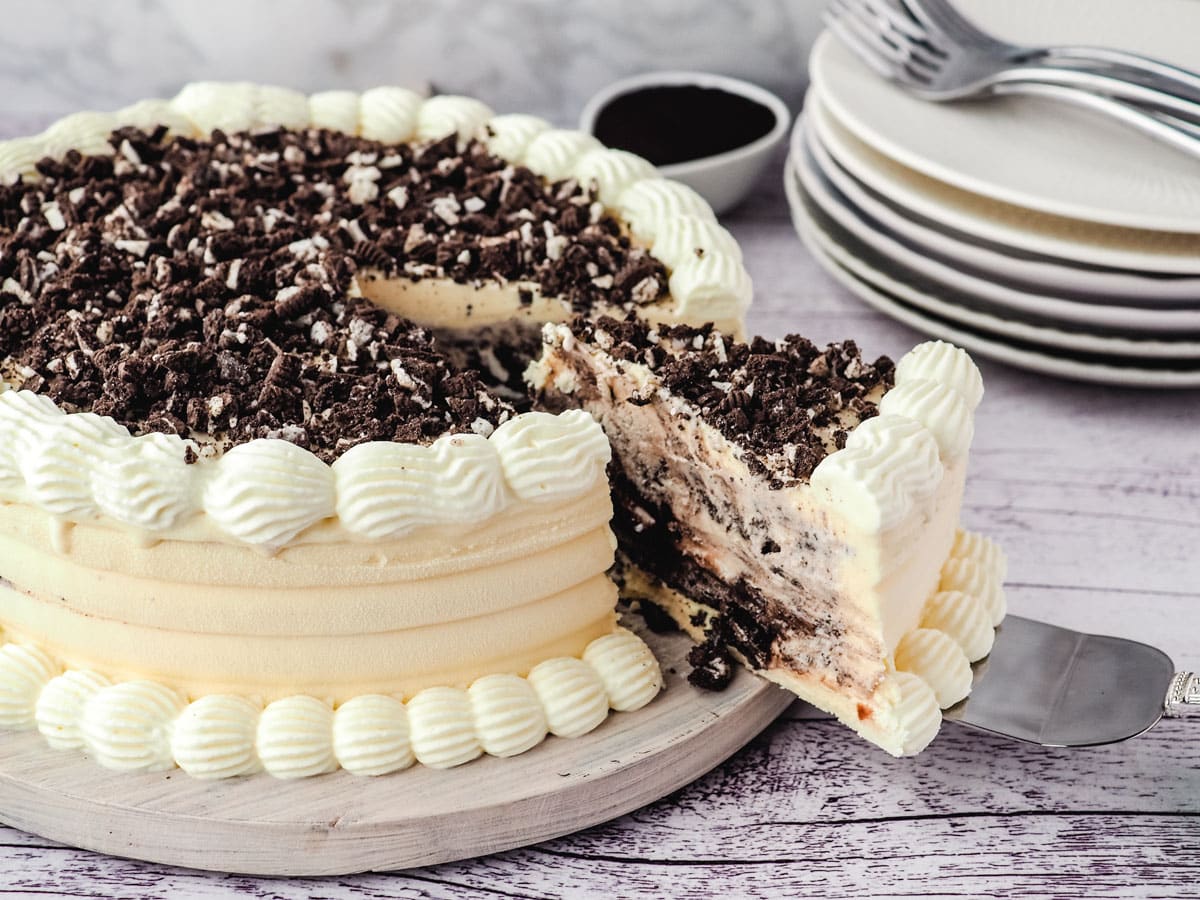
To serve remove from freezer. Slice with a gently warmed and dried knife and enjoy! Once serves return the rest of the cake to the freezer to stop it from melting. Fabulous on its own or drizzled with a little extra chocolate fudge sauce. Delicious!
How to store
This ice cream cake will last in an airtight container in the freezer for up to two weeks. After that it will still be perfectly edible but may start to go a little icey over time.
Have you made this recipe? Tell me how it went in the comments below and tag me on instagram so I can see your delicious creations! @keep_calm_and_eat_icecream
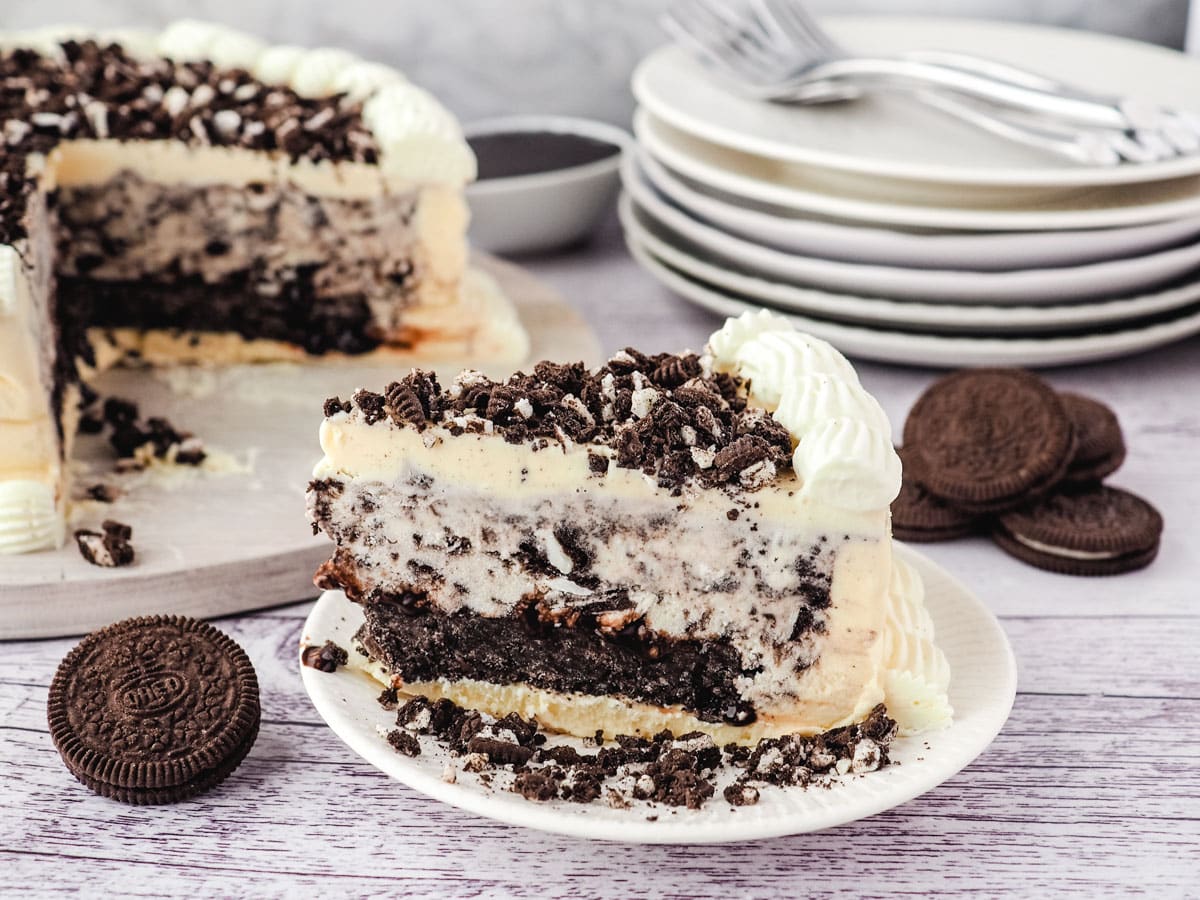
Recipe tips and frequently asked questions
Can I make a simpler version of this cake?
Yes. The method described here will give you a cake that most resembles an Oreo Blizzard ice cream cake. To make a simpler, but equally tasty version do the following (remember to return the cake to the freezer between each step so it can harden).
- Make the Oreo circle directly into the larger cake tin.
- Add the Oreo ice cream layer.
- Add the vanilla ice cream layer.
- Pipe on the cream or simply spread with cool whip.
- Add the chocolate fudge sauce and sprinkle with Oreo pieces.
Can I make this with different flavored Oreos?
Definitely. I have stuck as close to the original Dairy Queen version as possible with regular Oreos, but you can mix things up with different flavors. I have tested this will Golden Oreos but other flavors would work well too. Just avoid chocolate-coated Oreos or double stuffed as the Oreo circle probably won't work properly with these.
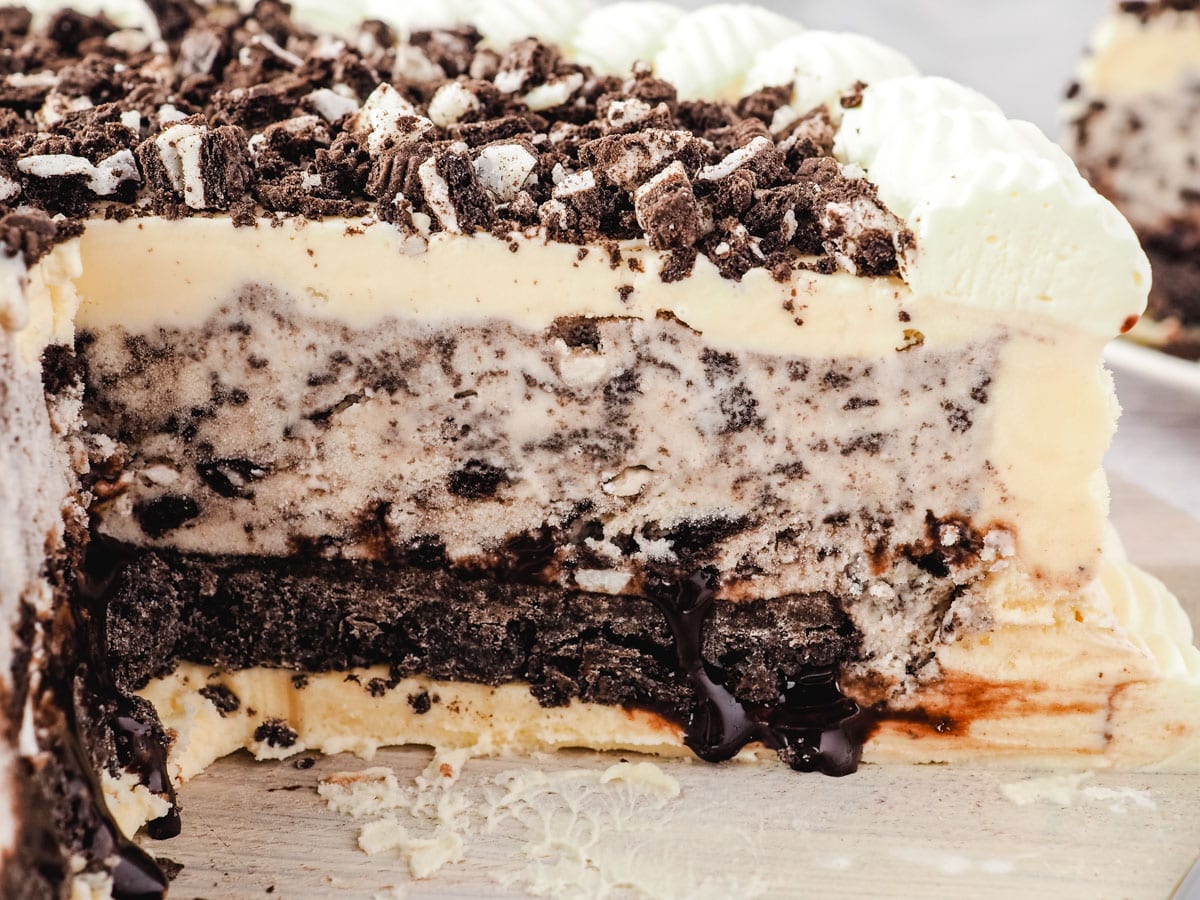
Can I make this with different flavored ice cream?
Absolutely. I have made this with golden Oreos for the base and a batch of my freshly churned strawberry ice cream on top which was delicious!
Can I make a smaller version of this ice cream cake?
You sure can. To make a smaller version try using a 7-inch spring form cake tin. Use the same amount for the Oreo base, but only 1 quart of ice cream in total, either a single flavor or two different half quarts of different flavored ice cream. A churned batch of one of my fruit or regular ice cream recipes fits perfectly in this sized cake tin. This smaller size cake will serve approximately eight to ten people.
Looking for more yummy Oreo dessert recipes?
Why not try making
Follow me on Facebook or Pinterest for many more delicious recipes.
📋 Recipe
Oreo Ice Cream Cake
Equipment
- 9-inch rouns spring form pan
- 10 inch round spring form pan
- parchment paper or food safe acetae
- piping bag with an piping tip
- Cake scraper with a wave/semi circle pattern
Ingredients
- butter to grease the tins
- 2 & ½ packets (133 gms each, 332 gms total) regular Oreos, divided
- 1 & ½ tablespoons unsalted butter
- 2 quarts (2 liters) vanilla ice cream
- ¼ cup chocolate fudge sauce
- 1 quart (1 litre) Oreo ice cream
- 1 cup Thickened cream
Instructions
Make sure you return the ice cream cake to the freezer to firm up frequently as you work, or you will end up with an ice cream cake puddle!
- Make sure you have enough room in your freezer for your cake tin before you start assembling the cake.
- Grease and line the bottom of the 9-inch spring form tin. Grease and line the 10 inch spring form tin. Put the 10 inch spring form tin into the freeer to chill.
- Blit two packs of the Oreos into breadcrumbs. Melt the butter in the microwave or small pot on the stove. Add the melted butter to the Oreo cookie crumbs and mix well. Press the Oreos into the tin and put them into the freezer to set.
- Place several scoops of vanilla ice cream into the 10-inch tin and press down onto the bottom and sides to form the bottom and sides of the cake with a spoon or cup. You may need to work at the ice cream a bit to get into to smooth out. Put into the freezer to harden.
- Remove the Oreo circle from the 9-inch tin. Place the Oreo cirle ontop of the vanilla ice cream base. Add the chocolate fudge sauce onto the Oreo circle and spread out. Put into the freezer to harden.
- Add the Oreo ice cream and smooth down. If you are using homemade Oreo ice cream you can add the churned ice cream directly to the cake. Return to the freezer to harden.
- Add the top layer of vanilla ice cream and smooth down. Use and offset spatula to smooth the top of the cake. Return to the freezer to harden.
- Put the serving board into the freezer to chill. Whip the cream and add to a piping bag with a piping tip. I used a start nozzle to get this shape. Finely chop the remaining ½ a packet of Oreos and put into the freezer to chill.
- Remove the cake from the spring form tin. Carefully peel back the parchment paper or acetage. The vanilla ice cream shell will be tricky to handle, try not to put to many finger dents into it.
- Place the cake onto the chilled board. Pipe the whipped cream around the base and top of the cake. To get the bumpy wave look squeese the piping bag, move the nozle along slightly, then squeenes and pull again. Sprinkle the chopped Oreos over the middle of the cake and you're done!
Notes
- You can use store-bought or homemade Oreo and vanilla ice cream in this recipe. If anything homemade Oreo ice cream is easier as you can put the churned ice cream directly into the cake tin, but you do need to work fast! The vanilla ice cream needs to be firmer to work with, so it doesn't matter if you use store brought or two batches of homemade.
- This recipe makes a large, heavy 10-inch cake. Make sure you have plenty of room in your freezer Before starting, or you will end up with a cake puddle!
- The method here will give you a cake that most resembles an Oreo Blizzard cake. However it can be tricky to create the vanilla ice cream shell with the layers inside.
- To make a simpler, but equally tasty version you can put the Oreo cookie base directly into the larger cake tin. Layer with Oreo ice cream, then vanilla ice cream. Top with chocolate fudge sauce and finally cream and Oreo pieces.
Nutrition
Nutritional Disclaimer
Nutritional information is an estimate based on an online database. The nutritional content of ingredients may vary by brand. If you require accurate nutritional information, you should calculate this based on the specific brands and products you are using.
Join the community!
Like Keep Calm and Eat Ice Cream on Facebook for more great recipes
Pin it for later!




Comments
No Comments