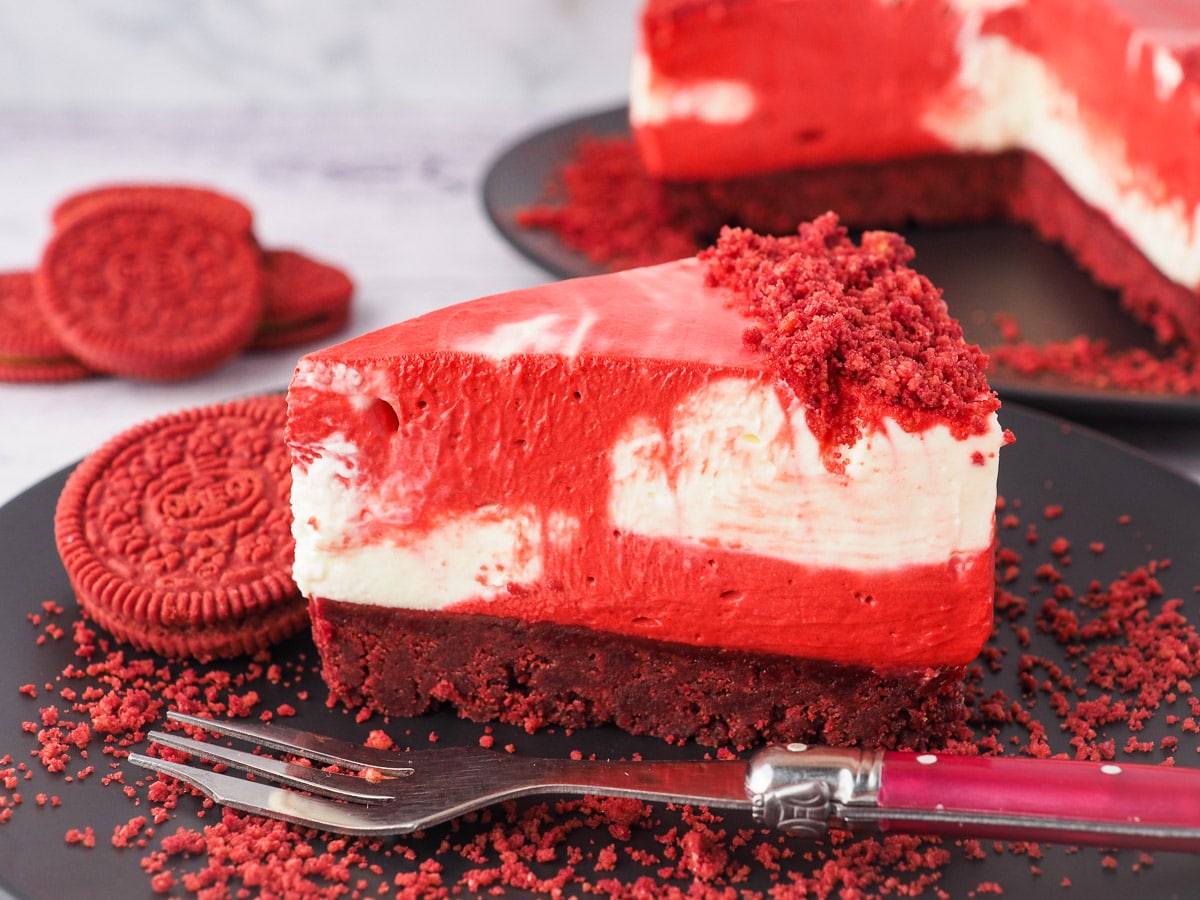
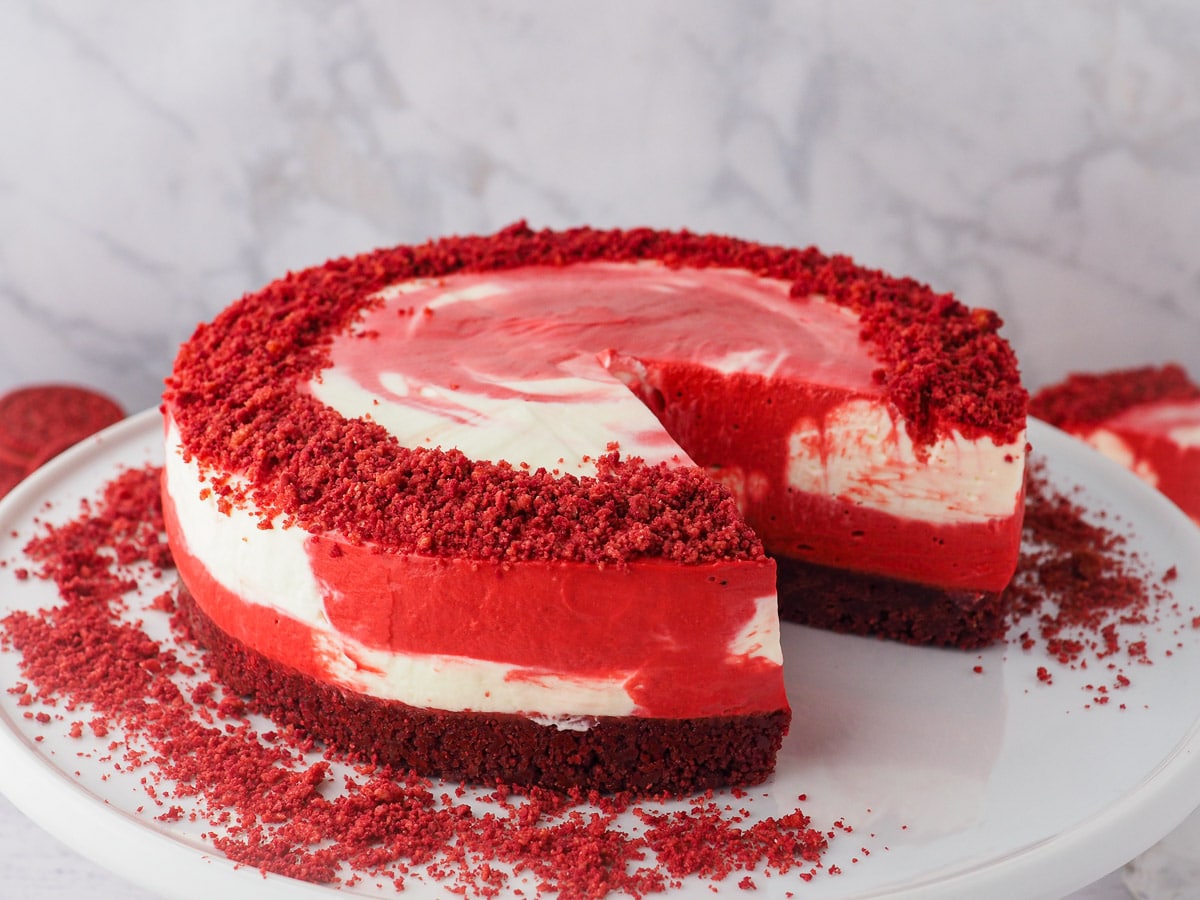
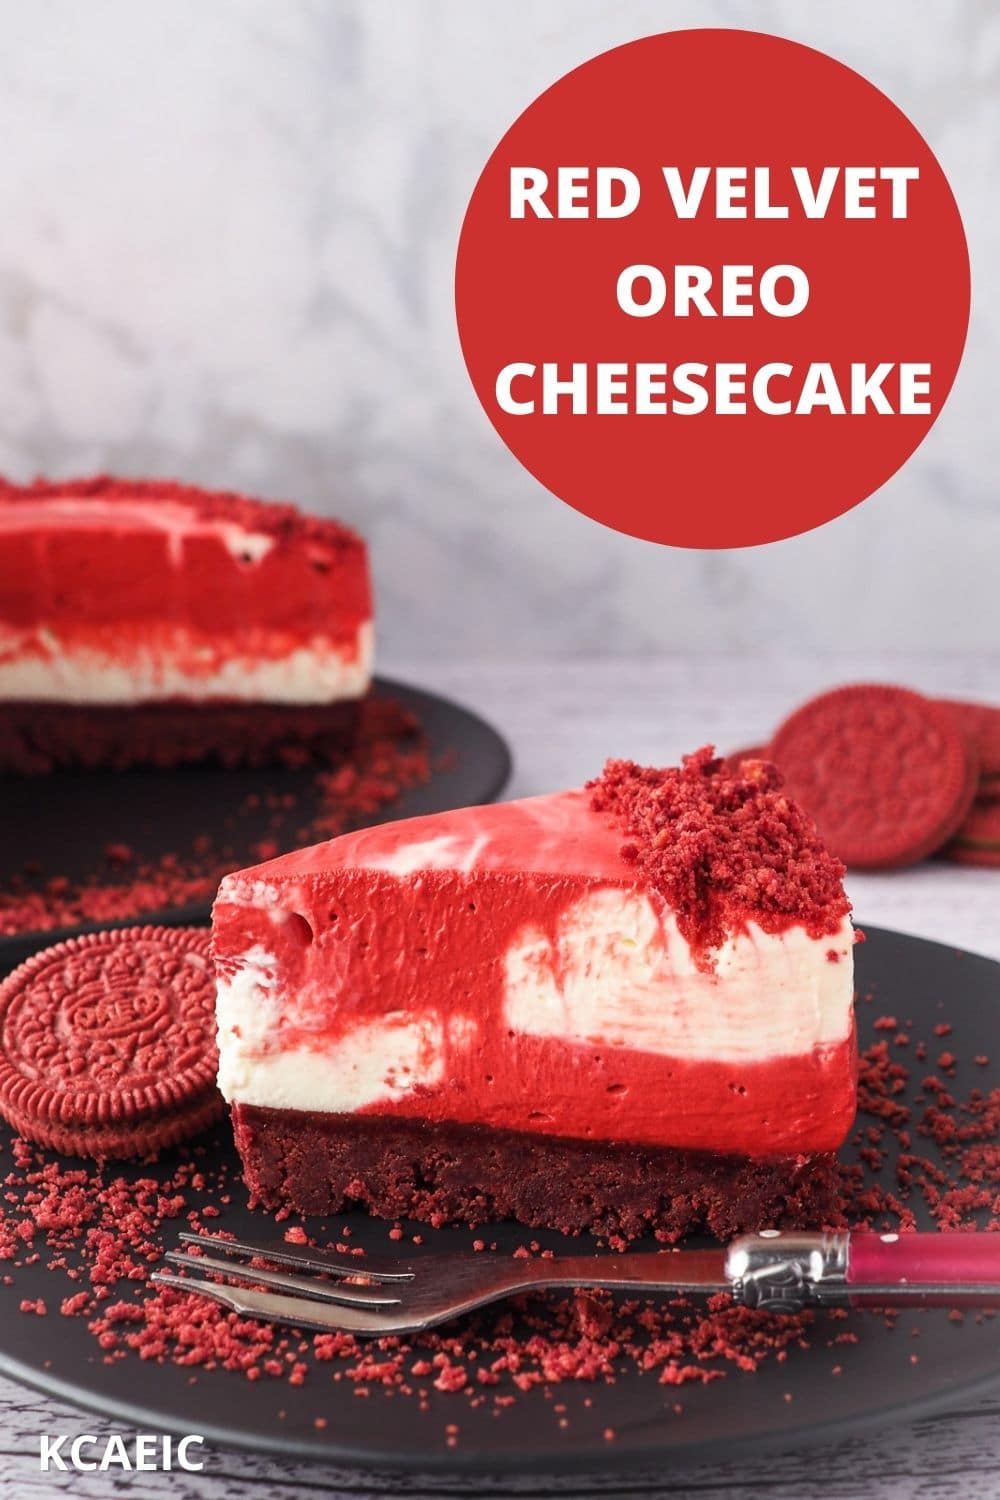
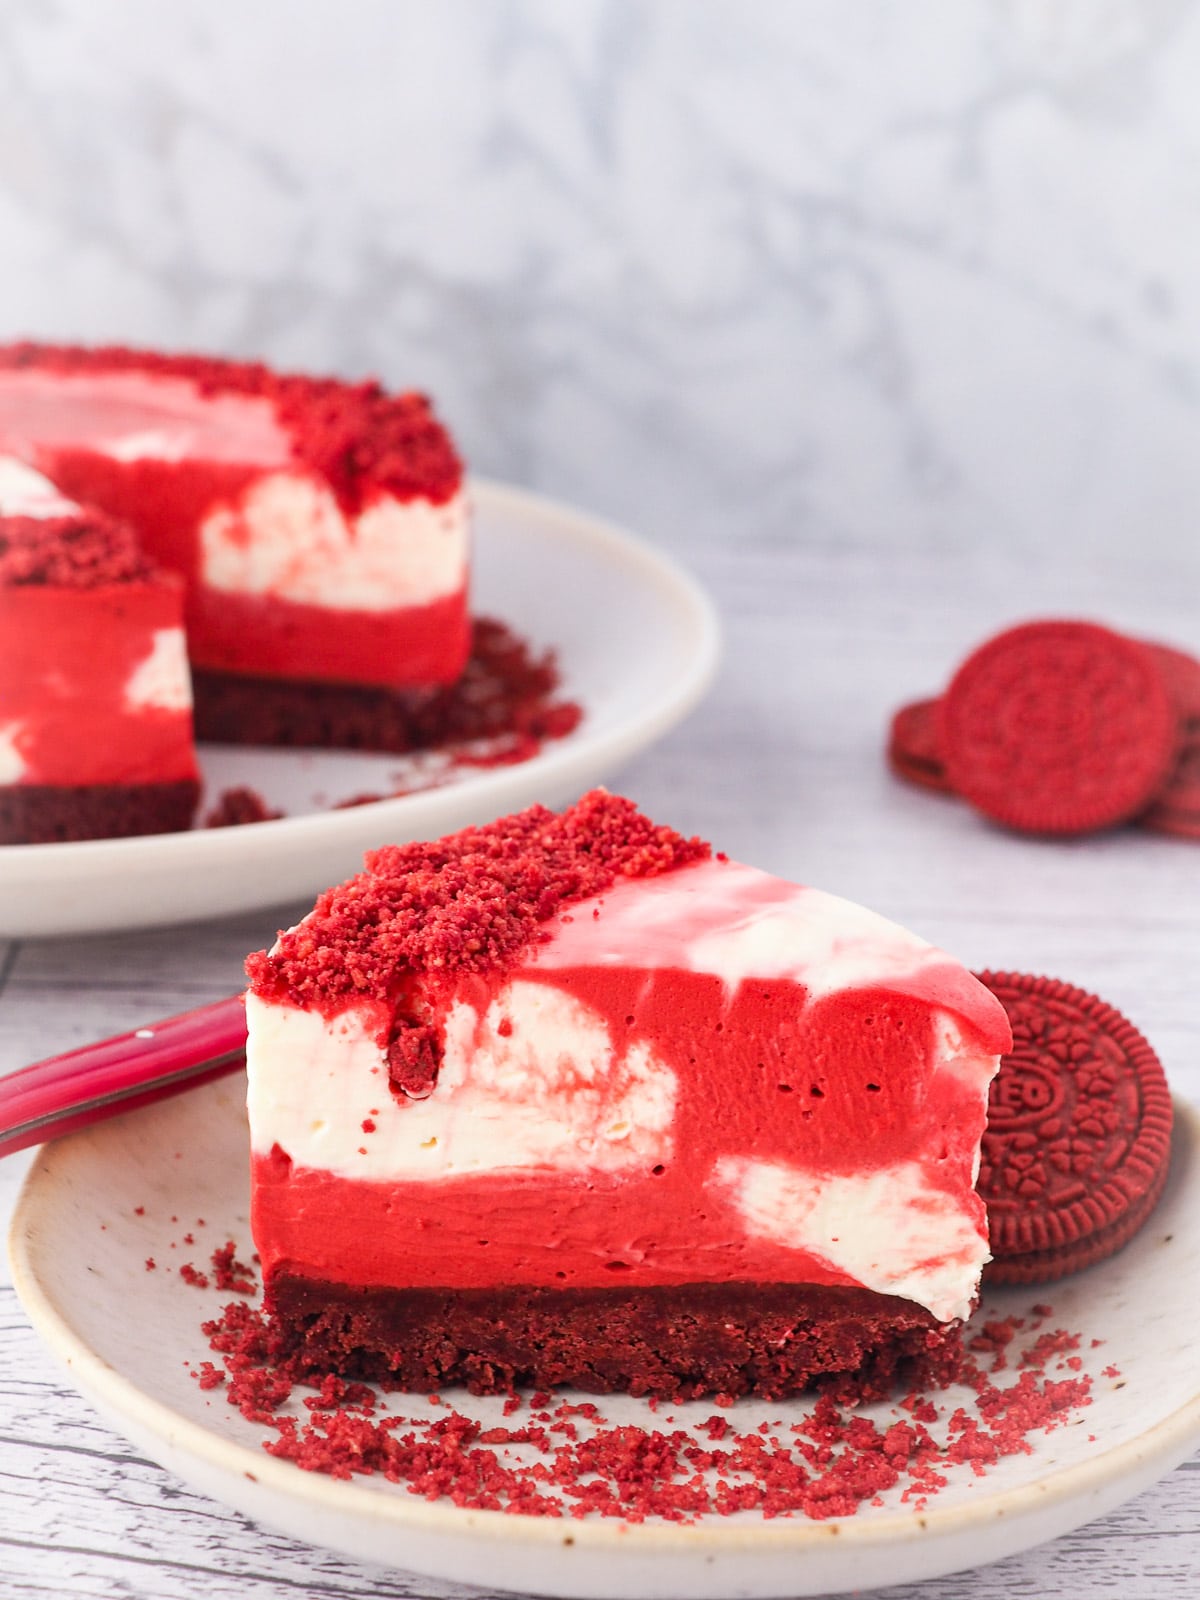
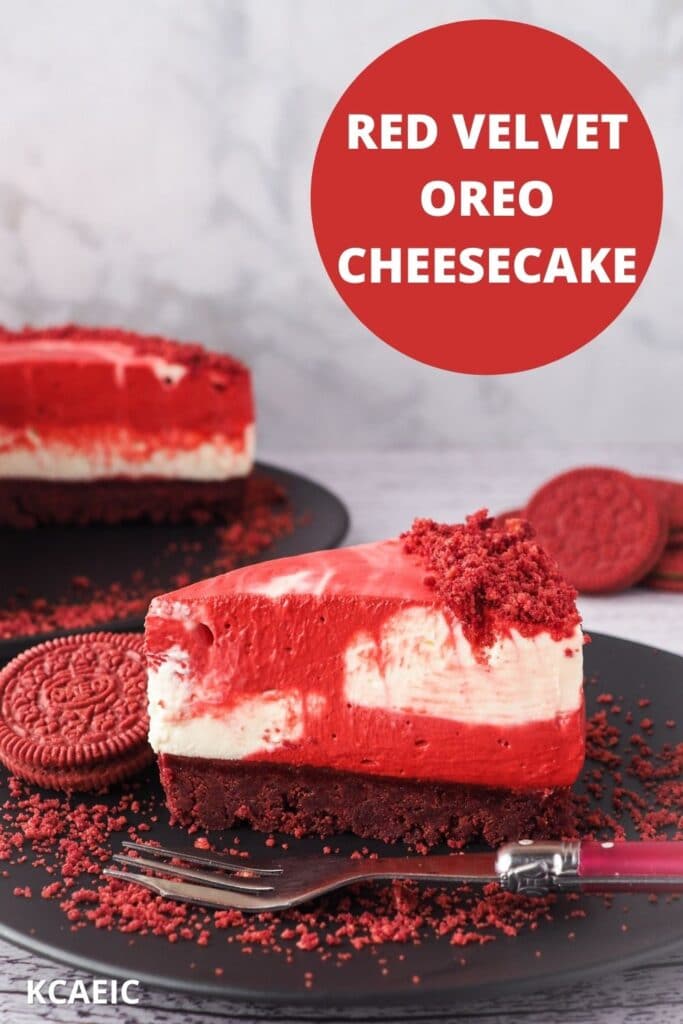
This easy no bake red velvet Oreo cheesecake is a real show stopper. With a pretty pink Oreo base and layers of red velvet and tangy cream cheese cheesecake filling.
Jump to:
This fabulous red velvet Oreos cheesecake is the stuff red velvet lovers' dreams are made of. Buttery, red velvet Oreo cookie base combined with layers of red velvet and cream cheese frosting cheesecake filling marbled together, drool! It's pretty as a picture and the perfect dessert for Valentine's Day, Galentine's Day or even Christmas!
Like many of my cheesecakes it's unbaked, so there's no need to worry about it cracking or mucking around with water baths. And there are no eggs or sour cream, instead relying on the classic no-bake cheesecake combination of cream cheese, whipped cream and time to set it.
I made this red velvet cheesecake with biscuit base with actual red velvet Oreos. This gives the cake a beautiful distinctive pretty pink base and offsets the marbled cheesecake filling fabulously.
Depending on where you are in the world red velvet Oreos can be a limited-edition flavor, or not available at all. If you can not get red velvet Oreos you can use regular Oreos instead (or mix things up with different flavors!). This will obviously change the color of the base of your cheesecake but should still taste delicious!
Love red velvet? You'll love my classic chocolate red velvet cake or creamy red velvet ice cream. Delicious!
Recipe tips and frequently asked questions:
What does red velvet cheesecake taste like?
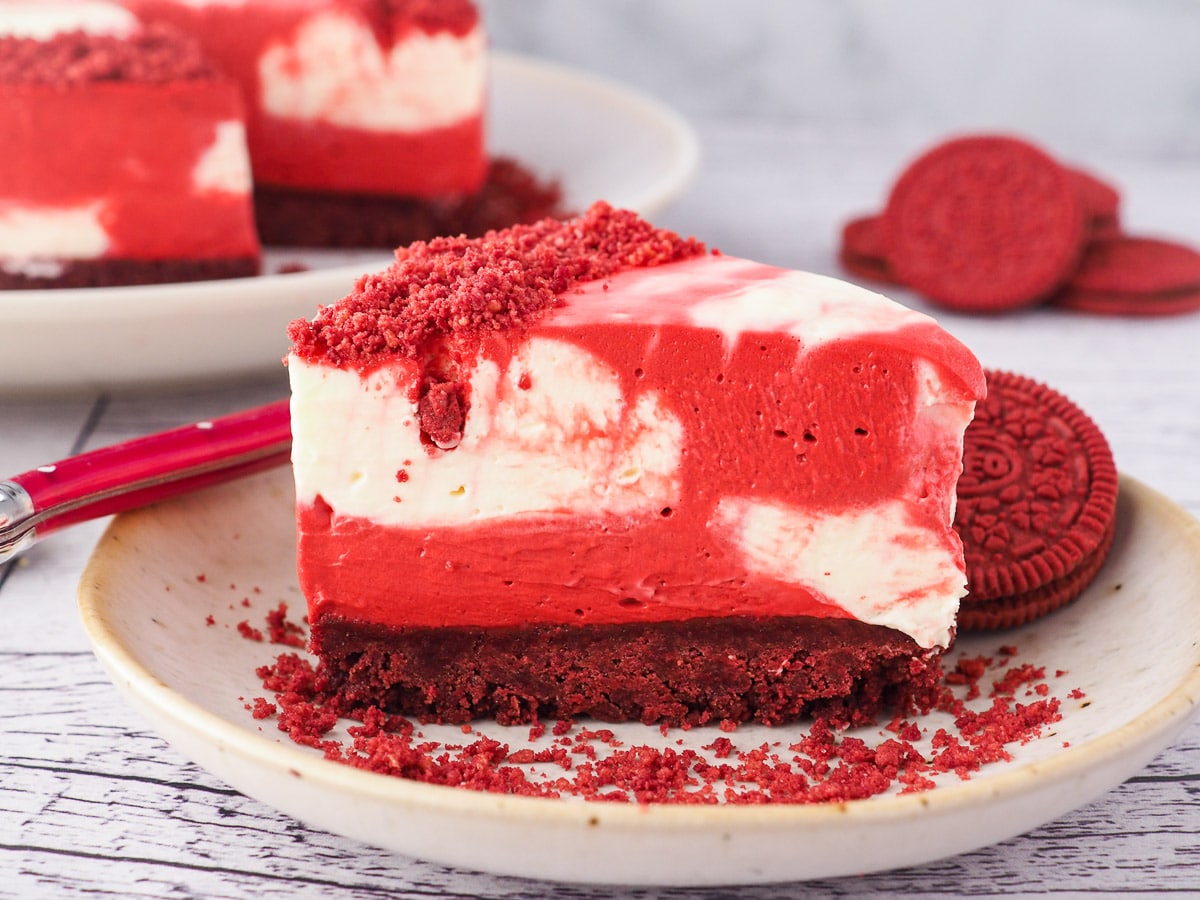
Much like the cake it takes after, red velvet cheesecake tastes like a combination of subtle chocolate with vanilla on steroids. It is usually combined with a tangy, cream cheese frosting element such as cream cheese frosting cheesecake filling. The resulting contrast of creamy red velvet and the tangy frosting reflect the flavors in the much-loved red velvet cake.
What is red velvet cheesecake made of?
Red velvet cheesecake is usually made with cocoa powder, vanilla and red food color to give that characteristic red velvet look and flavor. Often there is a cream cheese frosting element made of cream cheese and a tangy ingredient such as lemon juice in place of the cream cheese frosting of the famous red velvet cake.
Red velvet cake vs red velvet cheesecake
Red velvet cake:
- Always baked
- A risen cake that's usually made with buttermilk
- Usually two layers of cake covered in tangy cream cheese frosting.
Red velvet cheesecake:
- Can be baked or unbaked
- Usually has a cookie base
- Made with a set cheesecake filling
- Not usually frosted, but often contains elements with both red velvet and cream cheese frosting flavors.
Does red velvet cheesecake have chocolate?
Most red velvet cheesecakes achieve that characteristic mild chocolaty taste with the addition of cocoa powder, rather than chocolate itself.
Ingredients
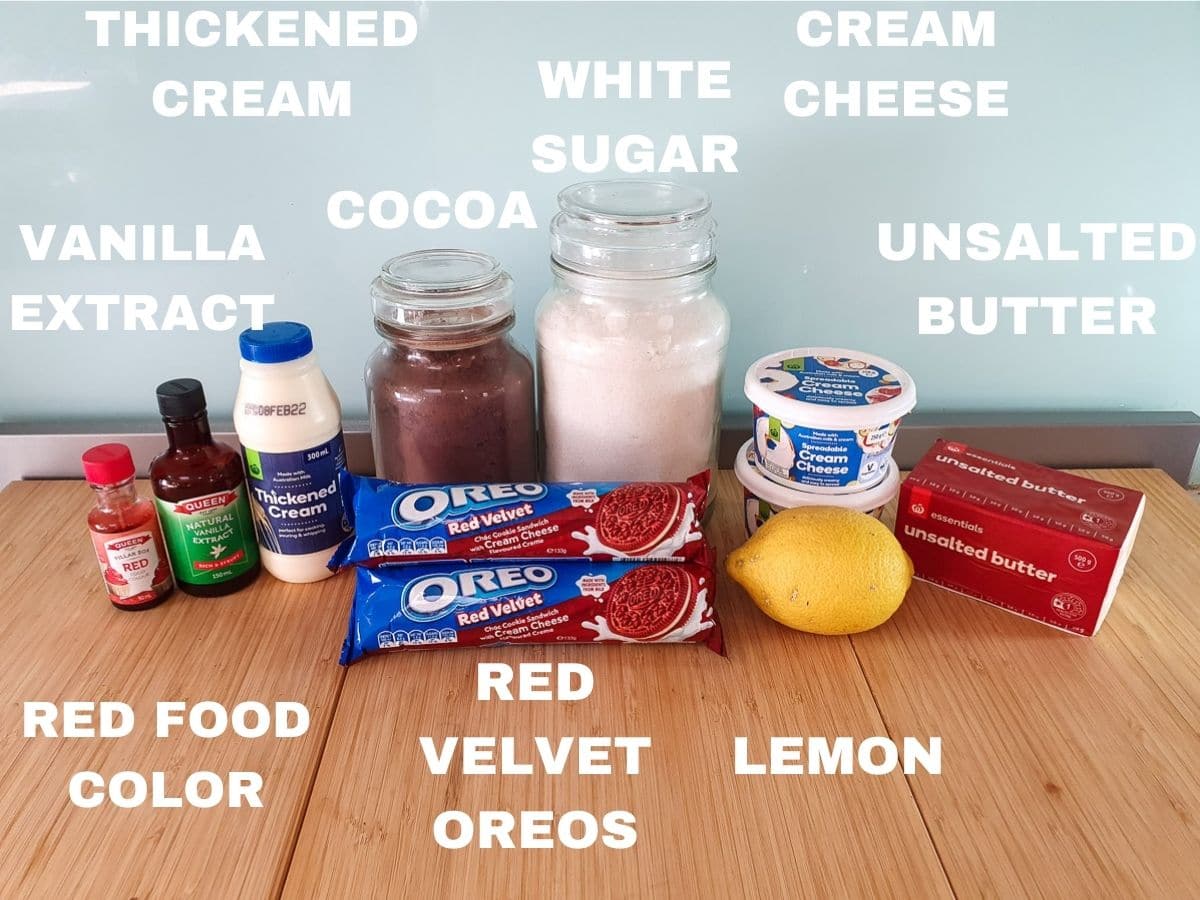
Red velvet Oreos: provide the beautiful pinky-red cookie base for this red velvet cheesecake with Oreo crust. If you can not get red velvet Oreos you can replace them like for like with regular Oreos, but the color of the base will be black instead of reddy pink.
Natural cocoa powder: natural cocoa powder is best for this recipe as it won't interfere with the red color, but you could use Dutch-processed if that's all you have (as opposed to chocolate red velvet cake, which is traditionally always made with natural cocoa).
Red food color: is needed to get that bright fire engine red color we all know and love.
Vanilla extract: sometimes also called vanilla essence, depending on where you live. You can use either, or imitation vanilla essence, depending on your preference and budget.
Cream cheese: full fat cream cheese is best for this recipe for that classic creamy cheesecake taste. If you use light cream cheese it may not set properly.
Cream: I use thickened cream which has a fat content of about 34%. You could also use heavy cream or heavy whipping cream which is similar.
Lemons: a dash of lemon juice helps balance the sweetness of the cream cheese frosting filling. Fresh is best, I don't recommend bottled lemon juice.
Unsalted Butter: because butter makes most things taste better. In this case it binds and sets the base.
How to make Red Velvet Oreo Cheesecake
See the full recipe card at the end of the post for ingredient amounts and instructions.
To make the red velvet oreo cookie base
Grease and line your springform cheesecake pan. Twist the red velvet Oreos apart. Scrap out the filling and set it aside. Break the remaining cookies up and blitz them into crumbs in a food processor. If you don't have a food processor you can put them into a plastic bag on a chopping board, cover with a tea towel and bash (carefully) with a rolling pin, or even the base of a small pot.
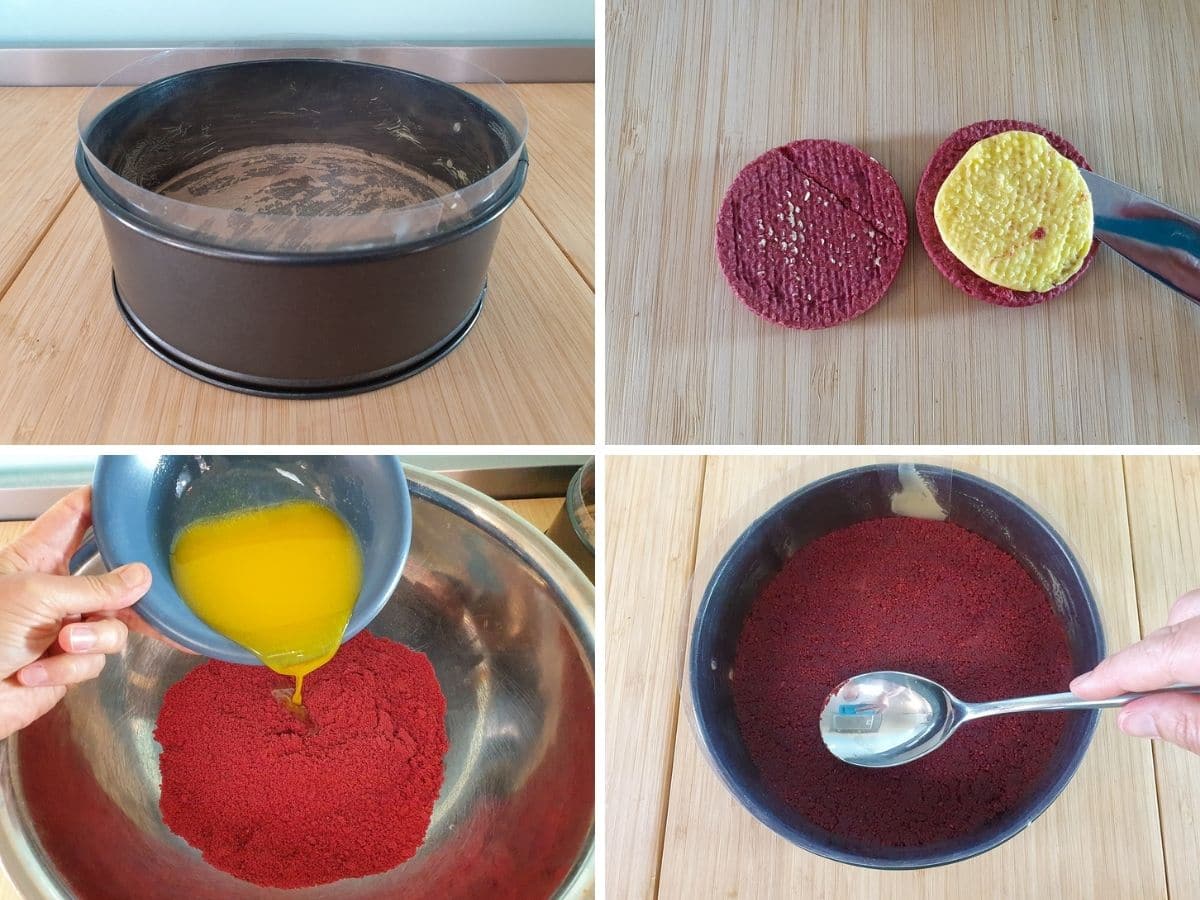
Melt the butter in a microwave or in a pot on the stove. Add the butter to the crumbs and mix well. Tip into the lined cake tin. Press down with the back of a spoon and chill for at least one hour, and up to twenty-four hours before filling. You want to press down enough for the base to hold together but not too firmly to your base will be too hard.
Hot tip: do not skip chilling the base. If it's to hot when you add the filling it can make the filing weep, resulting in a soggy cheesecake base. If you are pressed for time on the day you can make the base the day before and store it in the fridge.
To make the red velvet cheesecake filling
Whip the cream until firm peaks form. If using a stand mixer, divide the cream in half and wash your mixing bowl.
Hot tip: Make sure your cream cheese is at room temperature. This can take anywhere from thirty minutes to one hour depending on where you live. If your cream cheese is too cold it won't mix in properly and is one of the main causes of lumpy or grainy cheesecake.
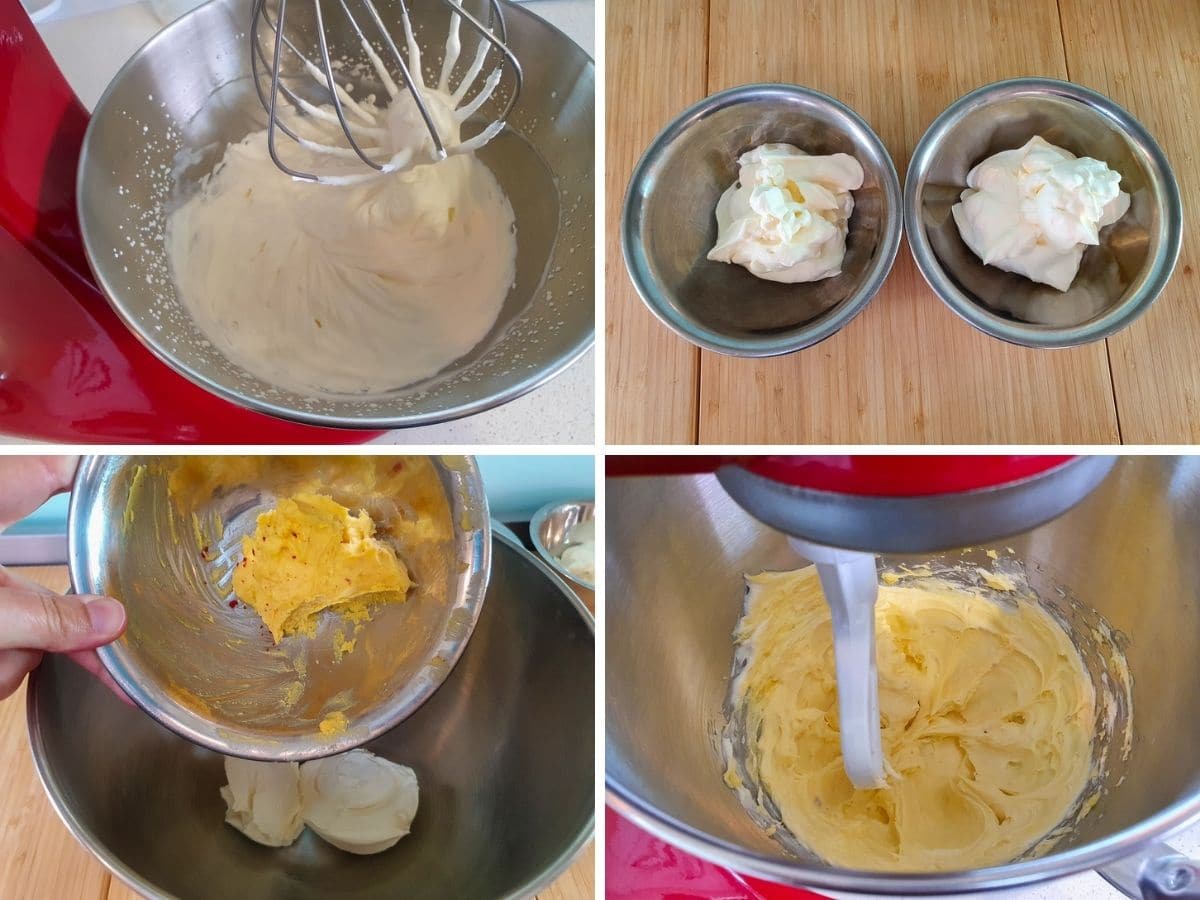
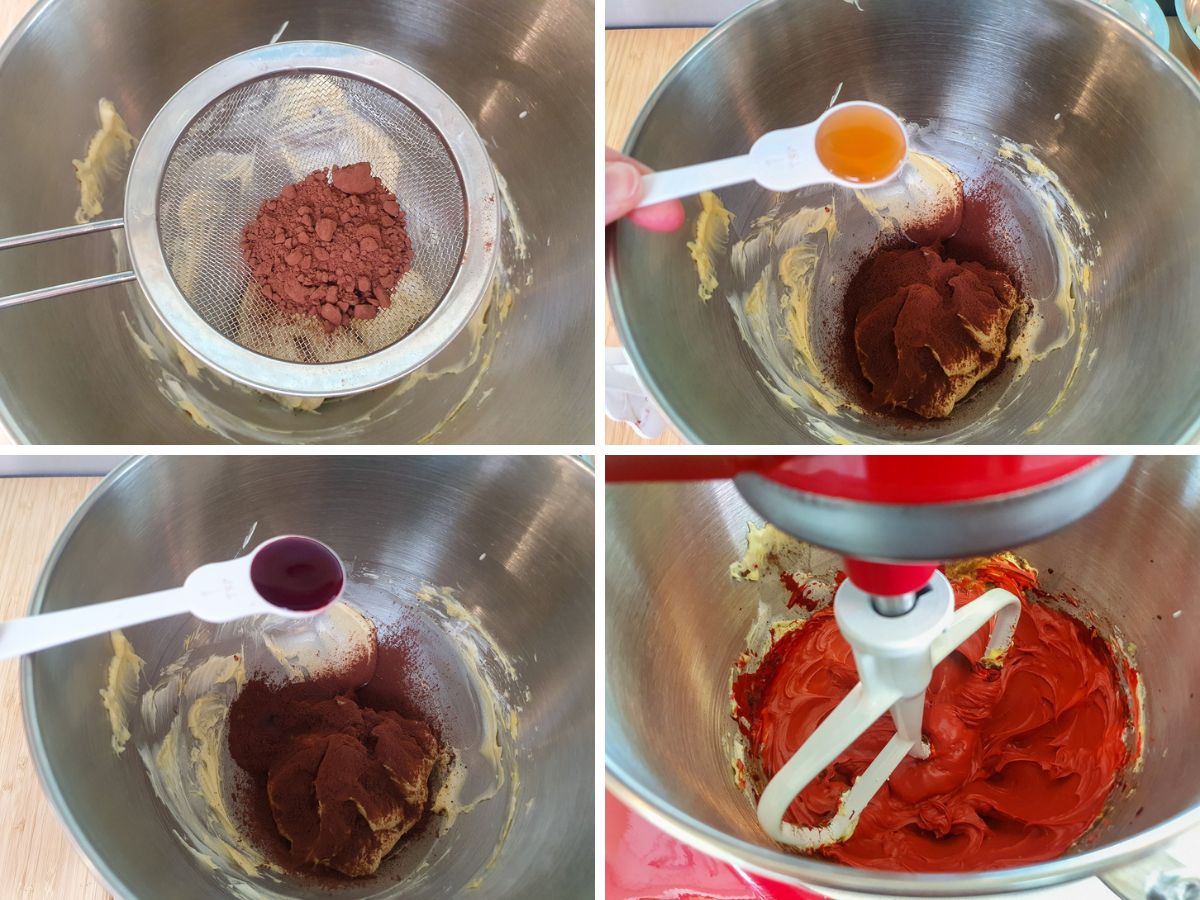
Add one tub of room temperature cream cheese and ¾ of the scraped-out Oreo filling (75gms in total). Beat in a stand mixer until smooth and well combined. Sift in the cocoa powder. Add 1 and ½ teaspoons vanilla extract and red food color. Mix well until smooth and combined. Add half the whipped cream and fold in, taking care not to knock too much air out of the cream.
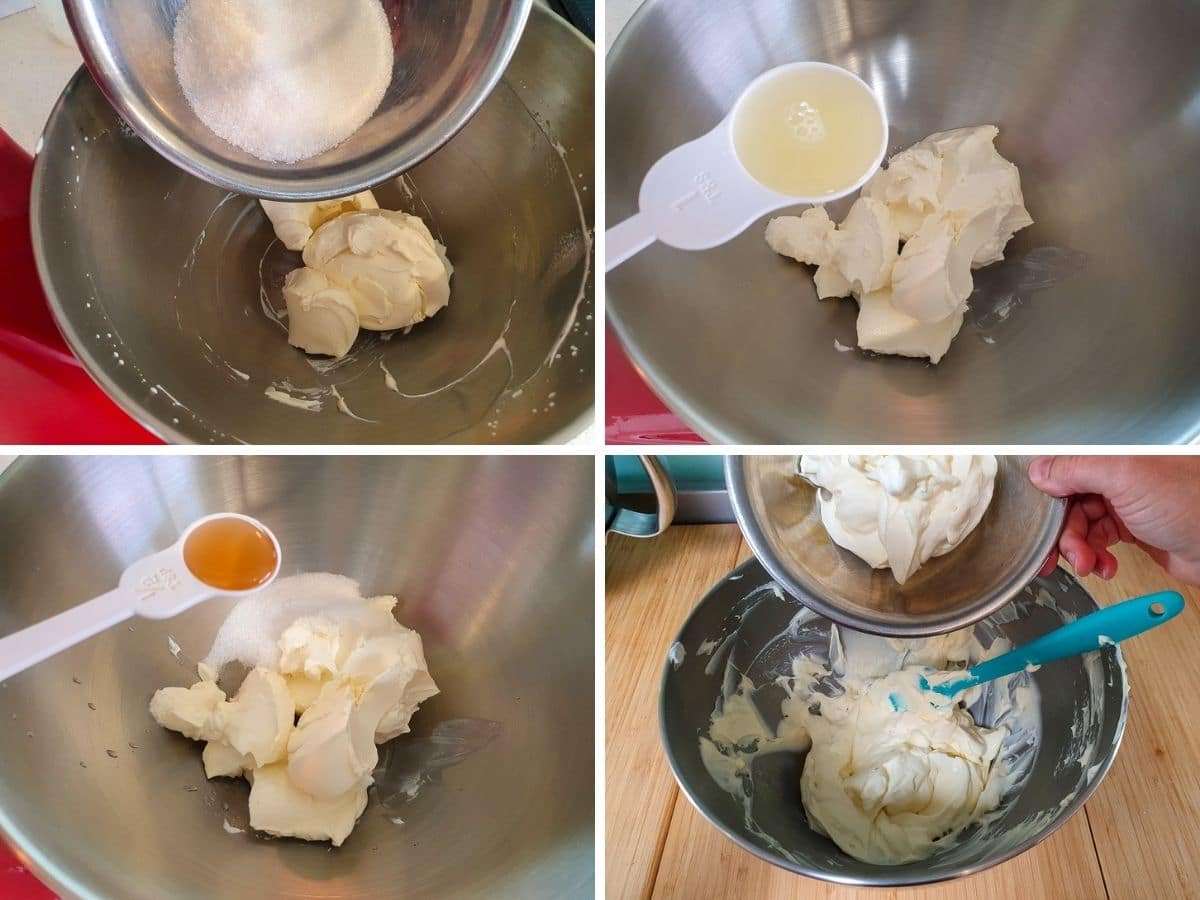
Either use a second mixing bowl or if you only have one for your stand mixer, transfer mix to another bowl, wash and dry your bowl. Add the second tub of cream cheese, sugar, lemon juice and half a teaspoon of vanilla extract. Mix on low until well combined and the sugar has dissolved and mix in well. Increase speed to medium and beat until smooth. Add the second half of the whipped cream and fold in, taking care not to knock too much air out of the cream.
Hot tip: Help! I didn't use room temperature cream cheese and now my cheesecake batter is lumpy! How do I fix it?
Look we've all been there. You're rushing and you forget to take the cream cheese out. Or the recipe test doesn't work and you have to get the extra cream cheese out of the fridge :).
If this happens you can try the following:
- turn up the speed of the mix and beat well for several seconds;
- use a spatula to squish the lumps out against the side of the mixing bowl;
- or my go-to, use a stick/immersion blender to quickly and carefully blend out the lumps. The last one works very well BUT you risk over-mixing your filling and/or making it to loose to set properly, so use with caution!
Spoon large blobs of alternating red and white filling onto the base of the cheesecake. Take care to try and fill in any air gaps and give the tin a few good taps on the bench to help remove any air bubbles before starting on the second layer.
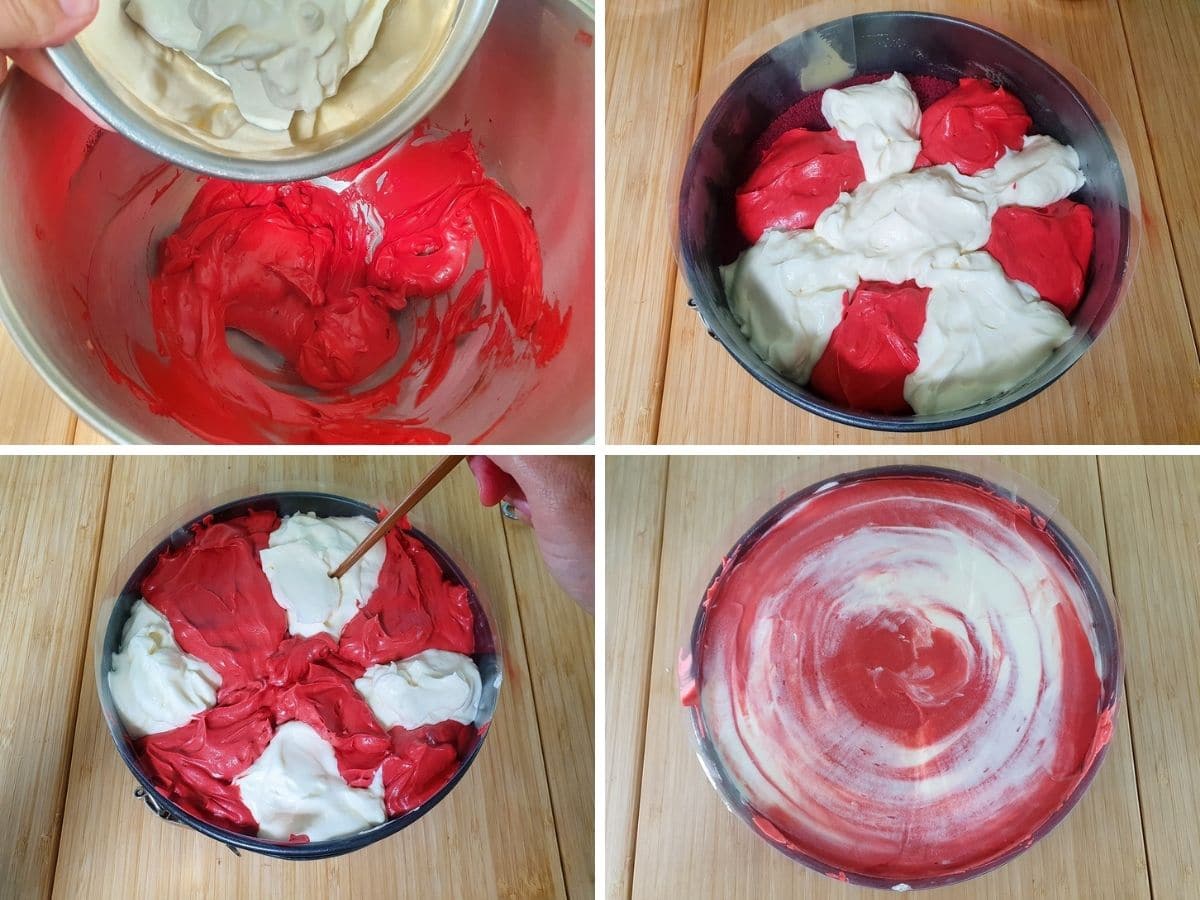
Once you have added all the filling, use a chopstick or other end of a piece of cutlery to gently marble the filling. Smooth down the top with an offset spatula. To stop the colors all muddling together try to smooth from white to red and clean your spatula regularly. Chill in the fridge for at least six hours, preferably overnight.
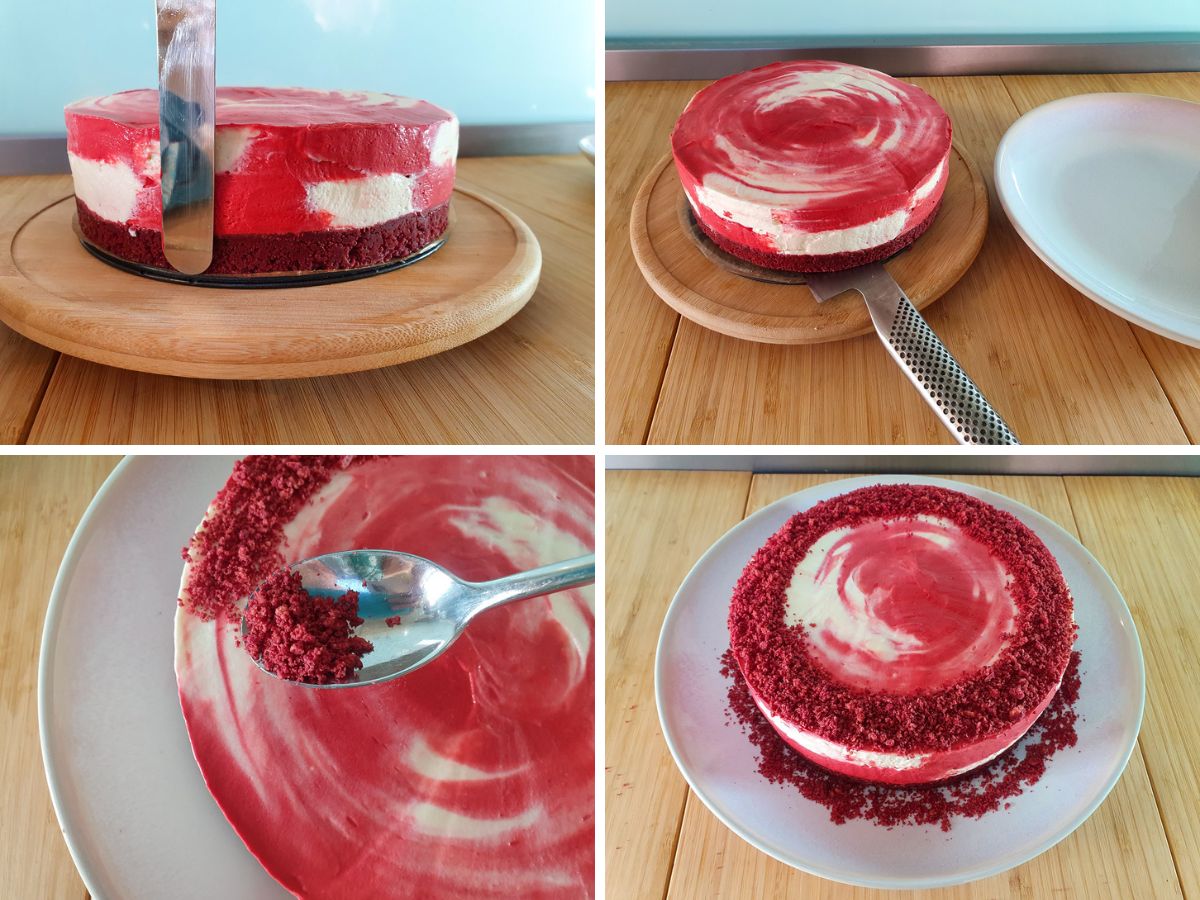
Once set remove from the tin. Be careful removing the baking paper or acetate as some of the filling will stick to it. You can use an offset spatula to smooth down the outside of the cake. As with the top of the cake, try to run the spatula over just white or red, cleaning the spatular when needed. This is optional but will keep the colors more distinctive if you care.
Carefully slide a large knife between the base of the cake and the baking paper to loosen it off, then transfer carefully to a plate. To decorate blitz up approx three whole red velvet Oreos into crumbs and sprinkle in a circle around the top, and you're done!
How to serve
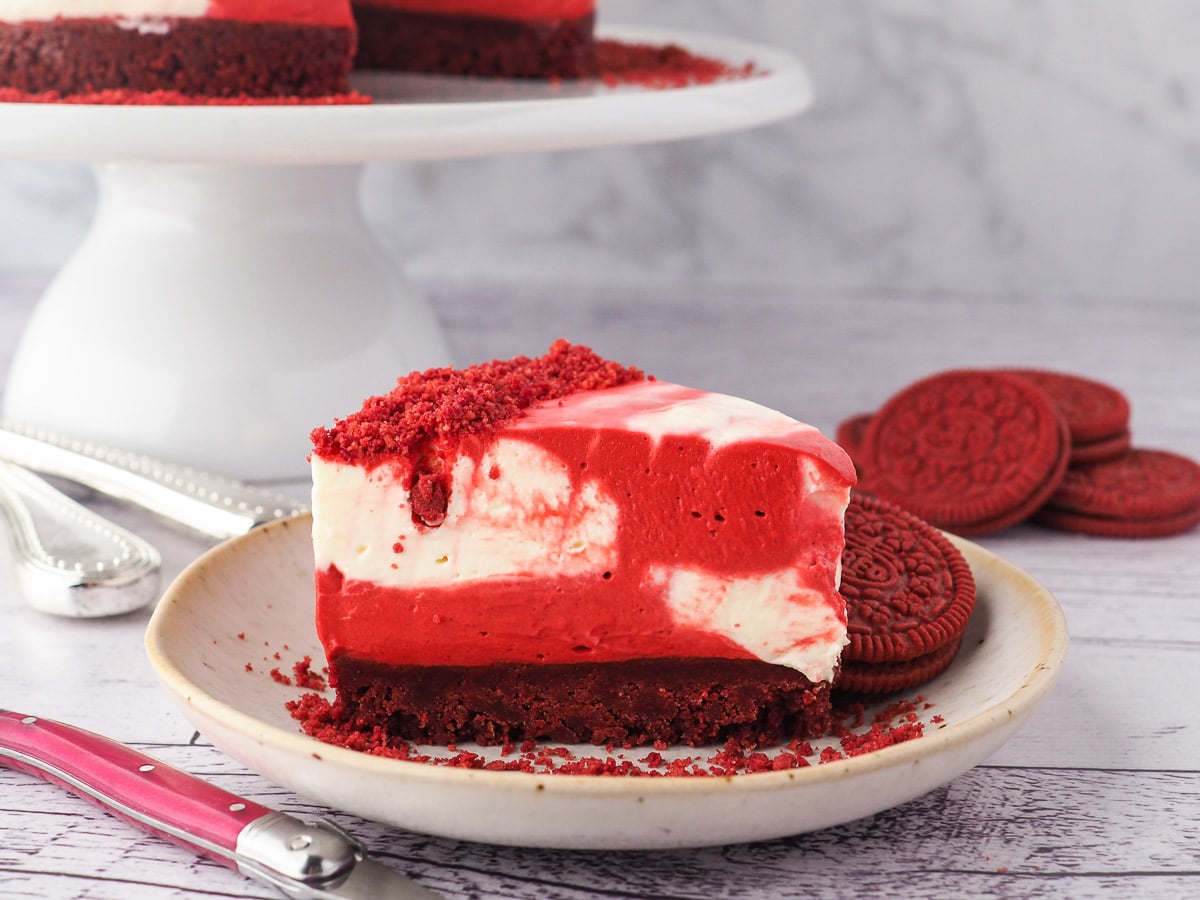
To serve the red velvet Oreo cookie cheesecake pop onto a plate, slice and enjoy! To get a smooth slice you can dip a large sharp knife in hot water, dry it quickly then carefully slice the cake. Don't heat up the knife too much or it will melt the cheesecake. It goes without saying the knife will be warm to hot. You may need to put a tea towel over the end to avoid burning your fingers on the hot metal.
How to store
How long is red velvet cheesecake good for?
This red velvet and Oreo cheesecake is good for three to four days in the fridge in a covered container.
Can you freeze red velvet cheesecake?
Like most no bake cheesecakes this red velvet cheesecake with Oreo crust can be frozen for up to a month. It will still be safe to eat for up to two months, but after a month the flavor and texture may be compromised. Wait until the cheesecake has set in the fridge, then wrap the whole cake in the tin in cling wrap and foil and freeze. To defrost put it in the fridge overnight, then remove from the tin and decorate.
Have you made this recipe? Tell me how it went in the comments below and tag me on instagram so I can see your delicious creations! @keep_calm_and_eat_icecream
Looking for more yummy dessert recipes?
Why not try making
- Chocolate Red Velvet Cake
- Red Velvet Ice Cream
- Oreo Mug Cake
- Homemade Oreos
- Pralines Roses (Pink Pralines)
- Biscoff Cheesecake
Follow me on Facebook or Pinterest for many more delicious recipes.
📋 Recipe
Red Velvet Oreo Cheesecake
Equipment
- Spring form cake tin, 7" x 2.5" (18cm x 6.5cm)
- Electric hand held beaters or stand mixer *its usefull but not essential to have two mixing bowls for your stand mixer for this recipe.
- Stick/immersion blender with chopping bowl attachment or food processor
- baking paper or food safe acetate *clear food safe acetate is available for some baking shops and cna help give smoother sides to the cheesecake.
Ingredients
Cheesecake base
- 2 & ½ packs (133gms per packet or about 335 gms total)/ 37ish Oreos red velvet oreos, seperated and filling removed *plus extra Oreos to decorate
- 1 stick (½ cup/ 115gms) unsalted butter
Cheesecake filling
- 1 cup (250mls) thickened cream, divided
- 2 x 8 ounce tubs (450gms total) full fat cream cheese, divided
- 1 tablespoon natural cocoa powder
- 3 teaspoons red food colour
- 2 teaspoons vanilla extract, divided
- 37ish (75gms) filling from red velvet Oreos
- 2 tablespoons & 1 teaspoon (35gms) white sugar
- 1 tablespoon lemon juice
Decorations
- 3 whole red velvet Oreos
Instructions
To make the cheesecake base
- Line the base and sides of a springform tin with baking paper or food safe acetate.
- Twist the Oreos in half and scrap out the filling. Put the filling aside. Break up the cookies and blitz briefly in a food processor into crumbs. You will need about 2 & ⅓ cups (250gms) Oreo crumbs.
- Melt the butter by cubing, adding to a microwave proof bowl and microwave for a minute or two.
- Pour the melted butter into the biscuits crumbs, add mix until it resembles fine bread crumbs.
- Pour into lined spring form tin and press down at the bottom to form the base. Do not press to firmly or your base may become to hard.
- Chill in fridge for at least one hour and up to overnight.
To make the cheesecake filling
- NB Make sure your cream cheese is at room temperature.
- Whip the cream until firm peaks form. If using a stand mixer, divide cream in half and wash your mixing bowl.
- Add one tub of room temperature cream cheese and ¾ of the scraped out Oreo filling (75gms in total). Beat in a standmixer untill smooth and well combined. Sift in the cocoa powder. Add 1 and ½ teaspoons vanilla extract and red food colour. Mix well untill smooth and combined.
- Add half the whipped cream and fold in, taking care not to knock to much air out of the cream.
- Either use a second mixing bowl, or if you only have one for your stand mixer, transfer mix to another bowl, wash and dry your bowl.
- Add the second tub of cream cheese, sugar, lemon juice and half a teaspoon of vanilla extract. Mix on low until well combined and the sugar has dissolved and mix in well. Increase speed to medium and beat until smooth.
- Add the second half of the whipped cream and fold in, taking care not to knock too much air out of the cream.
- Spoon large blobs of alternating red and white filling onto the base of the cheesecake. Take care to fill in any air gaps and give the tin a few good taps on the bench to help remove any air bubbles before starting on the second layer.
- Once you have added all the filling, use a chopstick or other end of a piece of cutlery to gently swirl the filling around. Smooth down the top with an offset spatula. Chill in the fridge for at least six hours, preferably overnight.
- To serve remove from the tin. You can use an offset spatula to smooth down the outside of the cake. Cafefully slide a lage knife between the base of the cake and the baking paper to loosen it off, then transfer carefully to a plate.
- To decorate blitz up approx three whole red velvet Oreos into crumbs and sprinkle in a circle around the top, and you're done!
Notes
- Red velvet Oreos are sometimes a limited-edition flavor, depending on where you are in the world. If you can't get red velvet Oreos you can use regular Oreos in this recipe.
- Separating the Oreos may seem a little fiddly but it's worth it! If you really can't handle removing the filling you can try useing 250 grams of whole red velvet Oreos for the base, and replace the filling in the red cheesecake layer with ⅓ cup white sugar. Your base and cheesecake will be sweeter if you do this and your base may not be as firm.
- I used a 7" x 2.5" (18cm x 6.5cm) as I like my cheesecake nice and tall with a deep cookie base. You can use a wider springform tin if that's what you have. Your cheesecake will be flatter but it will still be delicious!
Nutrition
Nutritional Disclaimer
Nutritional information is an estimate based on an online database. The nutritional content of ingredients may vary by brand. If you require accurate nutritional information, you should calculate this based on the specific brands and products you are using.
Join the community!
Like Keep Calm and Eat Ice Cream on Facebook for more great recipes
Pin it for later!




Comments
No Comments