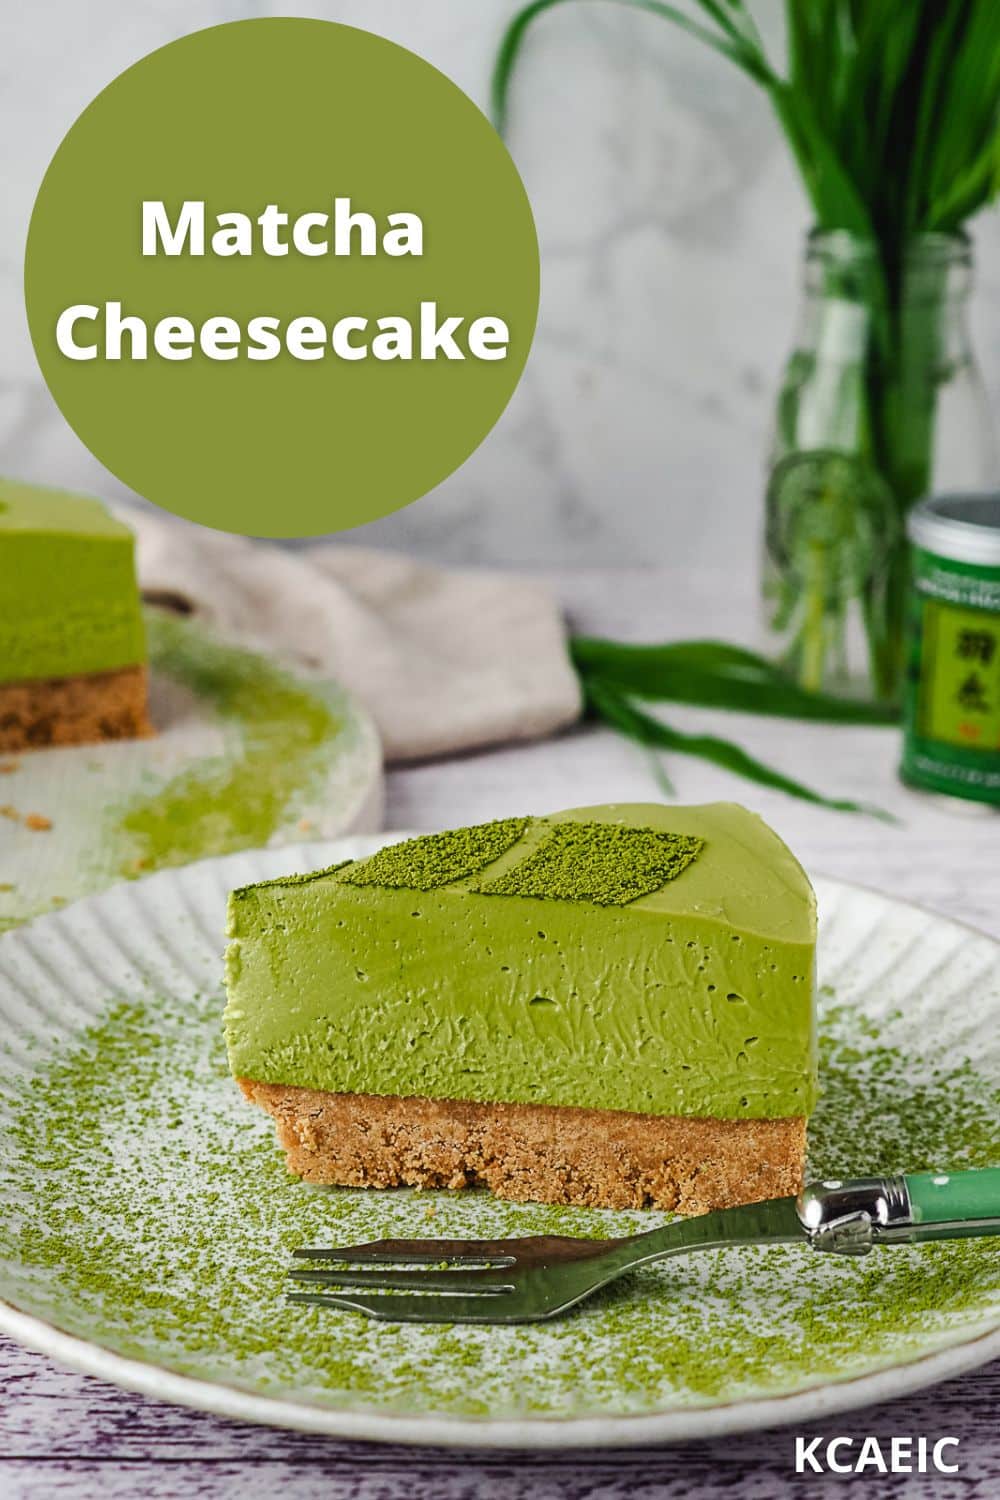
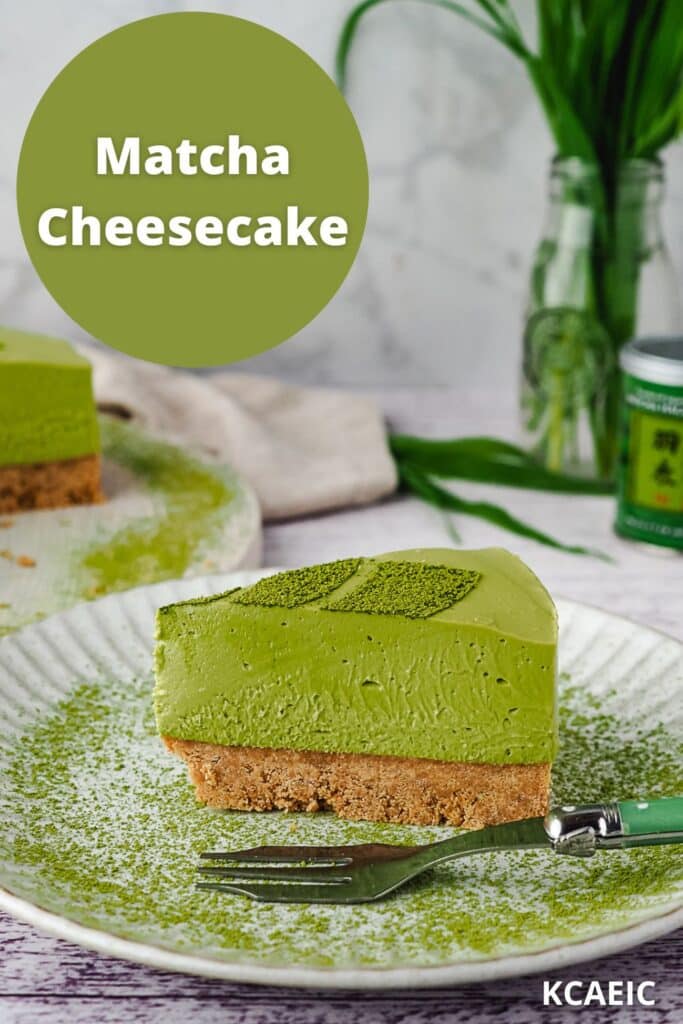
This no-bake matcha cheesecake without gelatin combines sweet earthy matcha green tea with a creamy cheesecake filling for a perfectly balanced matcha dessert.
Jump to:
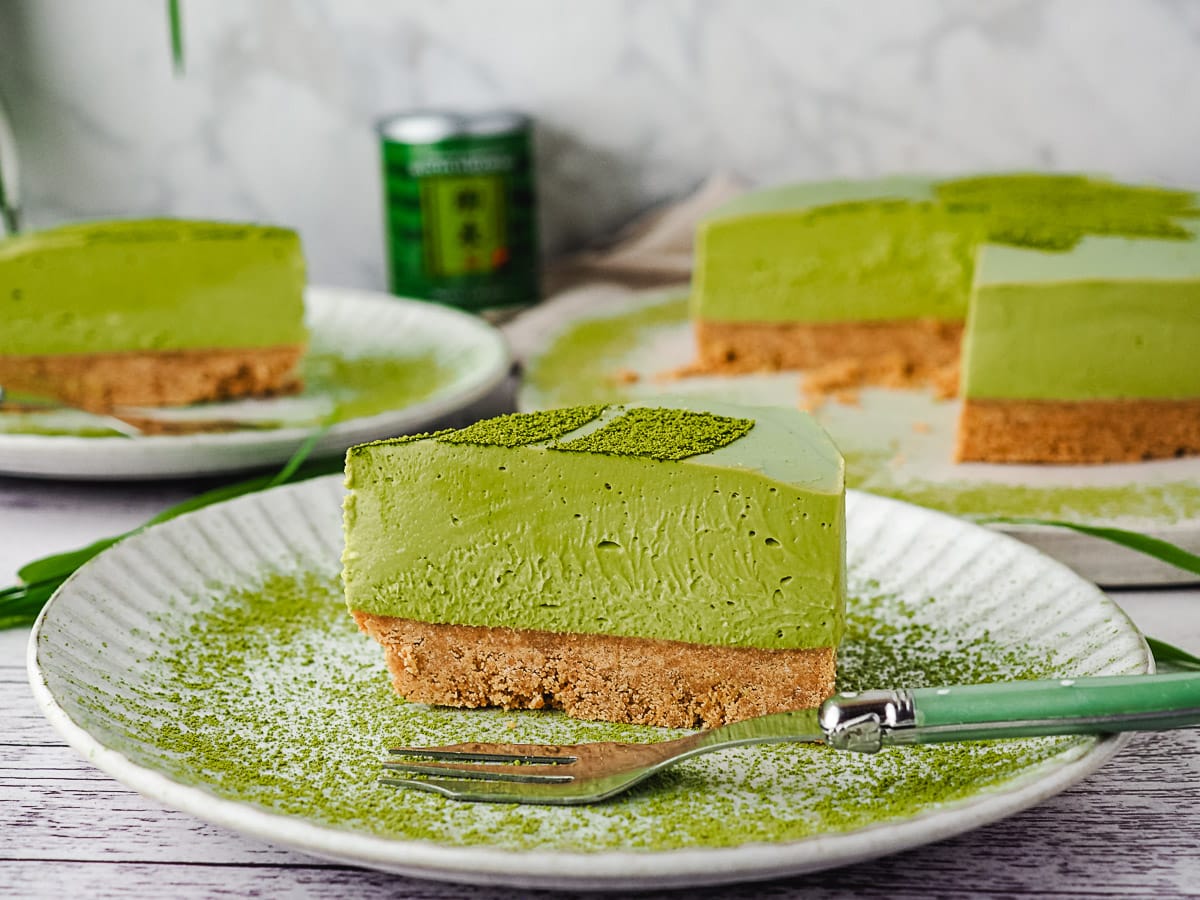
This no bake green tea cheesecake is the matcha dessert you've been looking for. The earthy, grassy matcha flavor combines with a tangy sweet cheesecake filling and buttery cookie base for a southeast Asian-inspired dessert that looks as good as it tastes.
Looking for more Asian inspired desserts? Why not try making my stunning no bake ube cheesecake, or easy matcha ice cream, smooth, creamy and that gorgeous signature green color.
Recipe tips and frequently asked questions
What is matcha?
Matcha is type of specially grown green tea that is traditionally consumed in South East Asia. The green tea plants are usually shaded for several weeks before harvesting to increase the amount of caffeine and other compounds in the tea. The leaves are ground into a fine powder and is used to make tea and flavor and color many foods including ice cream and lattes.
What does matcha cheesecake taste like?
This green tea cheesecake, much like matcha itself, has a mellow grassy vegetable taste, combined with the smooth creamy cheesecake filling. It is both savory and slightly bitter with sweetness to round it out, contrasted by a buttery cookie base.
Can I make a mini version of this?
You sure can. Simply make them lined muffin tins instead or silicon molds. As a guide this recipe will make about 24 'muffin tin' sized cheesecakes, which are a similar size to my no bake mini cheesecakes for comparison. You could easily half the recipe to make a dozen cheesecakes as per my mini cheesecakes recipe, or make more generous serves.
Can I make this gluten free?
For a gluten free version try replacing the cookies with your favorite gluten-free cookie (note I haven't tested this so can't say for certain if the base will set properly).
Ingredients
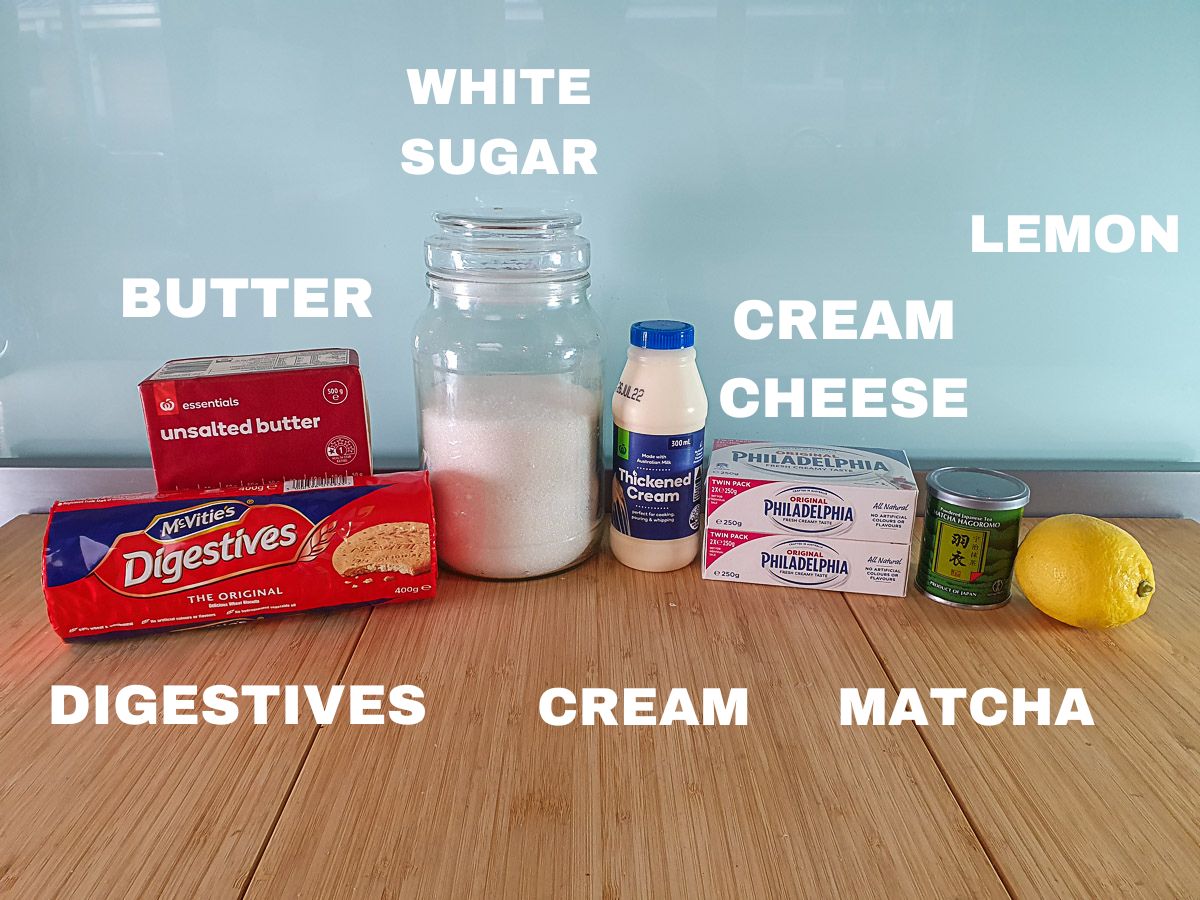
Matcha Powder: a good quality matcha powder will make the difference between a tasty cheesecake and one that's too bitter. Better quality powder will also dissolve more easily.
Cream cheese: full-fat cream cheese is best for this recipe for that classic creamy cheesecake taste. If you use light cream cheese it may not set properly.
Cream: I use thickened cream which has a fat content of about 34%. You could also use heavy cream or heavy whipping cream which is similar.
Vanilla extract (not pictured): sometimes also called vanilla essence, depending on where you live. You can use either, or imitation vanilla essence, depending on your preference and budget.
Lemons: a dash of lemon juice helps balance the sweetness of the cream cheese. Fresh is best, I don't recommend bottled lemon juice.
White Sugar: white sugar is best in this recipe. You could use castor sugar if you prefer. I don't recommend using other types of sugar, they will be hard to dissolve and will compete with the flavors in this no-bake cheesecake.
Digestive biscuits: are a type of sweet wholemeal cookie sold in Australia. If you can't get digestives you can use the same amount of alternative sweet cookie such as Graham crackers or crumbs or even nilla wafers.
Unsalted Butter: because butter makes most things taste better. In this case it binds and sets the base.
How to make matcha cheesecake
See the full recipe card at the end of the post for ingredient amounts and instructions.
To make the base
Break the cookies up and blitz them into crumbs in a food processor. If you don't have a food processor you can put them into a plastic bag on a chopping board, cover with a tea towel and bash (carefully) with a rolling pin, or even the base of a small pot.
Melt the butter in a microwave or in a pot on the stove. Add the butter to the crumbs and mix well.
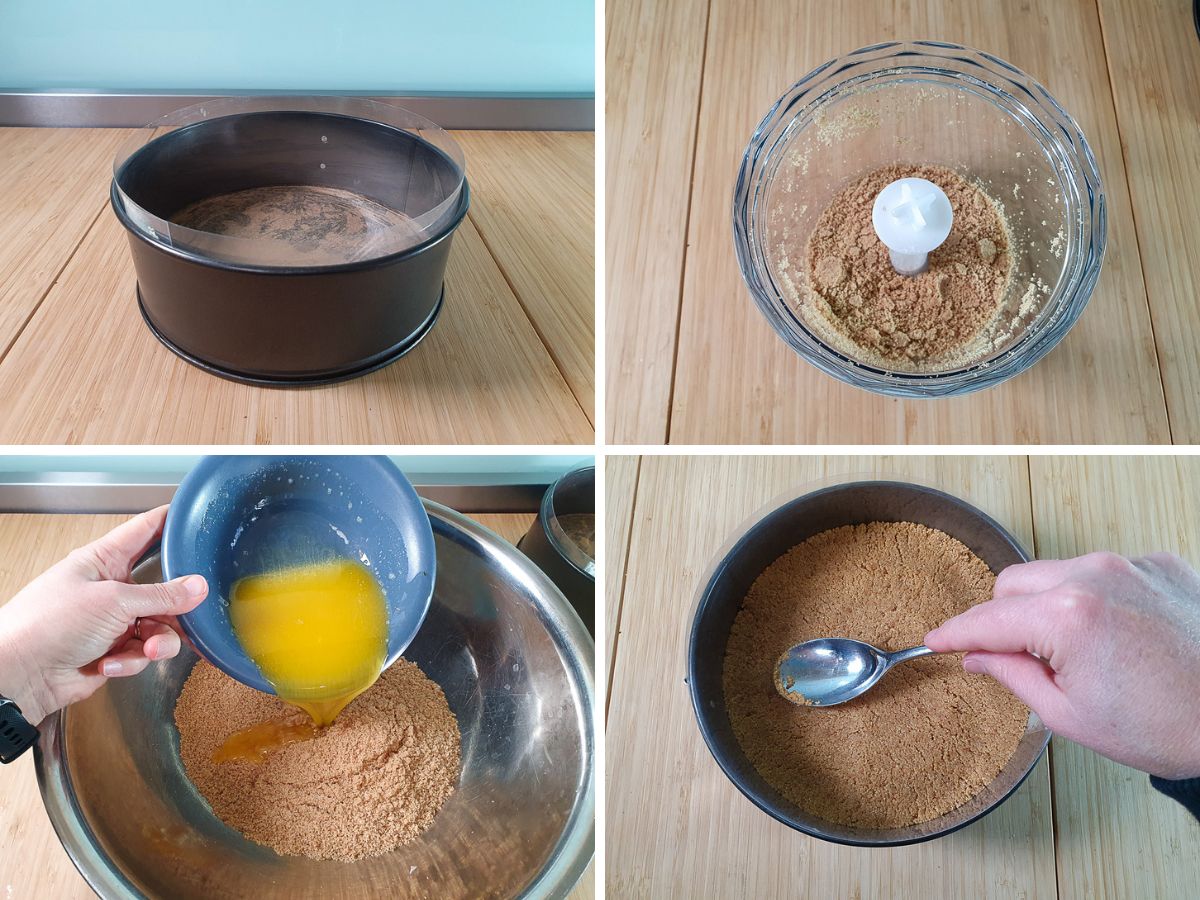
Tip into the lined cake tin. Press down with the back of a spoon and chill for at least one hour, and up to twenty-four hours before filling. You want to press down enough for the base to hold together but not too firmly to your base will be too hard.
Hot tip: do not skip chilling the base. If it's too hot when you add the filling it can make the filling weep, resulting in a soggy cheesecake base. If you are pressed for time on the day you can make the base the day before and store it in the fridge.
To make the matcha filling
Slice and juice the lemon. Beat the cream cheese briefly to soften. Add the lemon juice, sugar and vanilla to the room temperature cream cheese and beat on low until combined and the sugar has all dissolved.
Hot tip: Make sure your cream cheese is at room temperature. This can take anywhere from thirty minutes to one hour depending on where you live. If your cream cheese is too cold it won't mix in properly and is one of the main causes of lumpy or grainy cheesecake.
In a separate sift some of the matcha powder into the cream. Whisk on medium-low until matcha starts to incorporate. Sift in some more and repeat until all the matcha is incorporated into the cream. Remember the scrap down the sides of the bowl with a spatula and try to stir in any bigger lumps.
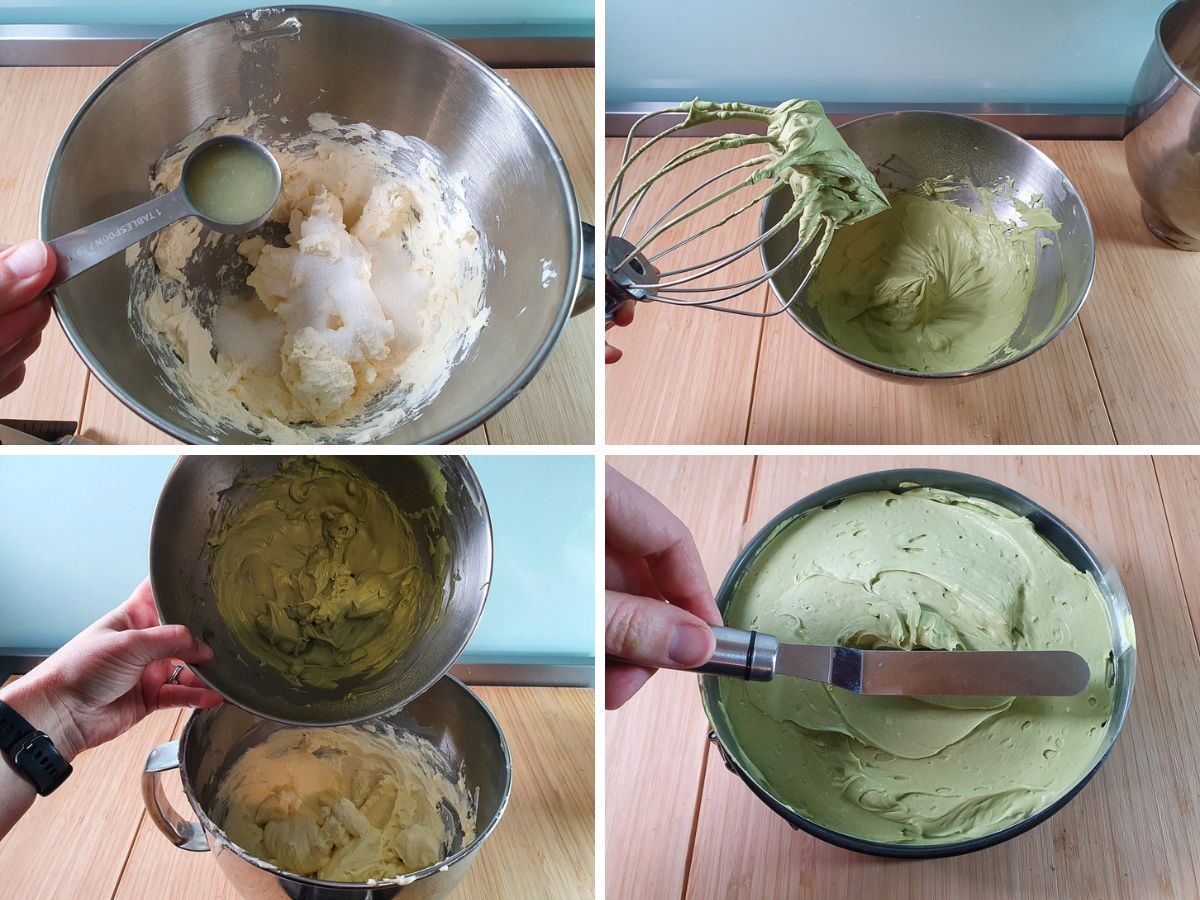
Once all the matcha is all incorporated into the cream turn the speed up to medium-high and whip until firm peaks form, remembering to scrape down the sides of the bowl occasionally. If using a stand mixer check to make sure there is no un-whisked portion in the center of the whisk attachment.
Gently fold the matcha whipped cream into the cream cheese mix until well combined. Pour the cheesecake filling onto the prepared base and smooth down. The filling will be pretty thick, so take care to smooth it down right to the edges and try to press out any air bubbles. Chill in the fridge for at least four hours, preferably overnight.
Once set remove from the tin and carefully peel back the baking paper or acetate. Carefully slide a large knife between the base and baking paper to loosen it, then transfer to a serving plate or board. Smooth the sides with a spatula.
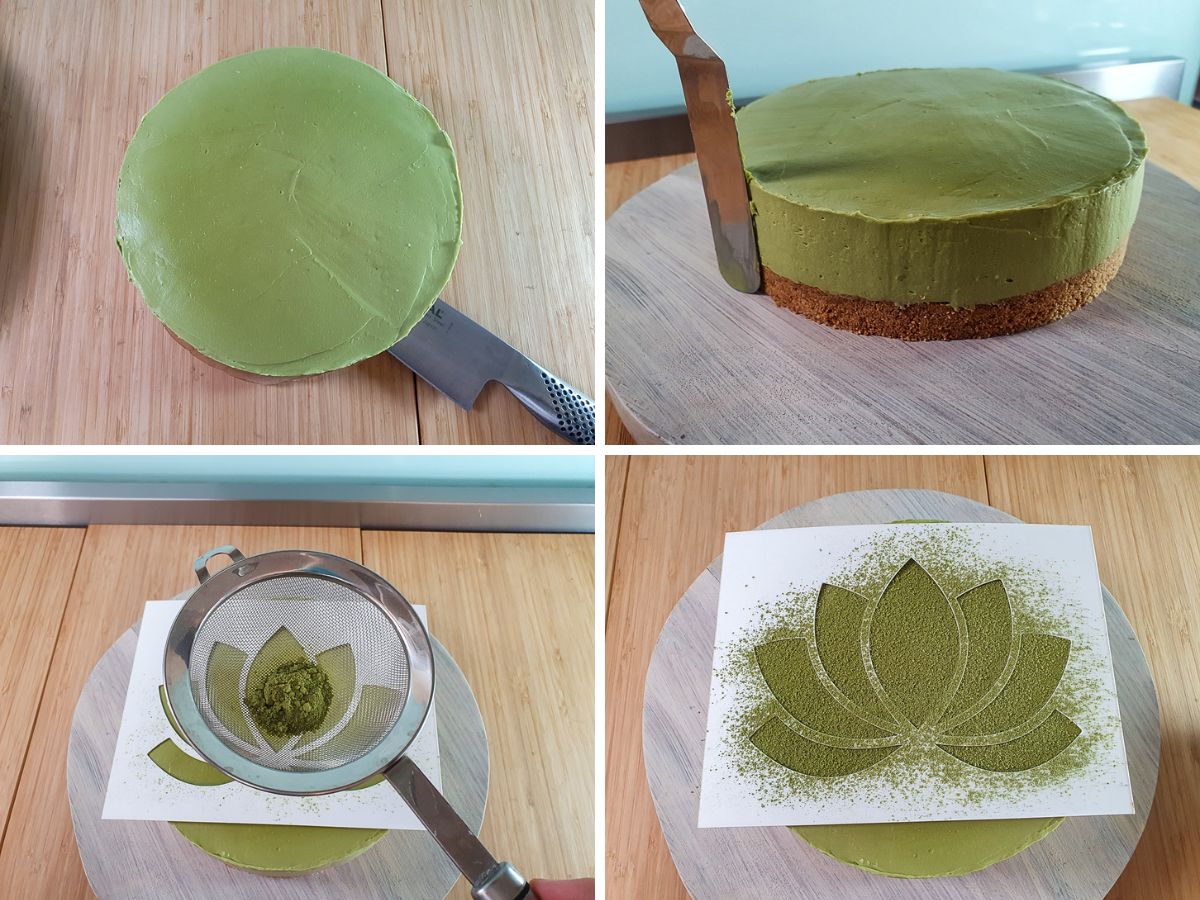
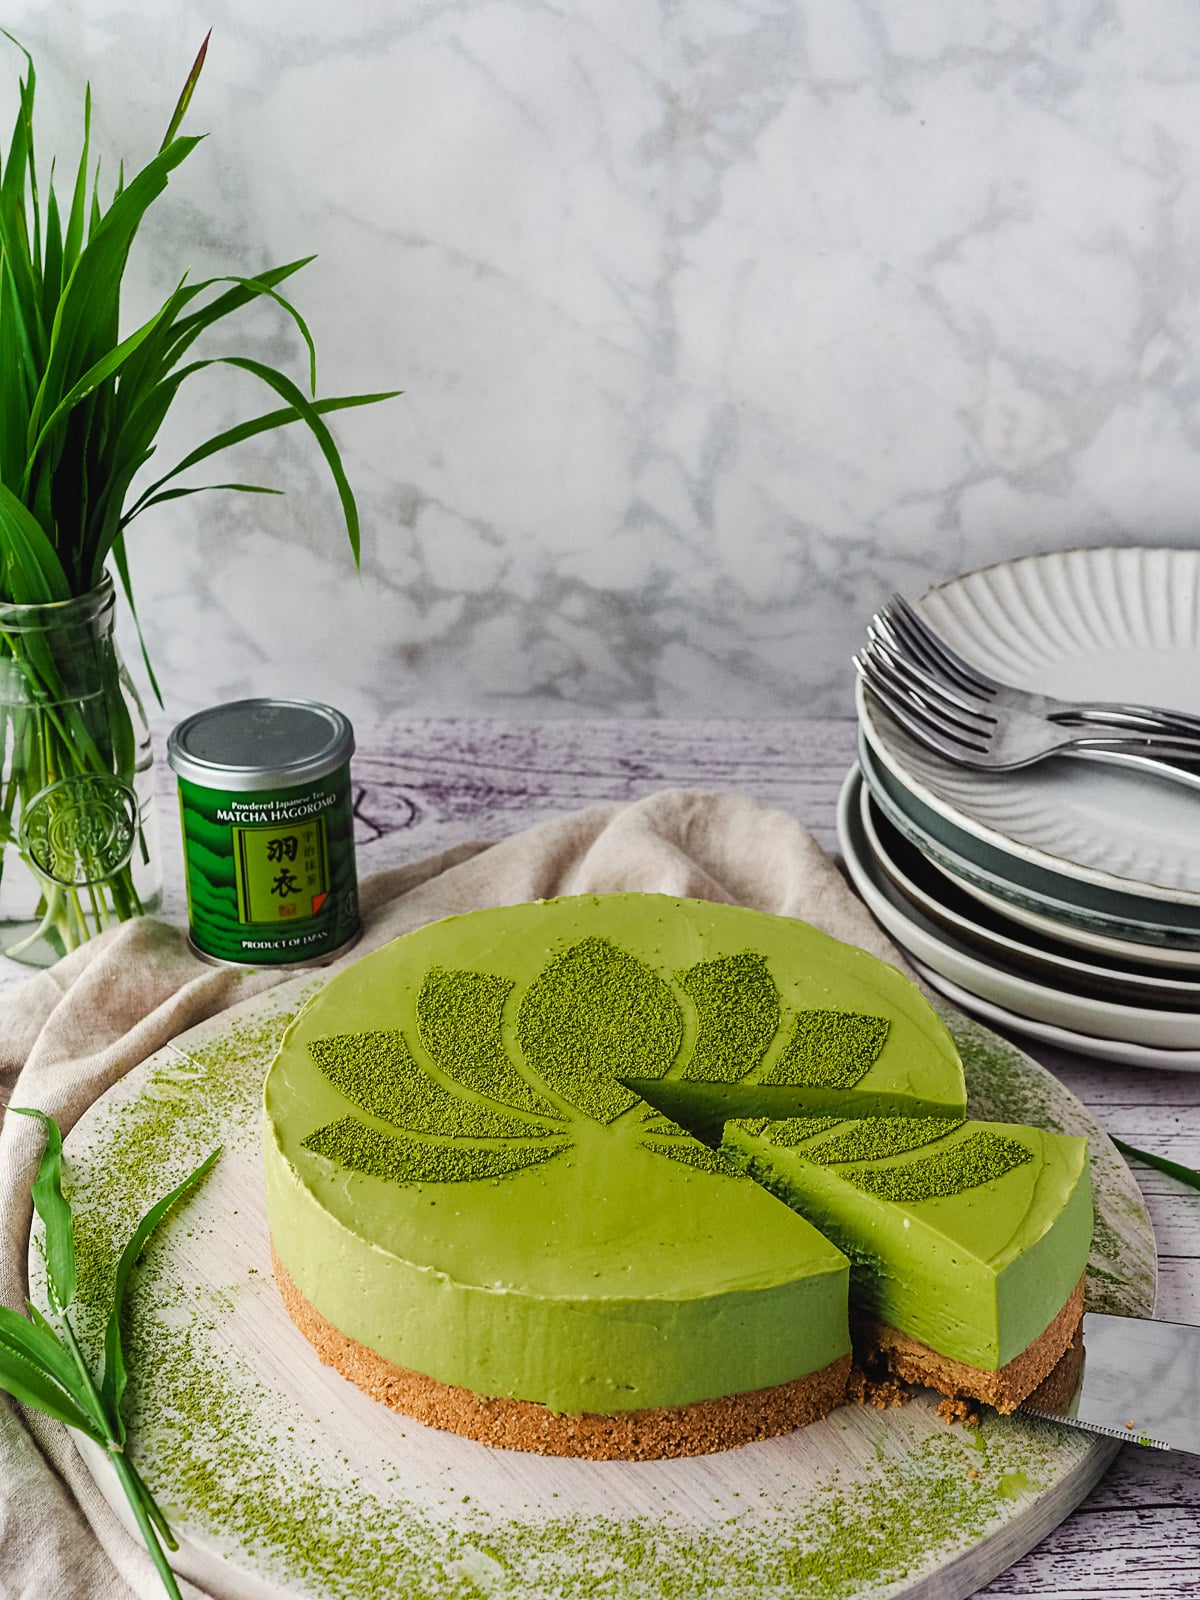
To decorate gently place the stencil on top of the cake and dust with matcha powder. Carefully remove the stencil and you're done!
How to serve
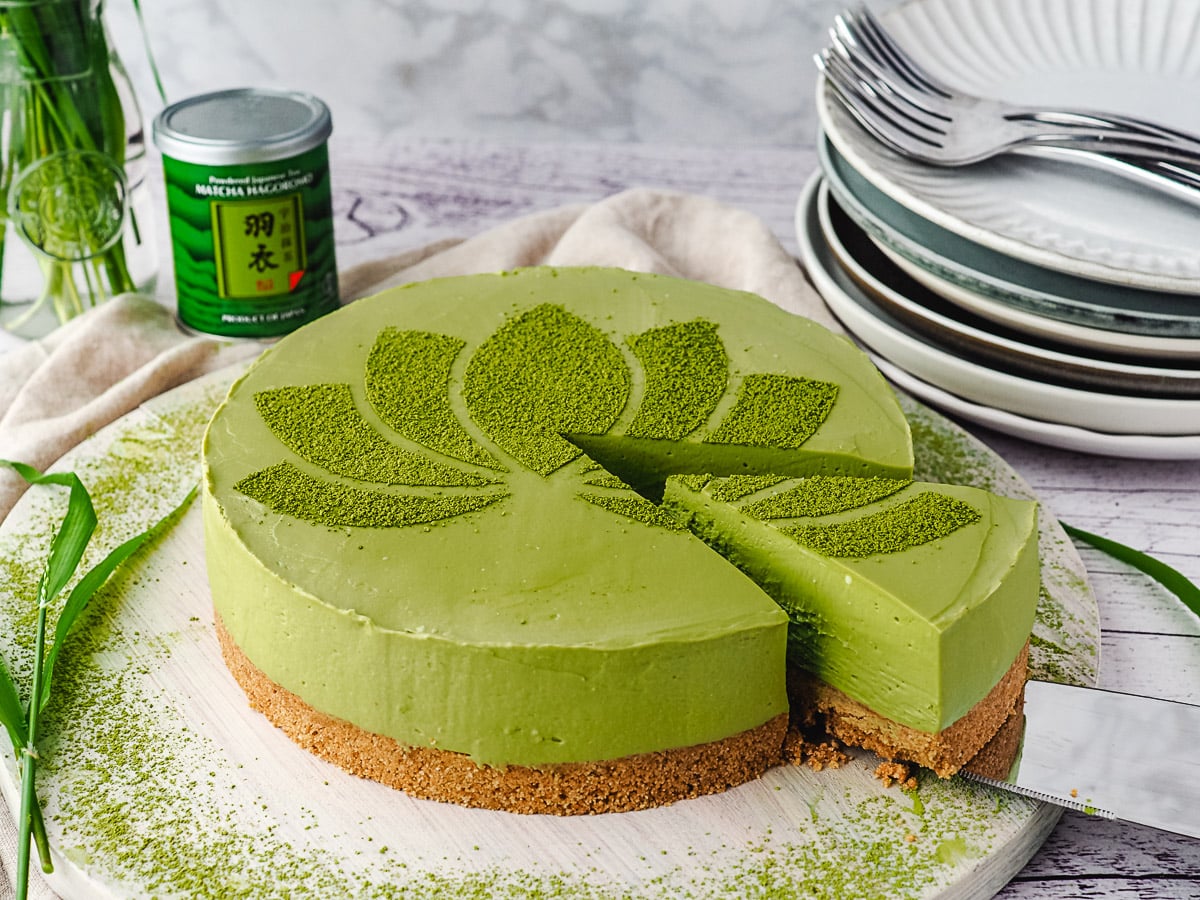
To serve this matcha green tea cheesecake pop onto a plate, slice and enjoy! Perfect with a cup of matcha tea or a matcha latte of course!
To get a smooth slice you can dip a large sharp knife in hot water, dry it quickly then carefully slice the cake. It goes without saying the knife will be Hot. You may need to put a tea towel over the end to avoid burning your fingers on the hot metal.
How to store
This matcha no bake cheesecake will store well in the fridge for up to five days, preferably in a covered container, but will be freshest if eaten within three days.
Undecorated individual slices or the whole cake wrapped and frozen for up to two months, but best eaten within a month for better taste and texture.
Have you made this recipe? Tell me how it went in the comments below and tag me on instagram so I can see your delicious creations! @keep_calm_and_eat_icecream
Looking for more yummy dessert recipes?
Why not try making
Follow me on Facebook or Pinterest for many more delicious recipes.
📋 Recipe
Matcha Cheesecake
Equipment
- Spring form cake tin, 7" x 2.5" (18cm x 6.5cm) or similar
- Electric hand held beaters or stand mixer *its usefull but not essential to have two mixing bowls for your stand mixer for this recipe.
- Stick/immersion blender with chopping bowl attachment or food processor
- baking paper or food safe acetate *clear food safe acetate is available for some baking shops and cna help give smoother sides to the cheesecake.
- stencil *optional
Ingredients
Cheesecake base
- 2 & ⅓ cups (250gms) Digestive biscuite or graham cracker crumbs
- 1 stick (½ cup/ 115gms) unsalted butter
Cheesecake filling
- 2 x 8 ounce tubs (450gms total) full fat cream cheese
- ⅔ cup (145gms) white sugar
- 1 tablespoon fresh lemon juice
- ½ teaspoon vanilla extract
- 1 cup (250mls) thickened cream
- 2 tablespoons (15gms total) matcha powder
To decorate
- 1 - 2 teaspoons matcha powder, to decorate
Instructions
To make the cheesecake base
- Line the base and sides of a springform tin with baking paper.
- Break up the cookies and blitz briefly in a food processor into crumbs.
- Melt the butter by cubing, adding to a microwave proof bowl and microwave for a minute or two.
- Pour the melted butter into the biscuits crumbs and mix until it resembles fine bread crumbs.
- Pour into lined springform tin and press down at the bottom to form the base. Do not press to firmly or your base may become to hard.
- Chill in fridge for at least one hour and up to overnight.
To make the cheesecake filling
- NB Make sure your cream cheese is at room temperature.
- Slice and juice the lemon. Beat the cream cheese briefly to soften. Add the lemon juice, sugar and vanilla to the room temperature cream cheese and beat on low until combined and the sugar has all dissolved.
- Add the cream to a seperate bowl and sift in some of the matcha powder. Whisk in medium low until matcha starts to incorporate. Sift in some more and repeat several times until all the matcha is incorporated into the cream. Remember the scrap down the sides of the bowl with a spatula and try to stir in any bigger lumps.
- Once all the matcha is incorporated into the cream turn the speed up to medium-high and whip until firm peaks form, remembering to scrape down the sides of the bowl occasionally. If using a stand mixer check to make sure there is no un-whisked portion in the center of the whisk attachment.
- Gently fold the matcha whipped cream into the cream cheese mix until well combined.
- Put the cheesecake filling onto the prepared base and smooth down. Chill in the fridge for at least four hours, preferably overnight.
To decorate cheesecake
- Once set remove the cheesecake from the springform tin and smooth down the edges with an offset spatula.
- Gently place the stencil on top of the cake and dust with matcha powder. Carefully remove the stencil and you're done! If you don't have a stencil you can simply dust the top with matcha powder either in a pretty ring around the edges.
- To serve pop onto a plate, slice and enjoy! Perfect with a cup of matcha tea or a matcha latte of course!
Notes
Nutrition
Nutritional Disclaimer
Nutritional information is an estimate based on an online database. The nutritional content of ingredients may vary by brand. If you require accurate nutritional information, you should calculate this based on the specific brands and products you are using.
Join the community!
Like Keep Calm and Eat Ice Cream on Facebook for more great recipes
Pin it for later!



Comments
No Comments