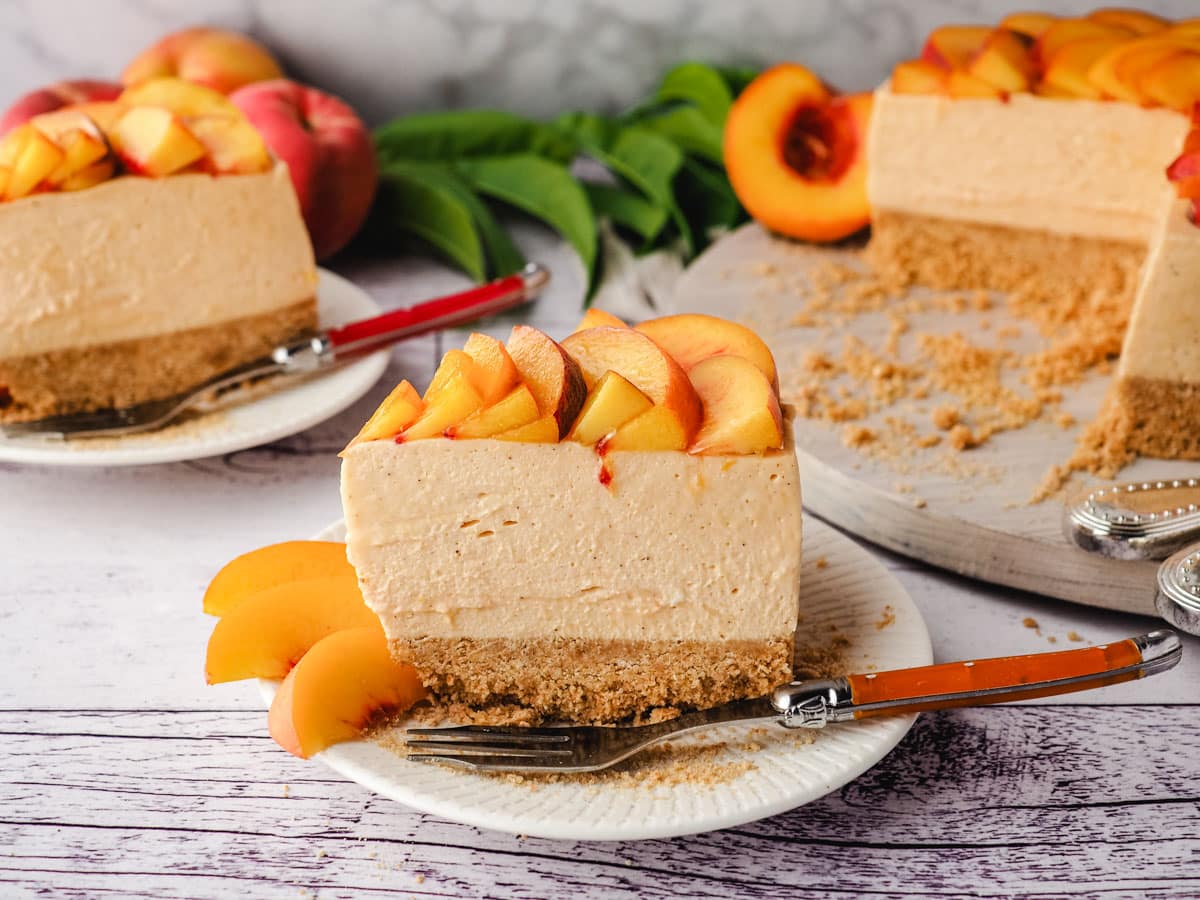
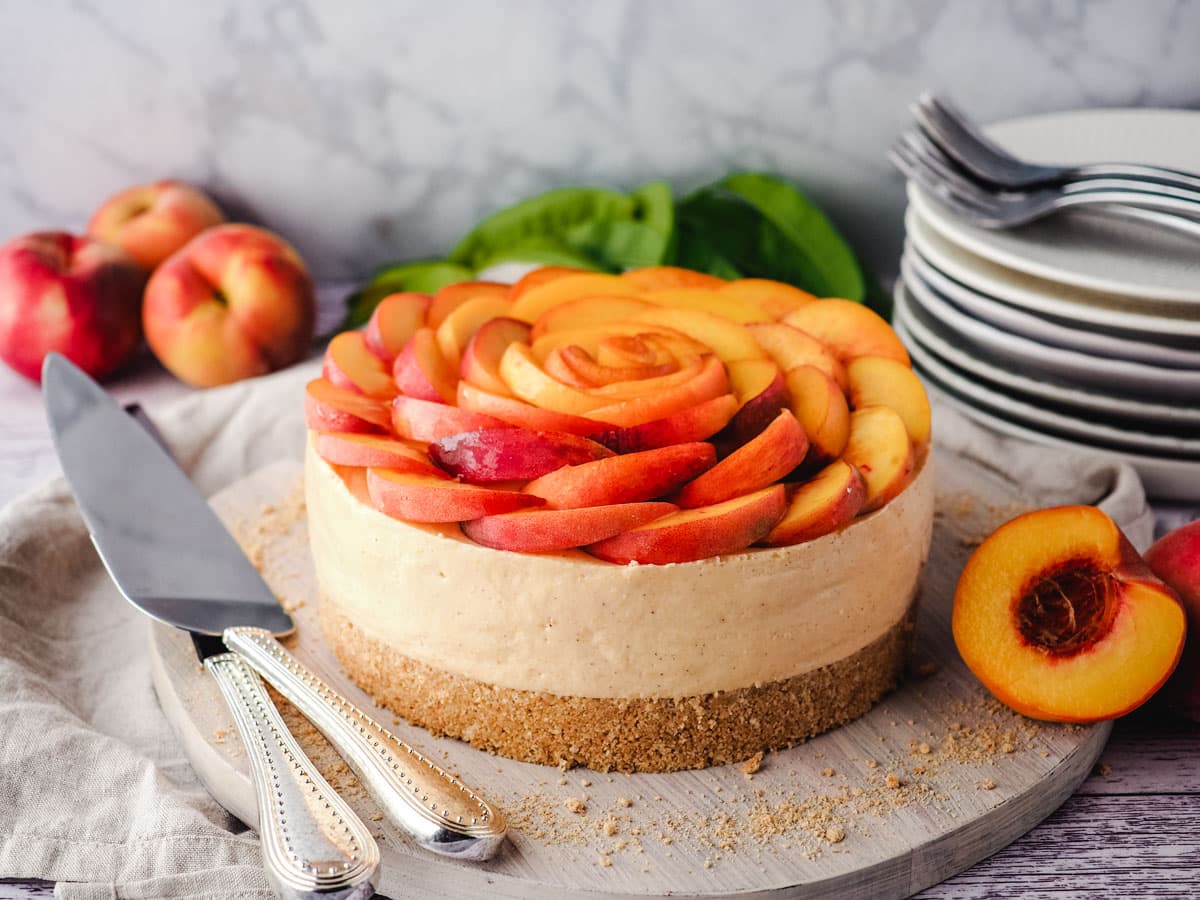
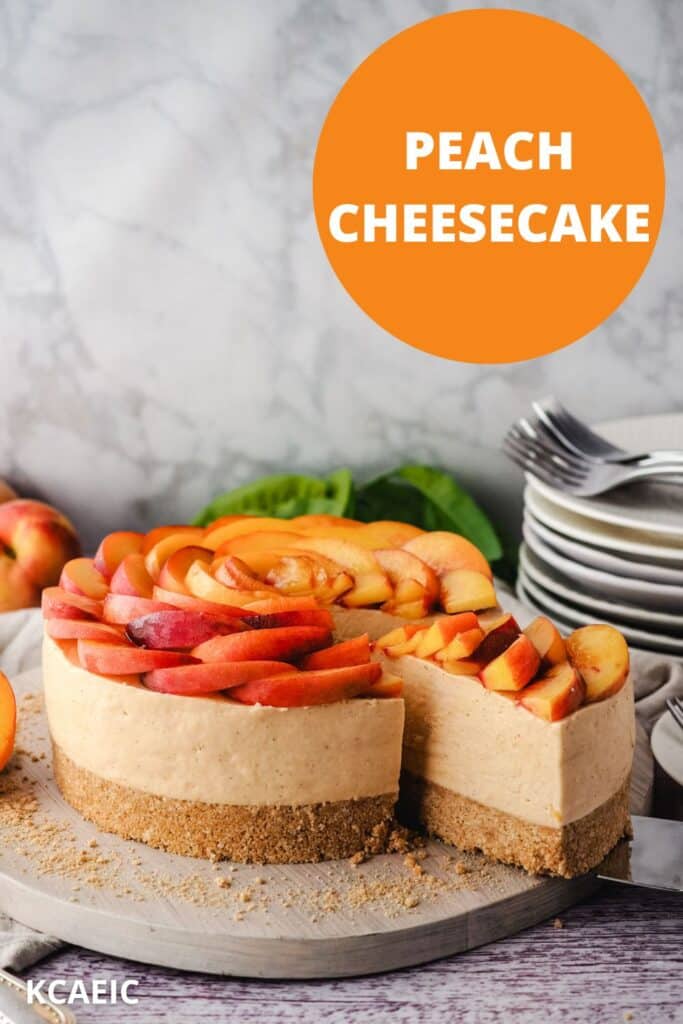
This no bake peach cheesecake with graham cracker crust is full of juicy peach flavor and a pretty peach rose on top. It's beautiful and delicious!
Jump to:
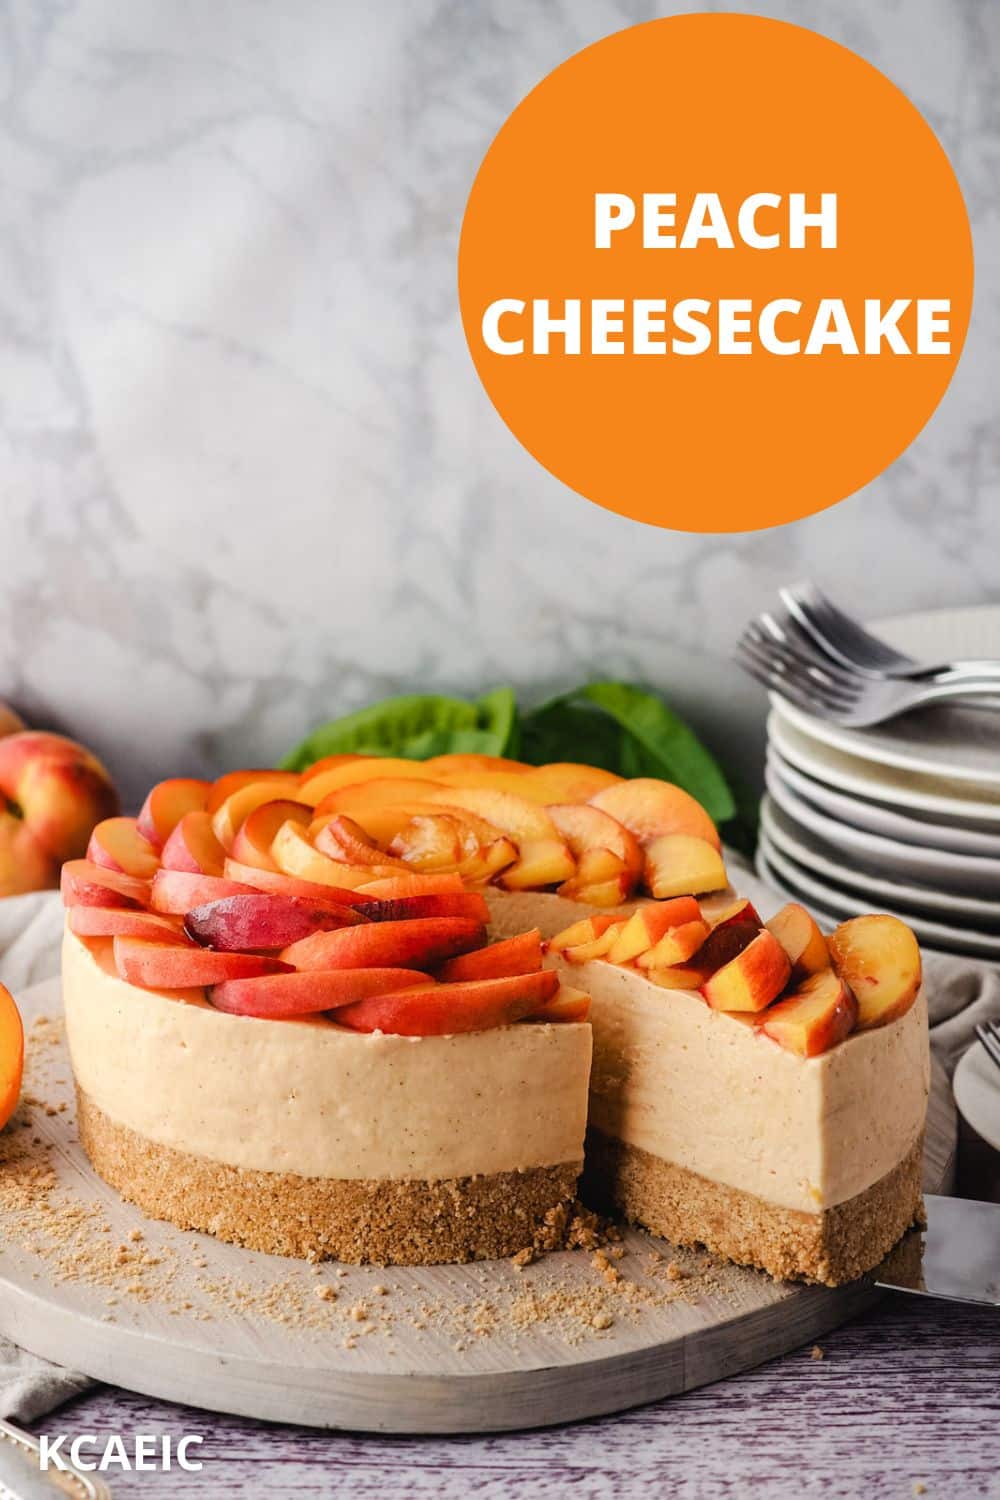
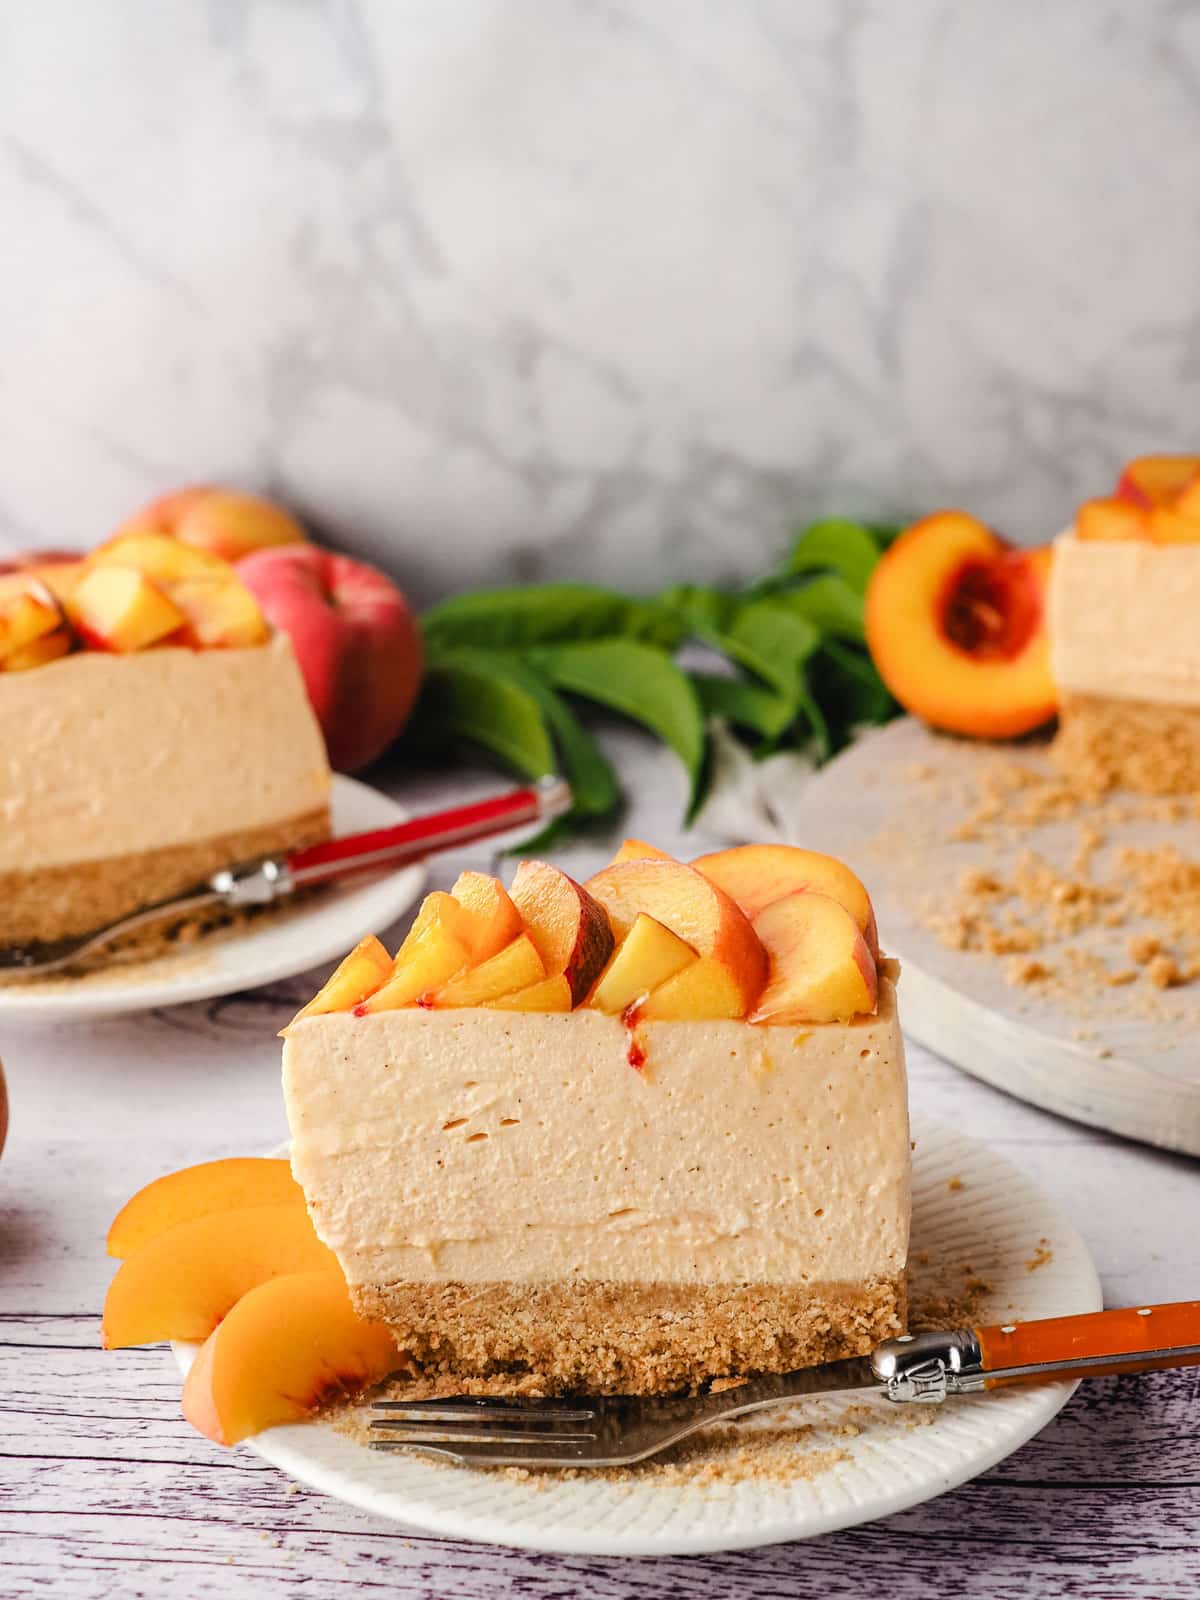
This no bake cheesecake with peach topping might just be the perfect summer dessert. Buttery graham cracker base, topped with creamy peaches and cream cheesecake filling with a hint of vanilla and cinnamon. All topped with a gorgeous fresh peach rose!
Why you'll love this recipe
- A great way to use lots of fresh, juicy ripe summer peaches.
- Pretty peach rose topping that will wow your friends and family.
- Save room in the oven with this easy no bake dessert.
- Summer flavors of peaches and cream.
Looking for more fabulous summer peach recipes? Why not try making my juicy peaches and cream ice cream or easy peach compote. Delicious!
Ingredients
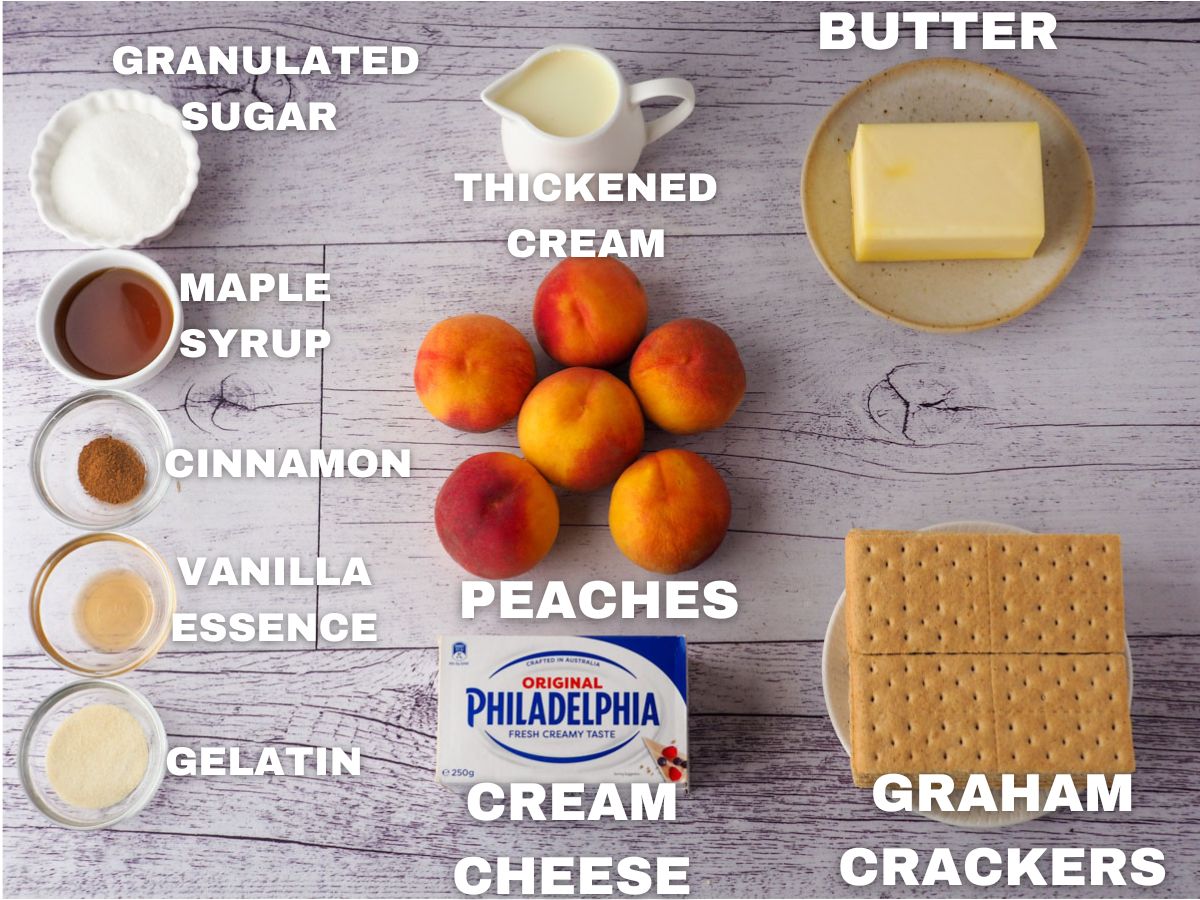
Peaches: I used beautiful fresh, ripe, juicy seasonal yellow peaches. You could also use white or any other variety of peach. The peaches must be fresh and ripe - if they don't taste good fresh, they won't taste good in the cake and your cheesecake will lack flavor.
The cheesecake also works perfectly well with canned peaches for a year-round treat, just the peach flavor isn't quite as strong. Look for peaches in juice instead of syrup, with no or minimal added sugar. If using canned peaches you will need approx two times 29oz (825gm) cans of peaches. Drain the peaches well from the juice. Use one can for the filling and the other for the peach rose on top.
Maple syrup: a dash of maple syrup as some lovely flavor to this fresh summer cheesecake that beautifully complements the peach flavor. If you are not a fan you can leave it out and replace it with the same amount of granulated sugar.
Ground Cinnamon: a great pairing with peaches. You could also try using allspice, nutmeg or ginger.
Vanilla extract: sometimes also called vanilla essence, depending on where you live. You can use either, or imitation vanilla essence, depending on your preference and budget.
Bourbon (optional): a dash of Bourbon adds some fabulous depth of flavor and helps balance the sweetness of the peaches. You don't need top-shelf stuff, but make one you would be happy to drink as you'll be able to taste it the sauce.
Cream cheese: full-fat cream cheese is best for this recipe for that classic creamy cheesecake taste. If you use light cream cheese it may not set properly.
Cream: I use thickened cream which has a fat content of about 34%. You could also use heavy cream or heavy whipping cream which is similar.
Granulated white sugar: is best in this recipe. You could use castor sugar if you prefer. I don't recommend using other types of sugar, they will be hard to dissolve and will compete with the flavors in this no-bake cheesecake.
Gelatin: a little bit of gelatin helps this no bake cheesecake set. Without it the amount of liquid from the peaches is likely to prevent the cheesecake from setting properly and you would end up with cheesecake soup! Gelatin can vary in its strength depending on the brand, see the note on the recipe card for a guide on how to check you have the right amount.
Graham crackers: are a type of sweet plain cookies with wholegrain which are the classic cheesecake base. If you can't get Grahams you can use Digestives which are similar.
Unsalted Butter: because butter makes most things taste better. In this case it binds and sets the base.
How to make peach cheesecake
See the full recipe card at the end of the post for ingredient amounts and instructions.
To make the cheesecake base
Grease and line your cake tin. Break up the Graham crackers into smaller pieces. Blitz them until they become fine breadcrumbs.
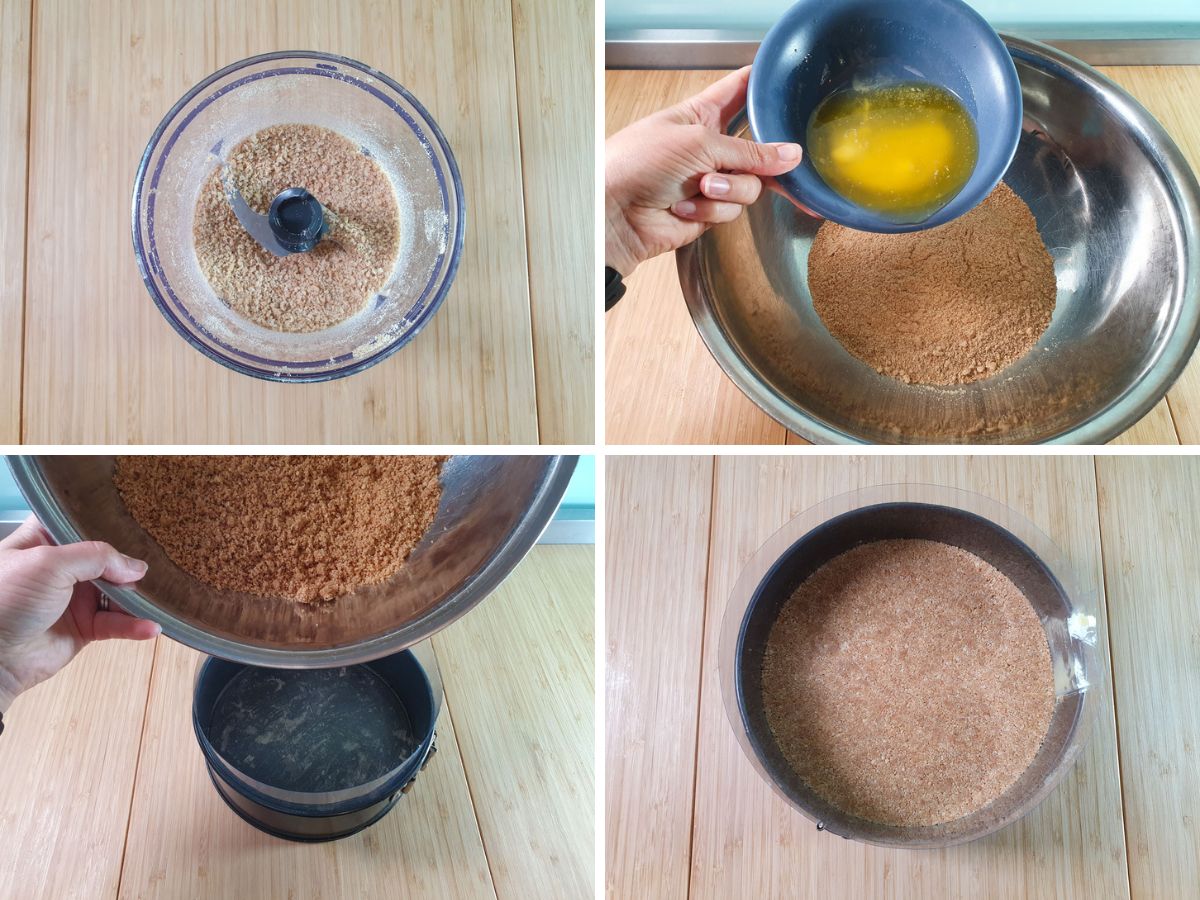
Melt the butter in a small pot on the stove or in the microwave. Add the melted butter to Graham cracker crumbs and mix well. Tip the base mix into the lined cake tin and press down with the back of a spoon or the base of a cup.
Chill the base in the fridge for at least one hour and up to overnight.
To make the cheesecake filling
Skin the peaches for the cheesecake filling. This is optional but I find it gives the cheesecake a better, smoother texture. Boil a medium pot of water. Make a bowl of ice water. Use a spoon to gently lower the peaches into boiling water. Gently move around for one minute then transfer to the ice water.
Once cool use a small knife to cut an X in the bottom of the peach. The skins should then come off easily.
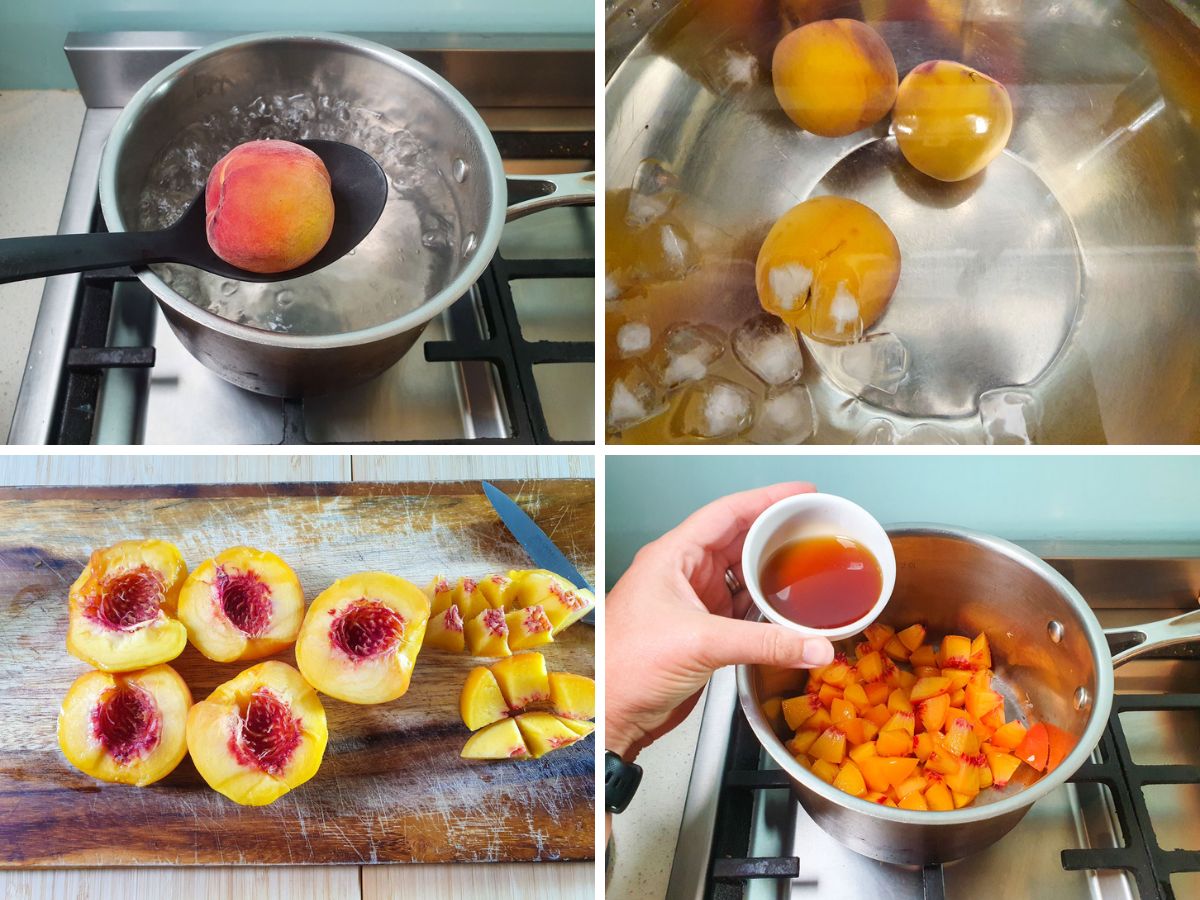
Remove the stones and dice the skinned peaches. The skinned peaches will be very slippery so take care slicing them! Add the sliced peaches to a medium pot with the maple syrup, vanilla and cinnamon. Add the lid and cook on medium-low for about ten minutes to get the peach juices flowing. Stir or shake to pot frequently to prevent the peaches from catching.
Remove the lid and continue to cook for about fifteen minutes or until the peaches have cooked down and jammy. Stir frequently to prevent catching and help the steam evaporate.
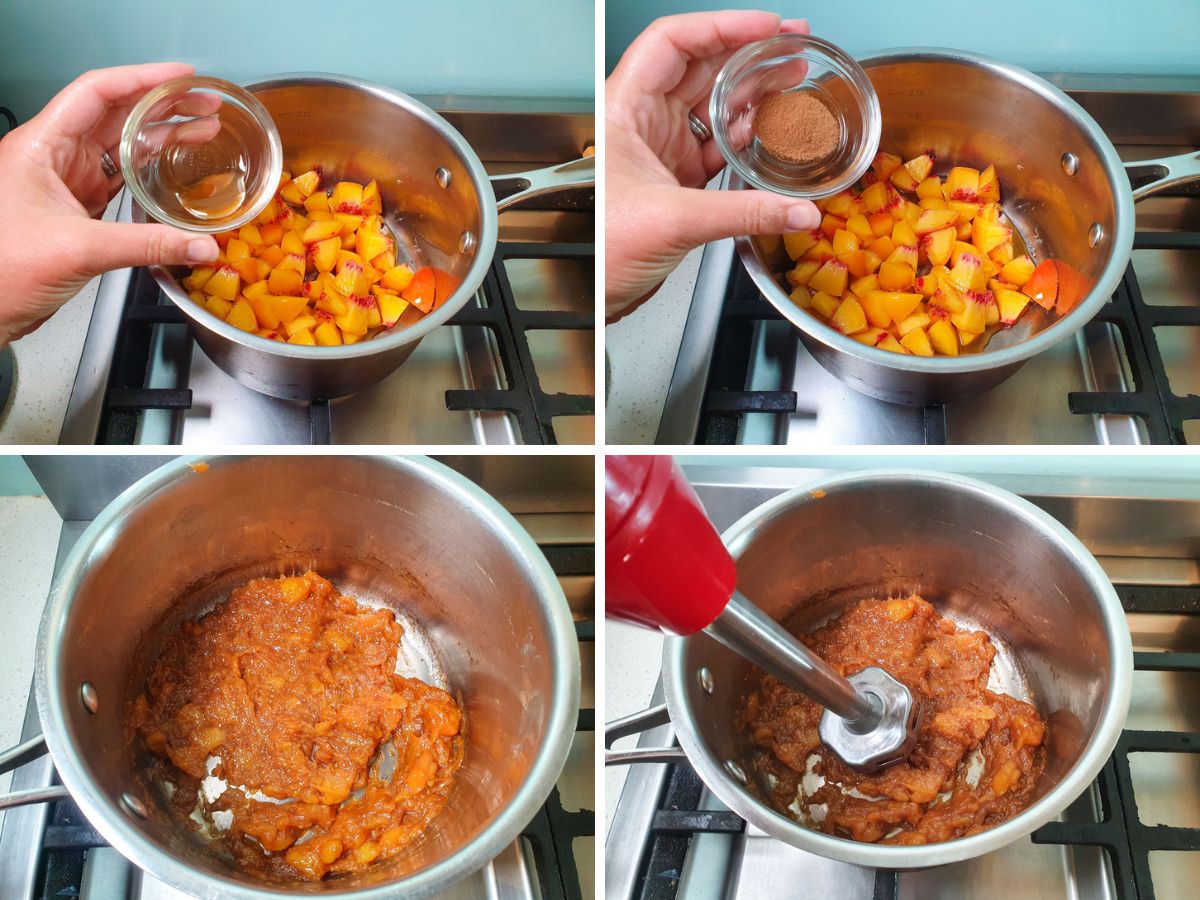
Allow the cooked peaches to cool, then blitz carefully with an immersion blender. You should have approximately three-quarters of a cup of delicious peach puree. Add the lemon juice and Bourbon if using and stir well. Cool the mix to room temperature.
Beat the cream cheese briefly to soften it. Add the granulated white sugar and mix on low until the sugar is fully dissolved and mixed in. Add the peach puree and mix well. If you are using a stand mixer, remember to scrap the paddle and bottom of the mixing bowl occasionally.
Add the room-temperature water to a small bowl. Sprinkle over the gelatine. Allow to stand for five minutes to bloom the gelatine. In a separate bowl whip the cream until just starting to form soft peaks.
Heat the bloomed gelatine in the microwave for about ten seconds or until just melted. Stir well to ensure all the powder has mixed in. Working quickly add a large spoonful of cream to the gelatine and mix well to temper it. This helps stop the gelatine from becoming stringy. If the cream isn't mixing in properly you can use a whisk to help with this.
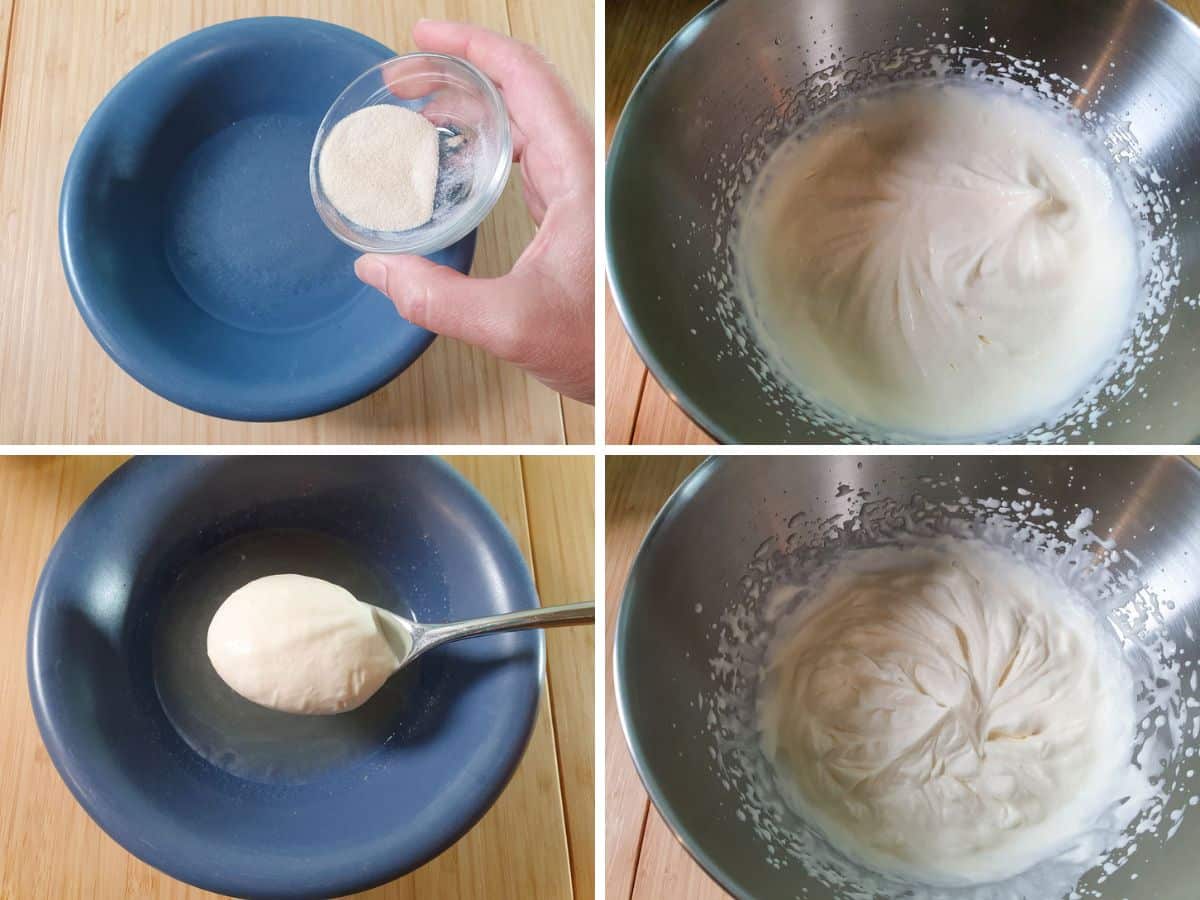
Turn the mixer on medium-low and slowly pour in the gelatine mix. Continue to whip until firm peaks form. This won't take long.
Fold the whipped cream into the cheesecake mix, taking care not to knock the air out of the whipped cream. Tip the cheesecake filling onto the chilled base, taking care to smooth out any lumps in the filling.
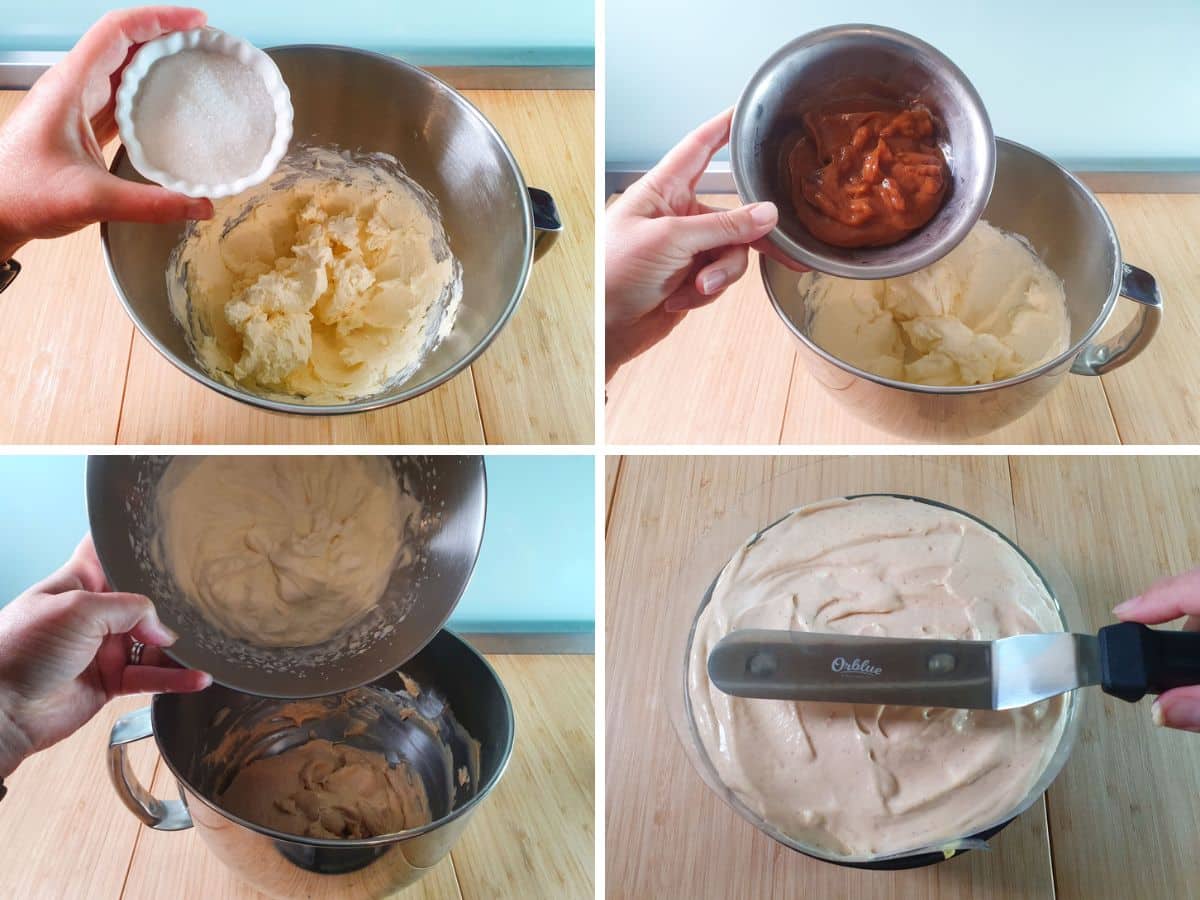
Smooth the top of the cheesecake with an offset spatula and chill in the fridge for at least four hours, preferably overnight and up to two days.
To make the peach cheesecake topping
Remove the cheesecake from the springform tin. Gently peel back the acetate or parchment paper. Smooth the sides with an offset spatula.
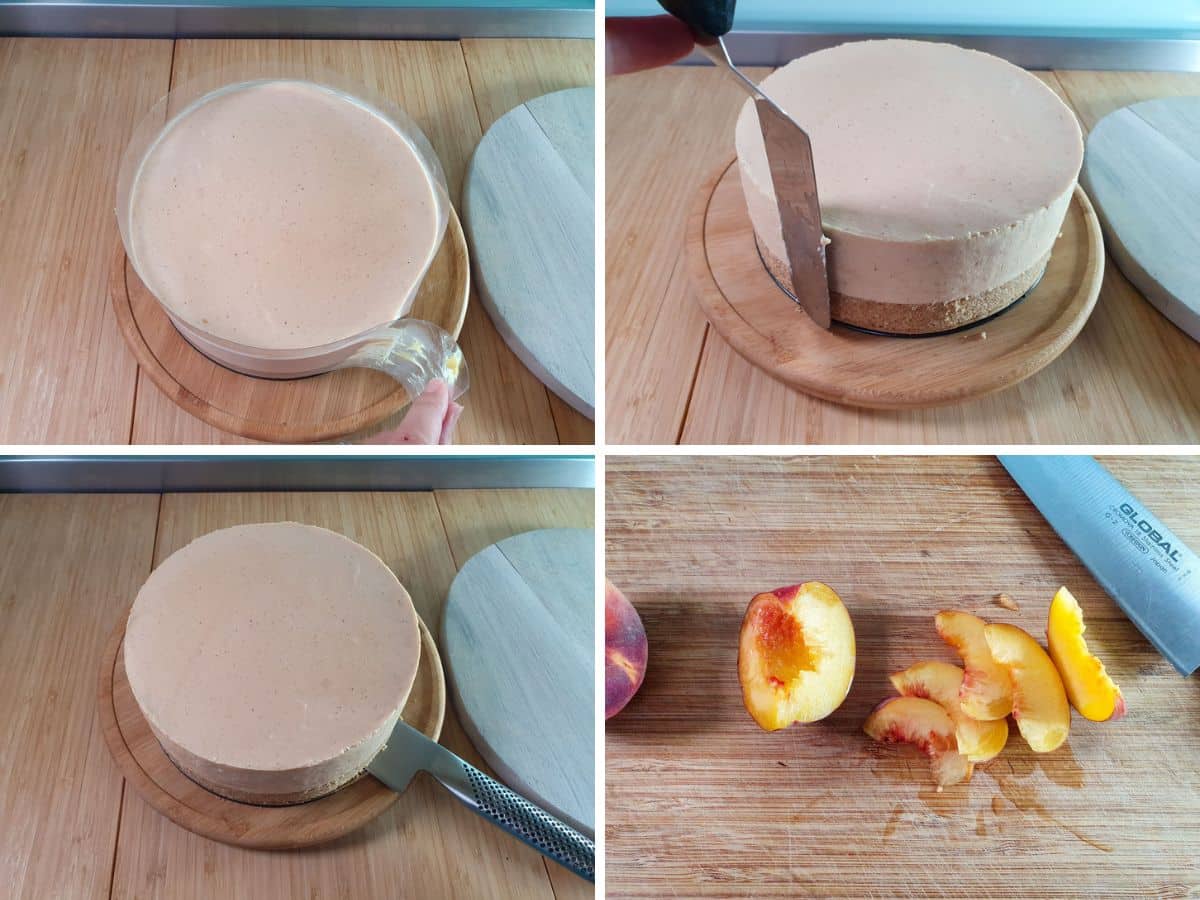
Use a large knife to carefully separate the base from the parchment paper and transfer the cake to a serving board or plate.
Remove the stones for the peaches for the top of the cake. Slice thinly. Starting from the outside lay the peach slices in an overlapping circle on the top of the cake with the peach skins facing outwards, overlapping the previous slice by about one-third.
When you get back to the beginning use a fork to gently lift the first piece to slide the last piece underneath to form a continuous circle. Repeat the next circle of peaches, slightly overlapping the first circle so there are no gaps.
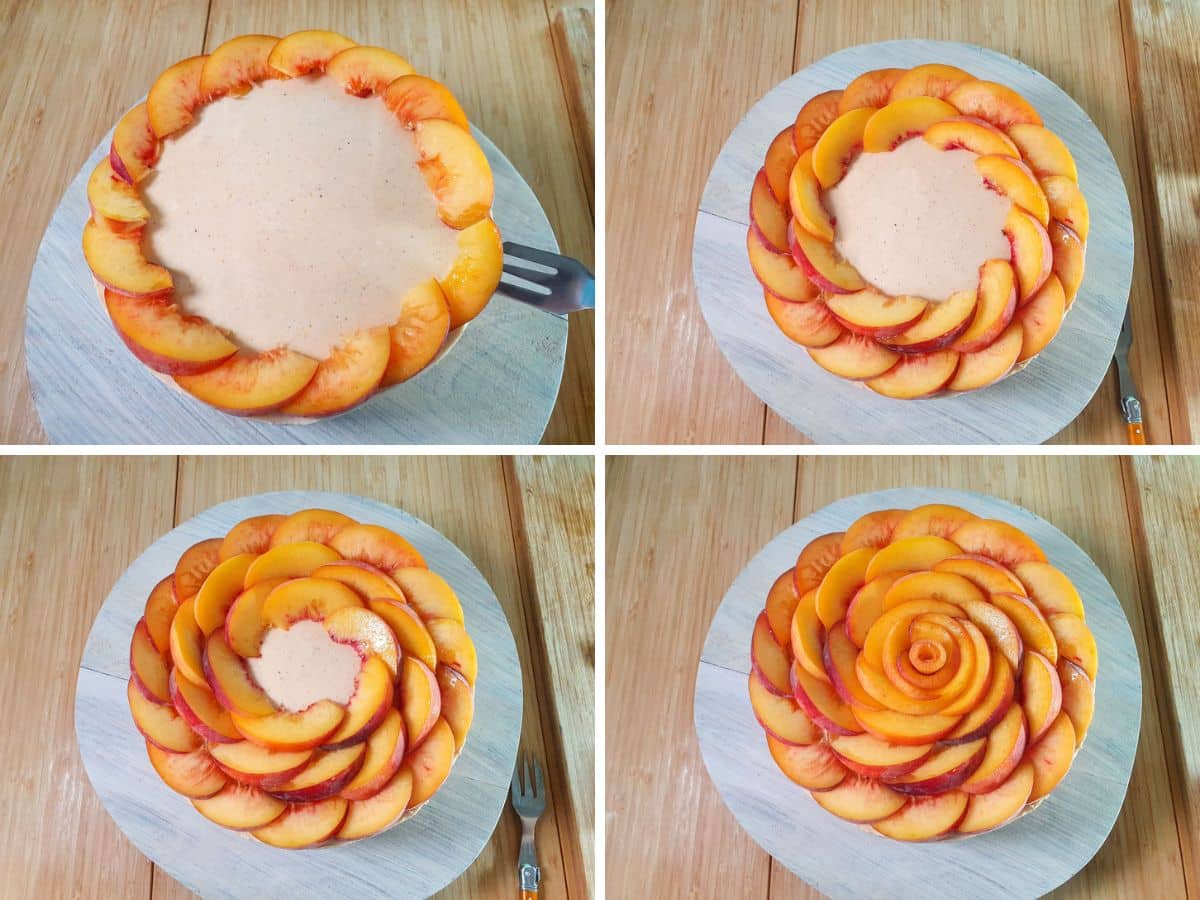
Continue until the top of the cake is covered. When you get to the center roll a thin slice of peach to form the peach center and you're done!
Hot tip - if you are not serving the cheesecake immediately the peaches on top can start to dry out. Brush them lightly with a little peach or apricot jam mixed with a splash of water to help prevent this and give a lovely glossy finish.
How to serve
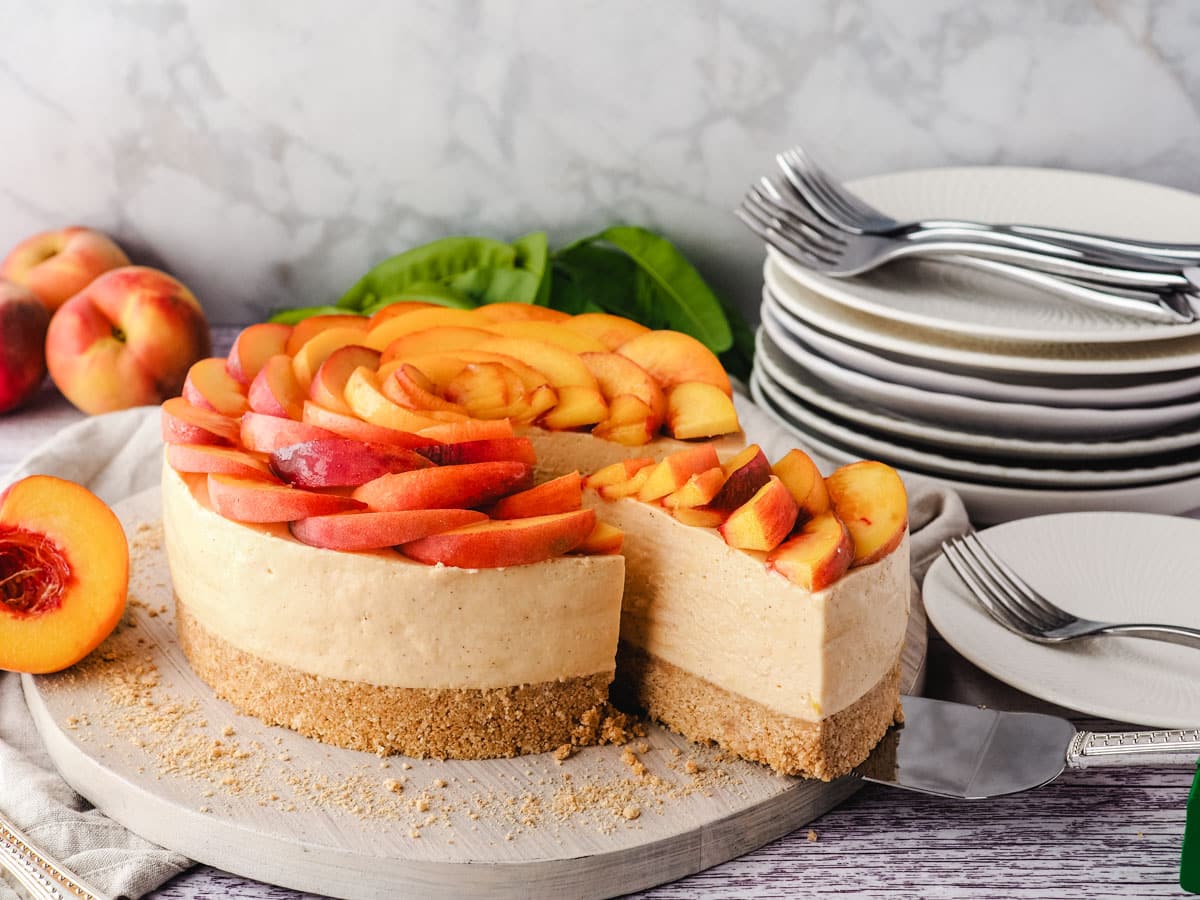
To serve this peach rose cheesecake pop it onto a plate, slice and enjoy! I recommend gently sawing through the peach rose on top, then press down to finish slicing the cheesecake.
How to store
This pretty no bake fresh peach cheesecake dessert will store well in a covered in the fridge for up to three days but is best eaten on the day it's decorated to keep the peach rose topping fresh and juicy.
It can be frozen without the decoration for up to two months, but is best eaten within one month. Defrost completely in the fridge overnight, then decorate within a few hours of serving.
Recipe tips and frequently asked questions
Can I make this cheesecake with canned peaches?
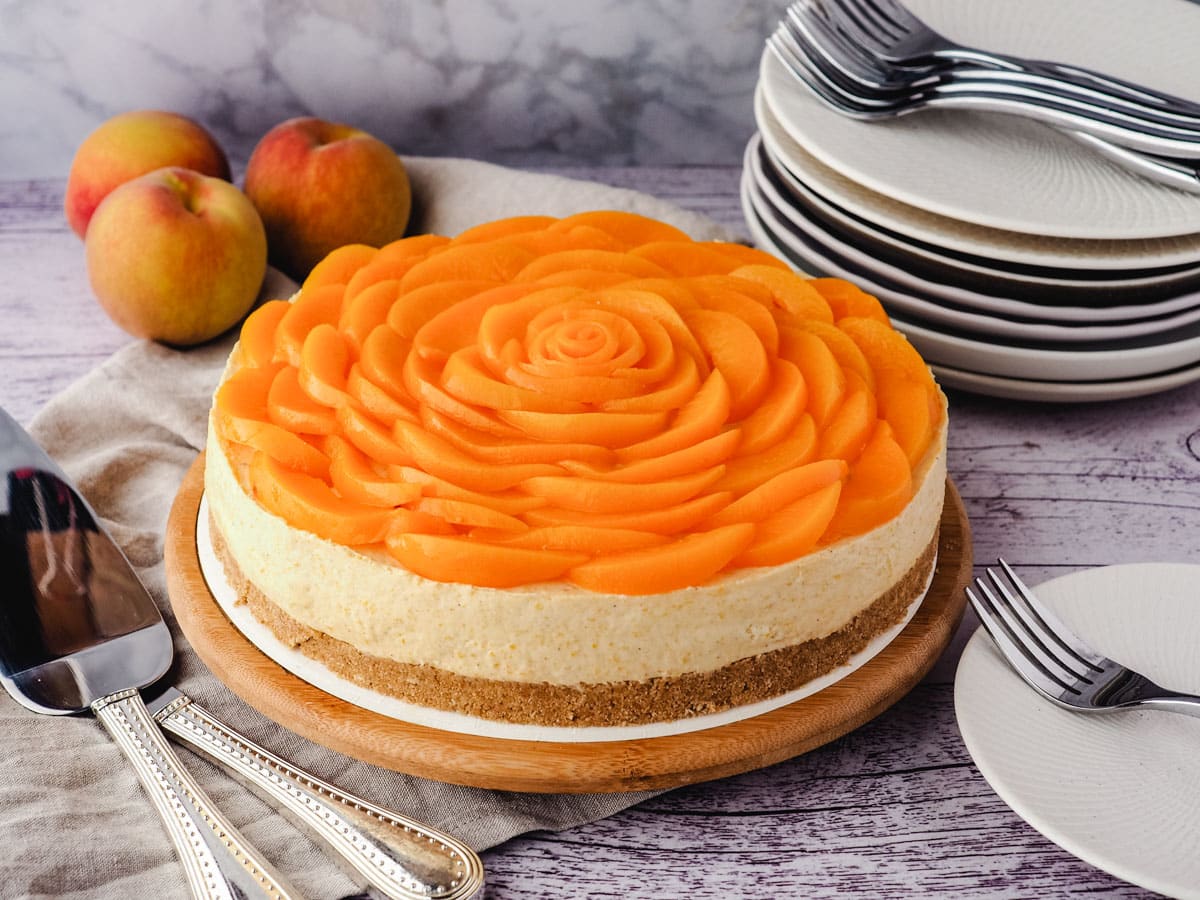
I have tested this recipe with canned peaches and it works perfectly well, including the peach rose on top. You will need just under two times 29oz (825 gms) cans of peaches. Look for peaches in juice instead of syrup, with no or minimal added sugar. Drain the juice well from the canned peaches, then slice and make as per the recipe. Use one can of drained peaches in the filling and the other for the peach rose on top.
I reduced the amount of maple syrup to two tablespoons to account for the slightly sweeter canned peaches, but it would probably be fine if made exactly as per the recipe.
Can I make this cheesecake with frozen peaches?
Frozen peaches would work OK in the cheesecake filling, but won't work well for the peach rose on top. The peaches will become mushy and won't slice properly to form the rose. But the peach rose works well with canned peaches so you could use frozen for the filled and canned peaches on top.
Can you freeze peach cheesecake?
You can, but the peach rose on top has a tendency to go mushy once frozen and defrosted. If you want to freeze it I recommend freezing the cheesecake before decorating. Defrost overnight in the fridge then add the peach rose within a few hours of serving.
Can I make this with a different crust?
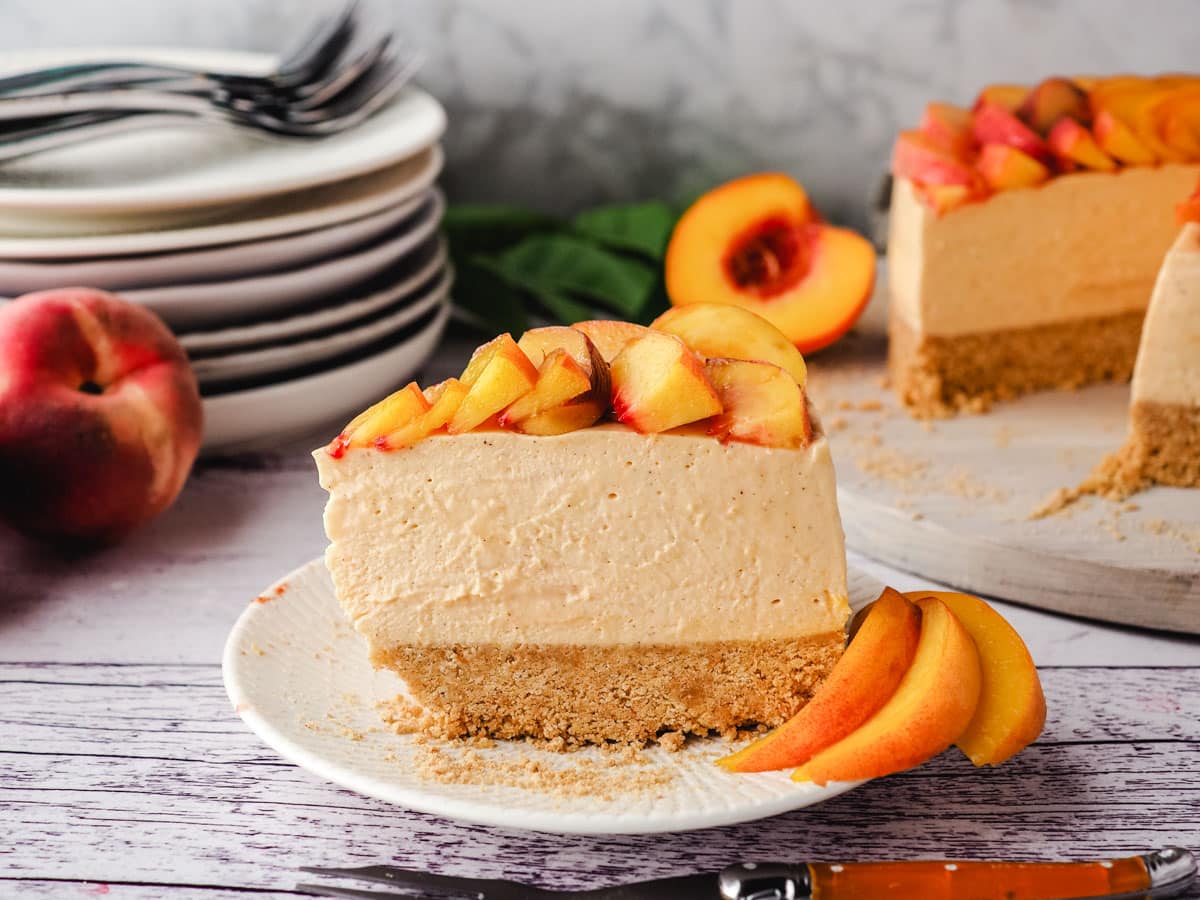
You sure can. The cheesecake would work equally well with your favorite cookie base, so long as it complements the peach flavor of the cheesecake. Some other tasty options include golden Oreos or Nila wafers.
Have you made this recipe? Tell me how it went in the comments below and tag me on instagram so I can see your delicious creations! @keep_calm_and_eat_icecream
Looking for more fabulous summer desserts?
Why not try making
- Peaches and Cream Ice Cream
- Peach Compote
- Cherry Cheesecake (recipe coming soon!)
Follow me on Facebook or Pinterest for many more delicious recipes.
📋 Recipe
Peach Cheesecake
Equipment
- Spring form cake tin, 7" x 2.5" (18cm x 6.5cm)
- Electric hand beaters or stand mixer
- immersion/stick blender with chopping bowl attachment or food processor
- Parchment paper or food safe acetate
Ingredients
For the cheescake base
- 2 & ⅓ cups (250gms) Graham cracker crumbs
- 1 stick (½ cup/ 115gms) unsalted butter
For the cheesecake filling
- 4 medium (1 lb/ 450gms) fresh peaches
- 3 tablespoons maple syrup
- 1 teaspoon vanilla extract
- ½ teaspoon ground cinnamon
- 1 teaspoon Bourbon (optional)
- 2 x 8 ounce tubs (450gms total) full fat cream cheese
- ⅓ cup (75gms) white sugar
- 3 tablespoons room temperature water
- 1 & ½ teaspoons (7.5gms) gelatin
- 1 cup (250mls) thickened cream
- 6 drops orange food color (optional)
To decorate and serve
- 3 medium fresh ripe peaches
- 1 teaspoon peach or apricot jam (optional)
Instructions
To make the cheesecake base
- Grease and line your cake tin.
- Break up the Graham crackers into smaller pieces. Blitz them until they become fine breadcrumbs.
- Melt the butter in a small pot on the stove or in the microwave. Add the melted butter to Graham cracker crumbs and mix well.
- Tip the base mix into the lined cake tin and press down with the back of a spoon or the base of a cup.
- Chill in fridge for at least one hour and up to overnight.
To make the cheesecake filling
- NB Make sure your cream cheese is at room temperature.
- Skin the peaches for the cheesecake filling. Boil a medium pot of water. Make a bowl of ice water. Use a spoon to gently lower the peaches into boiling water. Gently move around for one minute then transfer to the ice water.
- Once cool use a small knife to cut an X in the bottom of the peach. The skins should then come off easily.
- Remove the stones and dice the skinned peaches. Add to a medium pot with the maple syrup, vanilla and cinnamon. Add the lid and cook on medium-low for about ten minutes to get the peach juices flowing. Stir or shake to pot frequently to prevent the peaches from catching.
- Remove the lid and continue to cook for about fifteen minutes or until the peaches have cooked down and jammy. Stir frequently to prevent catching and help the steam evaporate.
- Allow the cooked peaches to cool, then blitz carefully with an immersion blender. You should have approximately three-quarters of a cup of delicious peach puree. Add the lemon juice and Bourbon if using and stir well. Cool the mix to room temperature.
- Beat the cream cheese briefly to soften it. Add the granulated white sugar and mix on low until the sugar is fully dissolved and mixed in. Add the peach puree and mix well. If you are using a stand mixer, remember to scrap the paddle and bottom of the mixing bowl occasionally.
- Add the room-temperature water to a small bowl. Sprinkle over the gelatine. Allow to stand for five minutes to bloom the gelatine. In a separate bowl whip the cream until just starting to form soft peaks.
- While the gelatin is blooming put your cream in a separate and whip until soft peaks form. Once the gelatin has bloomed, melt it by microwaving it for about ten to fifteen seconds. Mix well to ensure all the gelatin is mixed in and dissolved.
- Heat the bloomed gelatine in the microwave for about ten seconds or until just melted. Stir well to ensure all the powder has mixed in. Add a large spoonful of cream to the gelatine and mix well to temper it. The helps stop the gelatine from becoming stringy.
- Turn the mixer on medium-low and slowly pour in the gelatine mix. Continue to whip until firm peaks just start to form. This won't take long.
- Fold the whipped cream into the cheesecake mix, taking care not to knock the air out of the whipped cream. Tip the cheesecake filling onto the chilled base, taking care to smooth out any lumps in the filling.
- Smooth the top of the cheesecake with an offset spatula and chill in the fridge for at least four hours, preferably overnight and up to two days.
To decorate the cheesecake with the peach rose
- Remove the cheesecake from the springform tin. Gently peel back the acetate or parchment paper. Smooth the sides with an offset spatula.
- Use a large knife to carefully separate the base from the parchment paper and transfer the cake to a serving board or plate.
- Remove the stones for the peaches for the top of the cake. Slice thinly. Starting from the outside lay the peach slices in an overlapping circle on the top of the cake, overlapping the previous slice by about one-third.
- When you get back to the beginning use a fork to gently lift the first piece to slide the last piece underneath to form a continuous circle. Repeat the next circle of peaches, overlapping the first circle so there ate no gaps.
- Continue until the top of the cake is covered. When you get to the center roll a thin slice of peach to form the peach rose in the center and you're done!
Notes
- Clear food-safe acetate is available for some baking shops and can help give smoother sides to the cheesecake.
- Gelatine brands can vary in their strength. You will need enough gelatin to set 2 & ½ cups (625mls) of liquid. You could try one satchel of Knox Gelatin as a starting point.
Nutrition
Nutritional Disclaimer
Nutritional information is an estimate based on an online database. The nutritional content of ingredients may vary by brand. If you require accurate nutritional information, you should calculate this based on the specific brands and products you are using.
Join the community!
Like Keep Calm and Eat Ice Cream on Facebook for more great recipes
Pin it for later!




Erin
Delicious! Creamy, with a gorgeous peach flavour that’s deepened by that cheeky splash of bourbon.
Will become a family favourite.
Sarah Brooks
Yay! I'm so glad you enjoyed it Erin! Love it when one of my recipes becomes a beloved family favorite 🙂
monika
Are those the approx. calories per serving (1/10) or the entire cheesecake? Thanks!
Sarah Brooks
Hi Monika, ah thank you for the heads up. The nutritional calculator got the calorie calculation incorrect. It should be more like about 423 kcal per slice, but that's for ten quite generous slices. You could easily get twelve slices from this cheesecake, possibly more, which would reduce the approx. calories per slice.
The calculations are estimates based on an online database, if you need a more accurate calorie count I recommend working it out with the specific brand of products you are using, as they can vary between brands.
Either way I hope you love it, it was a huge hit with all my recipe testers 🙂