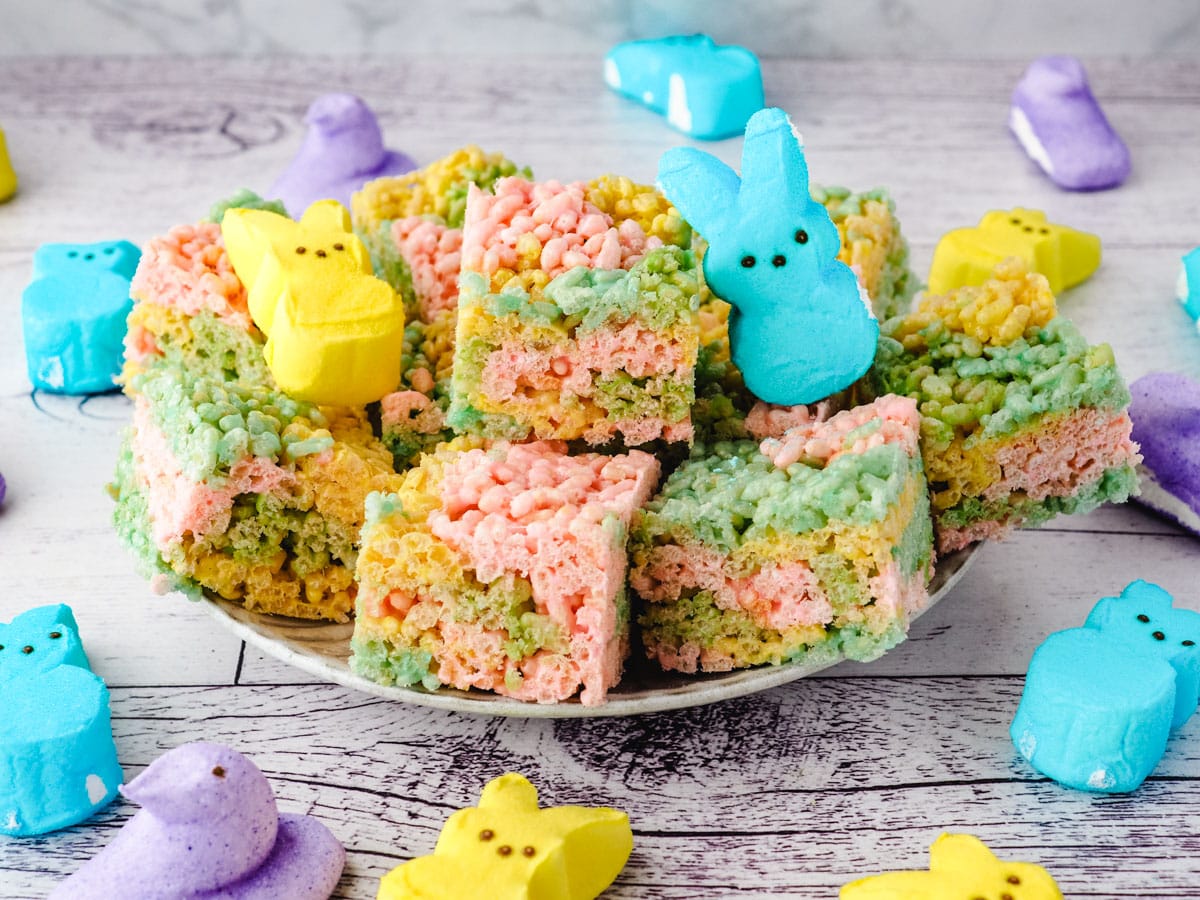
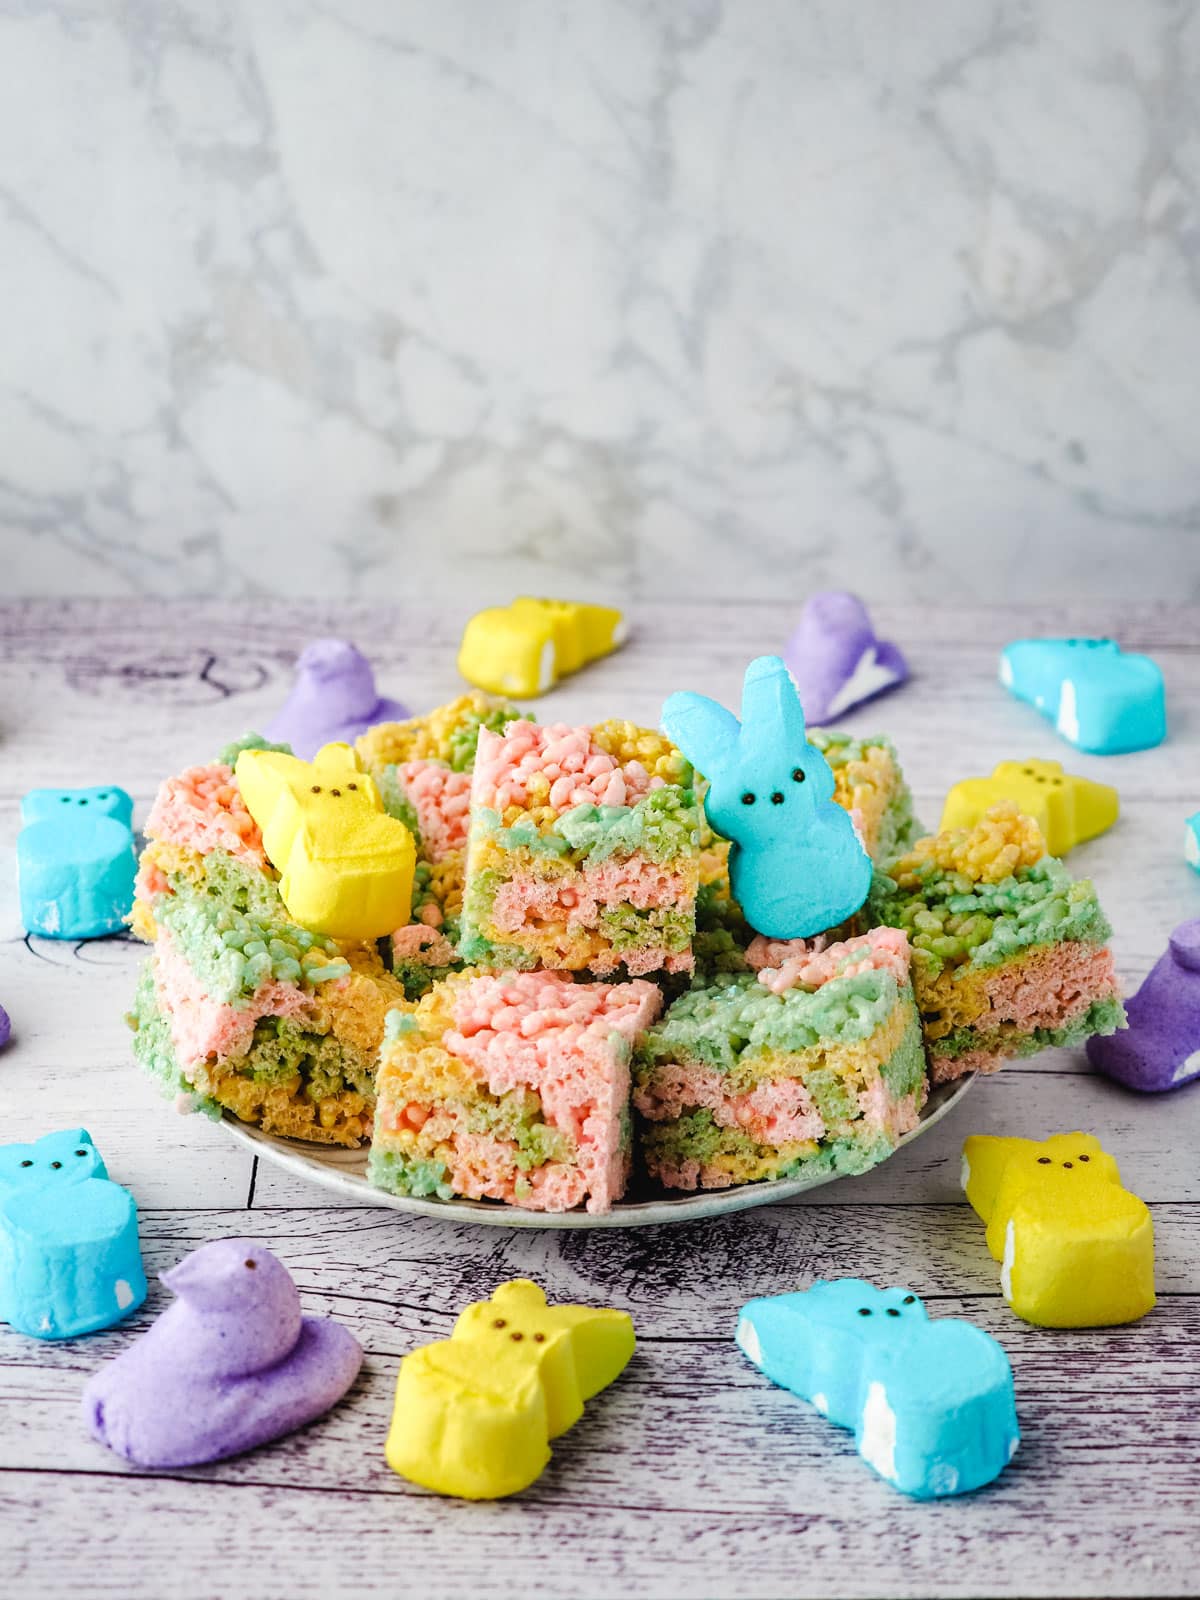
These easy Easter Peeps rice krispies treats are a fun and colorful addition to your Easter celebrations. Your little bunnies will love them this Easter!
Jump to:
These Peeps rice krispies are combine classic rice krispies with colorful Peeps marshmallow candy.
Why you'll love this recipe
- Fun and colorful version of rice krispie treats.
- Easy no-bake recipe, no need to turn on the oven.
- Make them ahead for simple Easter entertaining.
Looking for more fabulous Easter dessert recipes? Why not try making my fun Easter rice krispie treat nests, creamy mini egg cheesecakes, chocolate Easter brownies, or super cute Easter bunny cookies. Delicious!
Ingredients
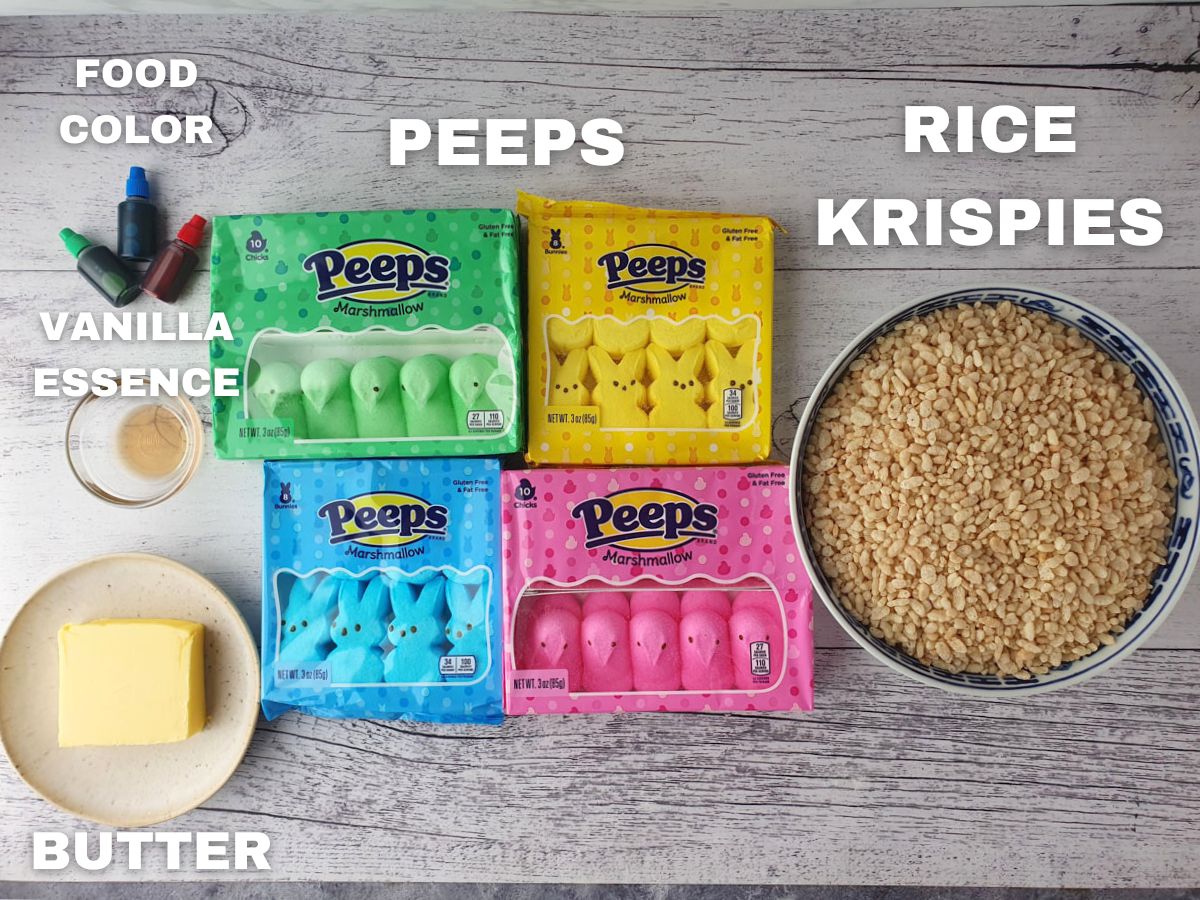
Peeps: are a type of marshmallow candy that come in a variety of fun colors and shapes. For these treats I have used green, yellow, blue and pink to give them a bright rainbow color but you can mix things up with your favorite Peeps colors.
Rice Krispies: are a popular type of puffed rice cereal. Fun fact, they are also known as rice bubbles in Australia and New Zealand. Regular rice krispies will give the best look to these treats, but you could experiment with different versions of the cereal if you like.
Unsalted butter: a little unsalted butter helps these rice krispie treats set, without it your treats can be too soft.
Optional:
Food color: Did you know many Peeps are only colored on the outside and white in the middle? This can make for very pale rice krispie treats. A few drops of matching food color can pump up the volume and give a more vibrant color to your treats.
Vanilla extract: if you like the taste of Peeps as they are all good, a touch of vanilla can enhance the flavor of these rice krispie treats and make them even more tasty!
How to make peeps rice krispie treats
See the full recipe card at the end of the post for ingredient amounts and instructions.
Grease and line your tin with parchment paper. Use a small sharp knife to remove the black dots from the Peeps (zombie bunnies!). Set up four pots on the stove. Add one-quarter of the butter to each pot, along with one packet of each of the peeps with the face dots removed.
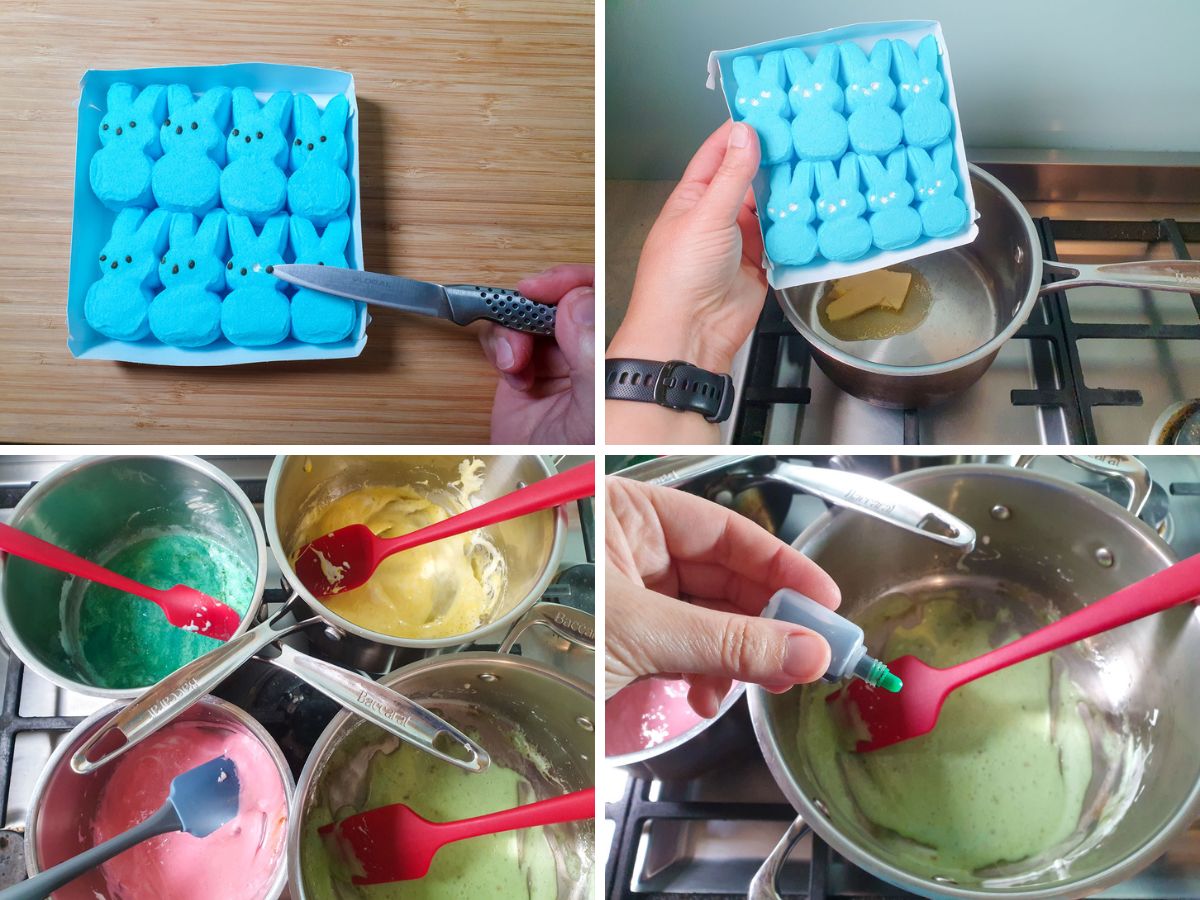
Heat the Peeps and butter on medium-low, stirring until the peeps have melted and mixed into the butter. If the color of any of the peeps isn't strong enough you can add a few drops of food coloring.
Hot tip: do not be tempted to crank up the heat. You will risk burning the butter and the peeps.
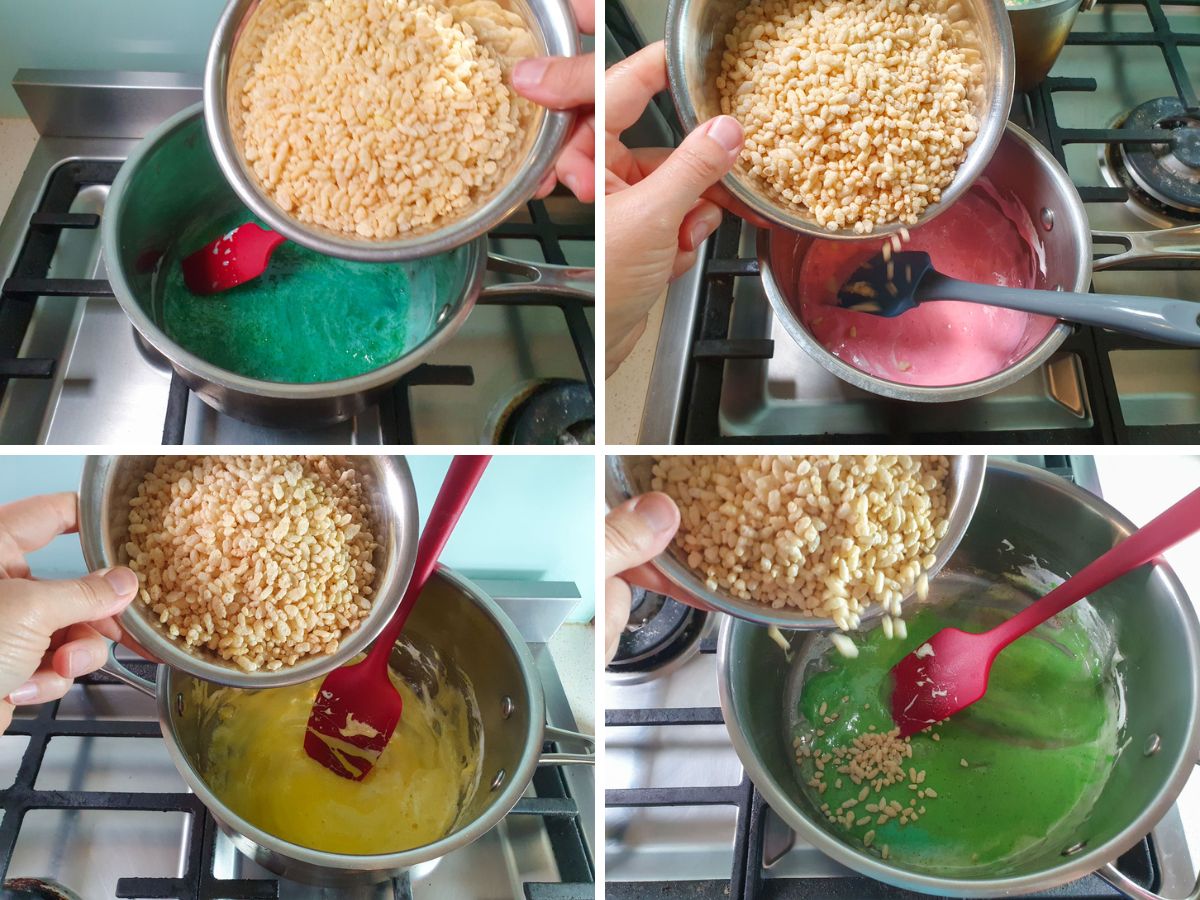
Divide the rice krispies into four bowls. Add one bowl to each of the melted butter and Peep mixes. Mix carefully and well, taking care to try to mix in as much of the melted mix from the bottom of the pot as possible.
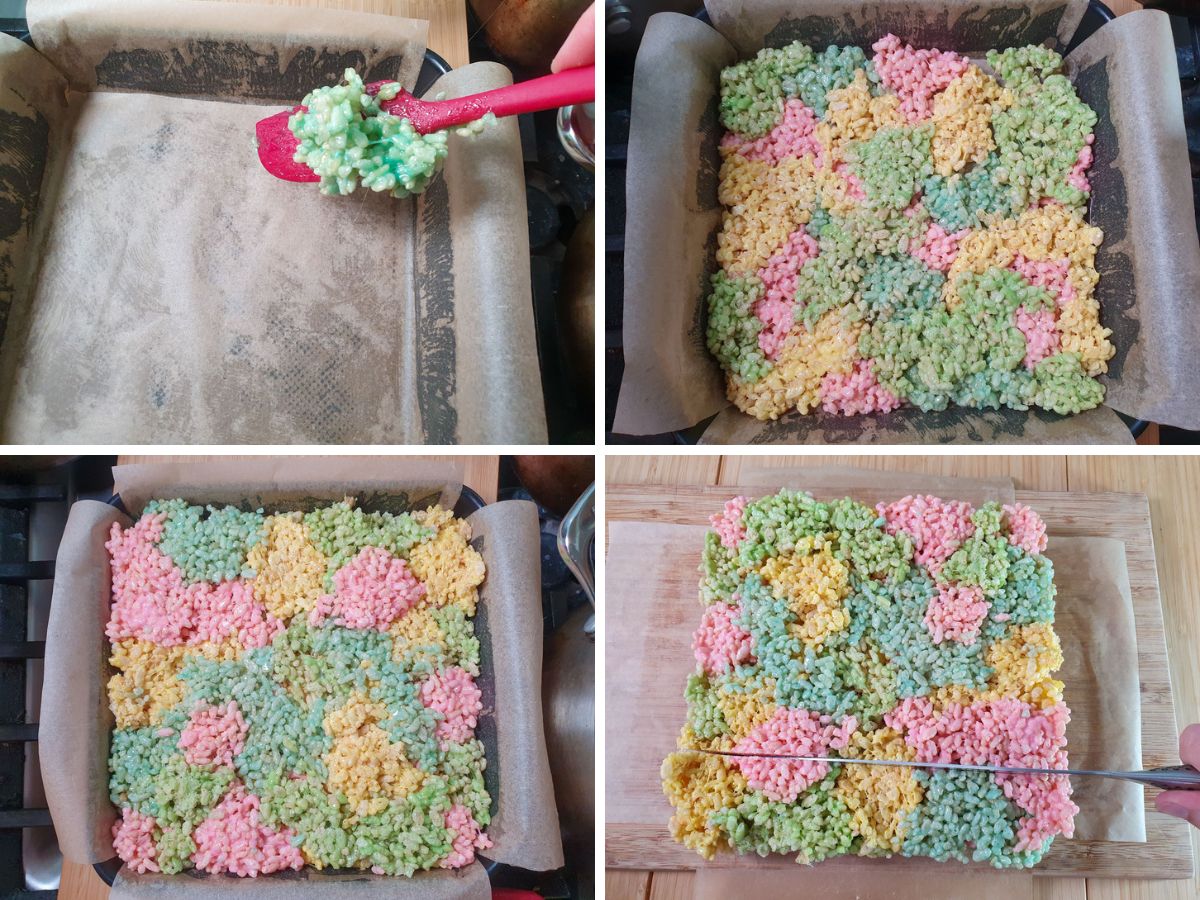
Use two clean spatulas to add spoonfuls of the different color mixes into the lined tin until they are all used up. I did about three layers which give a lovely rainbow effect to the rice krispies. Try not to have two spoonfuls of color sitting next to each other if you can avoid it.
If any of the mixes start to set you can very gently heat them on low for a min to help loosen up the mix a bit.
Once you have added all mixes gently smooth out the top, then leave to set for at least two hours at room temperature before slicing.
How to serve

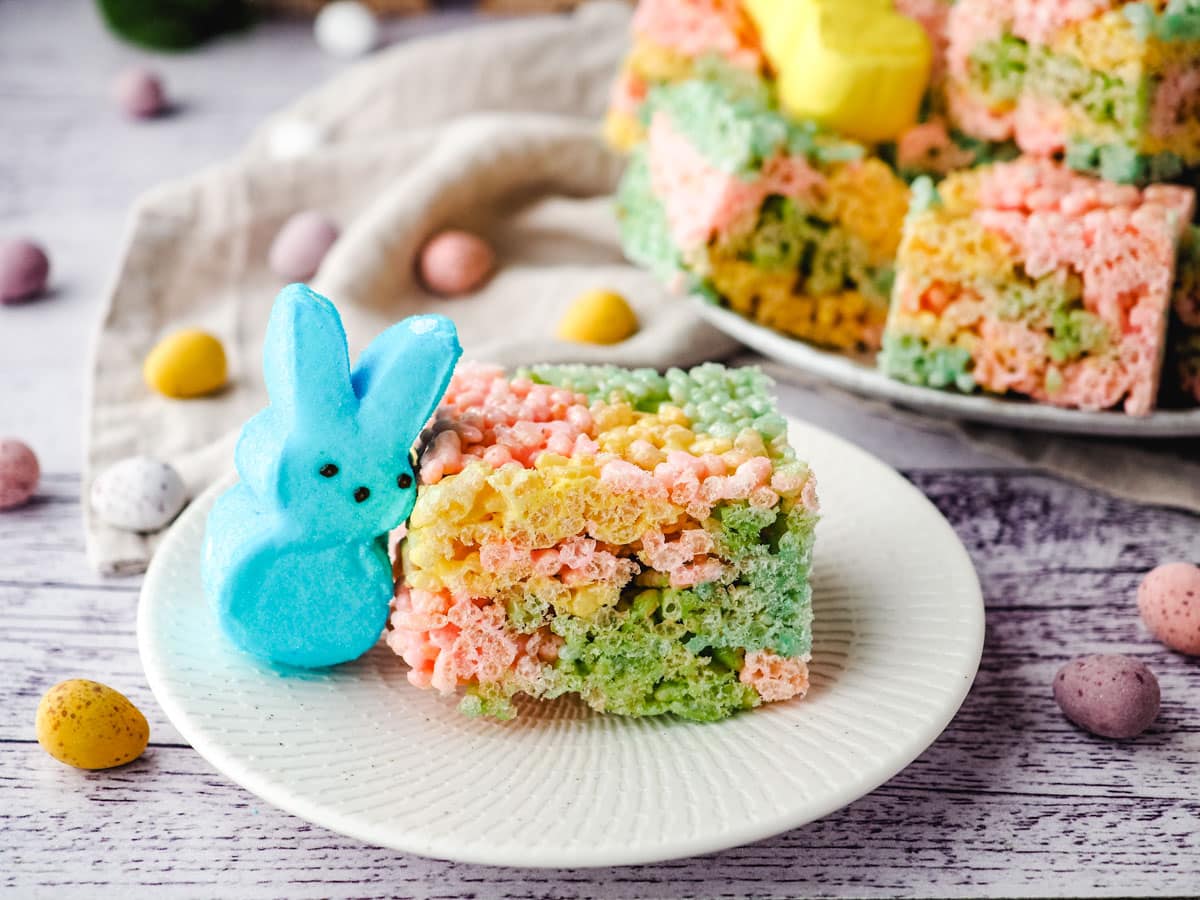
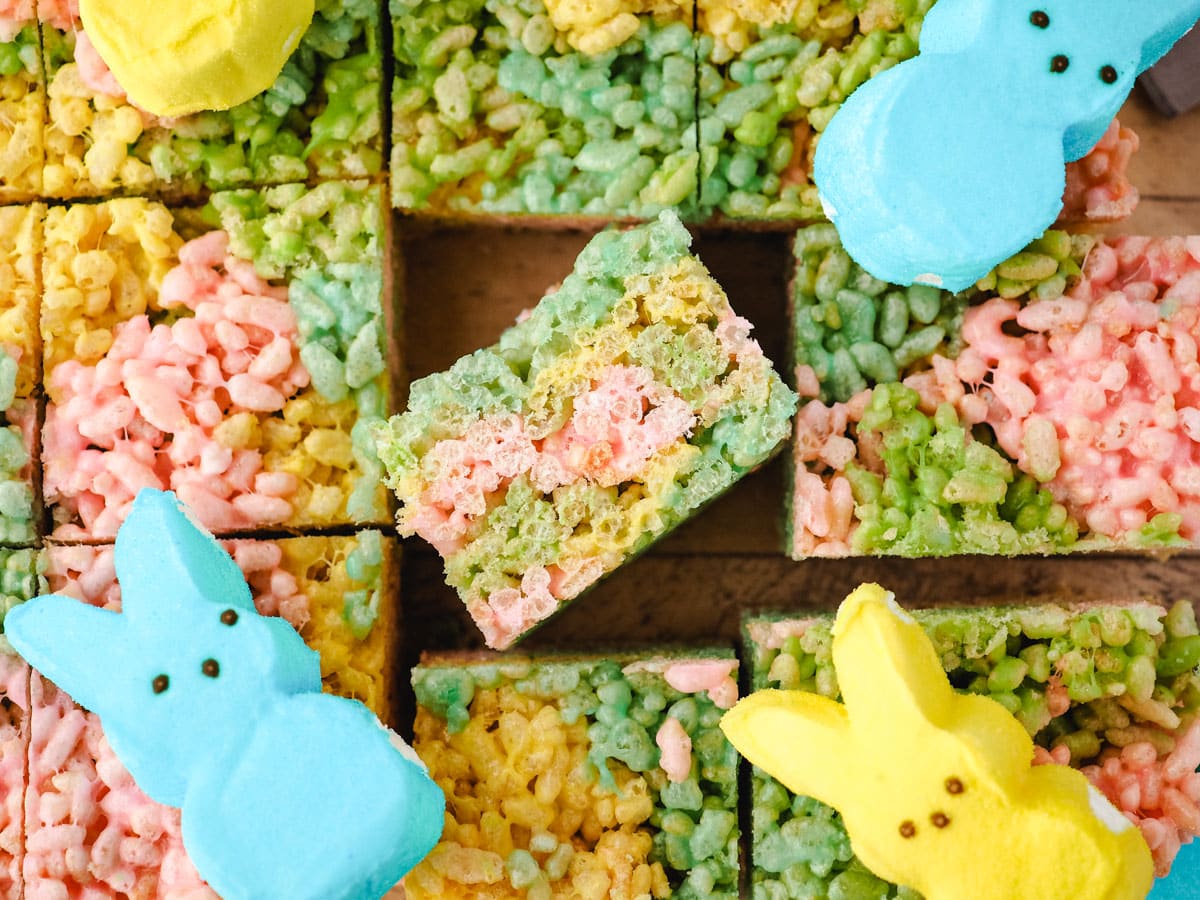
To serve these rice krsipy treats with Peeps pop them onto a plate and enjoy! The are perfect for an Easter dessert table decorated with some extra Peeps on the side, or make a fun holiday addition to kids lunch boxes (my kids ask for rainbow rice krispie treats when I make these 🙂 ).
How to store
These Easter rice krispie treats with Peeps will store in an airtight container lined with parchment paper for up to a week. After this they will still be safe to eat, but may start to go a little hard over time.
Recipe tips and frequently asked questions
Can you use peeps to make rice krispie treats?
You sure can! Peeps make excellent rice krispie treats, you can generally replace them one-for-one with marshmallows in a rice krispie treat recipe.
Can I add extra decorations to these?
You sure can! Some fun Easter sprinkles or some drizzled melted chocolate would also look great with these!
Can I make these for different holidays, such as Halloween or Christmas?
You sure can. These peeps have an Easter theme with bunnies and chicks, but you could make a Halloween version using white, orange, green and purple Halloween peeps, or a Christmas version using white, red and green peeps. Have fun with it!
Help! My rice krispie treats have set too hard!
There are a couple of reasons for this.
- The mix was heated up to hot. High heat can make the sugar in the peeps start to harden like toffee. Try using a low to medium-low heat next time and let it melt more slowly.
- The mix was pressed too hard. Try pressing more gently when assembling the rice krispie treats and when smoothing down at the end.
Have you made this recipe? Tell me how it went in the comments below and tag me on instagram so I can see your delicious creations! @keep_calm_and_eat_icecream
Looking for more yummy dessert recipes?
Why not try making
Follow me on Facebook or Pinterest for many more delicious recipes.
📋 Recipe
Peeps Rice Krispies Treats
Equipment
- 8" (20cm) square cake tin
Ingredients
- 4 packets (3 oz/85gms each) different colored Peeps
- ⅔ stick (¼ cup plus 1 tablespoon / 75gms) unsalted butter
- 7 cups (245gms) rice krispies
Optional:
- several drops food color to match the Peeps
- 1 teaspoon vanilla extract
Instructions
- Grease and line the cake tin with parchment paper. Use a small sharp knife to remove the black dot faces from the Peeps.
- Set up four large pots on the stove. Add one quarter of the butter and one packet of each of the peeps to each pot.
- Heat the Peeps and butter on low to medium low, stiring frequently until the Peeps have melted and mix into the butter. Add the matching food color and vanilla if using and mix well.
- Add one quarter of the rice krispies to each pot and mix, taking care to mix in the melted marshmellow from the bottom of the pot.
- Use two clean spatulas to add spoonfuls of the different color mixes to the lined tin. Complete the first layer then another one to two layers for a lovely rainbow effect. Try to alternate the colors and not have two of the same color next to each other.
- Once you have used up all the mixes gently smooth down the top. Allow to set for about two hours at room temperature before slicing.
Notes
Nutrition
Nutritional Disclaimer
Nutritional information is an estimate based on an online database. The nutritional content of ingredients may vary by brand. If you require accurate nutritional information, you should calculate this based on the specific brands and products you are using.
Join the community!
Like Keep Calm and Eat Ice Cream on Facebook for more great recipes

Pin it for later!




Comments
No Comments