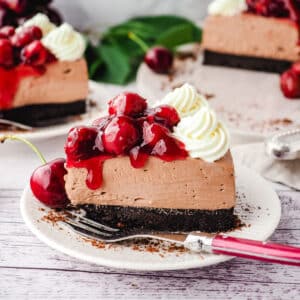
Black Forest Cheesecake
This no bake black forest cheesecake with Oreo crust turns your favorite black forest gateau and turns it into an irresistible chocolate cherry cheesecake.
Equipment
- Spring form cake tin, 7" x 2.5" (18cm x 6.5cm)
- Electric hand beaters or stand mixer
- Stick/immersion blender with chopping bowl attachment or food processor
Ingredients
For the cheesecake base
- 2 & ½ packets, (133gms per packet or about 335 gms total) or about 37 Oreos, seperated and filling removed
- 1 stick/ ½ cup (115gms) unsalted butter
For the chocolate cheesecake filling
- 2 x 8 ounce tubs (450gms total) full fat cream cheese
- ½ cup (110gms) granulated white sugar
- ¼ cup (25 gms) Dutch cocoa powder
- 4 teaspoons kirshwasser (or cherry juice)
- 1 cup (250mls) thickened cream
For the cherry sauce topping
- ½ jar (12oz/340gms) sour cherries such as Morelos (of a full size jar of 24oz or 680 gms). Drained with liquid put aside.
- 3 teaspoons tablespoons corn flour
- 3 teaspoons tablespoons granulated white sugar
- 2 teaspoons lemon juice
- ¼ teaspoon cinnamon
For the whipped cream topping
- ½ cup thickened cream
- 1 tablespoon powdered sugar
- 1 tablespoon kirshwasser (optional)
Instructions
Cheesecake base
- Line the base and sides of a springform tin with parchment paper.
- Break up the cookies and blitz briefly in a food processor into crumbs.
- Melt the butter by cubing, adding to a microwave proof bowl and microwave for a minute or two.
- Pour the melted butter into the biscuits crumbs and mix until it resembles fine bread crumbs.
- Pour into lined spring form tin and press down at the bottom to form the base. Do not press to firmly or your base may become to hard.
- Chill in fridge for at least one hour and up to overnight.
Cheesecake filling
- Beat the room temperature briefly to soften it. Add the gradulated white sugar for the cheesecake filling and beat on low until the sugar is mixed and dissolved in.
- Sift the Dutch cocoa power into the creamcheese mix and beat on low until mixed in. Add the kirch and mix well.
- Whip the cream untill firm peaks form.
- Fold the whipped cream into the cream cheese mix until well mixed in.
- Tip the cheesecake filling onto the prepared base, taking care to press down the filling into the edges as you go to smooth down any bubbles. Chill in the fridge for at least four hours, preferably overnight.
To make the cherry topping and decorate the cake
- NB: The cherry sauce will start to soften the cheesecake once added to the top of the cheesecake. The cherry topping can be made in advance but I recommend decorating your cheesecake just before serving.
- Juice the lemon. Drain the juice from the sour cherries and add ¼ cup of cherry juice to a small pot. Put aside the cherries.
- Add the granulated sugar for the cherry sauce, sugar, cinnamon and lemon juice. Whisk well to fully mix in the corn flour.
- Heat on medium height for five minutes, stirring well. When the mix starts to bubble turn down the heat. The mix will start an opaque lighter color and become dark and glossy and thicken as the sauce cooks.
- Remove from heat and cool. Add the drained cherries back into the sauce and mix.
- Whip the cream for the cheesecake decoration until medium peaks form. Sift in the powdered sugar and add the Kirch. Continue to whip until mixed in and firm peaks form.
- Remove the cheesecake from the tin. Use a large sharp knife inserted between the base and the parchment paper to loosen the base. Transfer to a serving board or plate. Smooth down the sides with a spatula.
- Put the whipped cream into a piping bag. Pipe the cream around the edge of the cheesecake in a circle. Spoon the cherries and sauce into the center of the cake and you're done!
Notes
Cake tin size:
I used a 7" x 2.5" (18cm x 6.5cm) as I like my cheesecake nice and tall with a deep cookie base. You can use an 8 or 9" springform tin if that's what you have. Your cheesecake will be flatter but it will still be delicious!
Cookie base:
For the base I used Oreos with the filling removed. You can make this with the filling left in, but you will only need just under 2 packets (2 & ⅓ cups crumbs/8.8oz/250gms total). Your base will be sweeter if you do this.
Alternatively you can use another type of chocolate-flavored cookies such as chocolate ripple or bourbon biscuits outside the USA.
Decorating:
The cherry sauce will start to soften the cheesecake once added. The cherry topping can be made in advance but I recommend decorating your cheesecake just before serving.
Storage:
This cheesecake can be stored in the fridge for up to five days, but is best eaten within three for maximum freshness. Keep in mind the cheery sauce will start to make the cheesecake soft over time.
Nutrition
Calories: 285kcalCarbohydrates: 37gProtein: 5gFat: 14gSaturated Fat: 7gPolyunsaturated Fat: 2gMonounsaturated Fat: 4gTrans Fat: 0.003gCholesterol: 24mgSodium: 323mgPotassium: 136mgFiber: 2gSugar: 19gVitamin A: 300IUVitamin C: 0.4mgCalcium: 45mgIron: 2mg
Nutritional Disclaimer
Nutritional information is an estimate based on an online database. The nutritional content of ingredients may vary by brand. If you require accurate nutritional information, you should calculate this based on the specific brands and products you are using.
Tried this recipe?Let us know how it was!